|
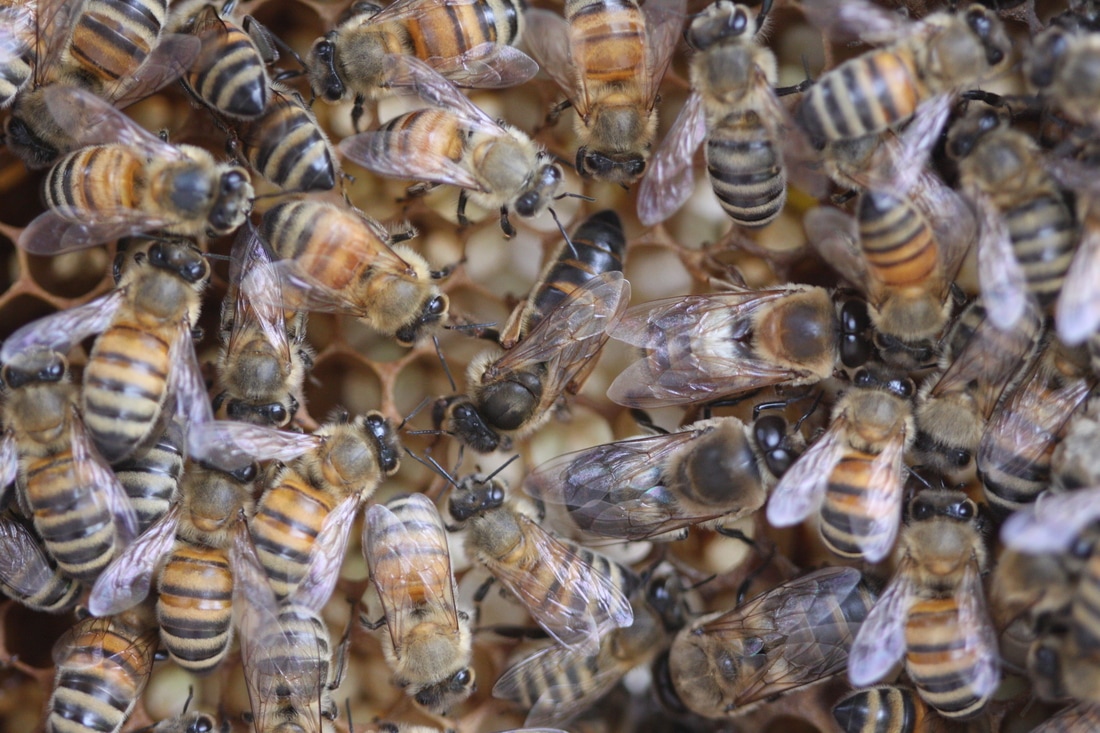
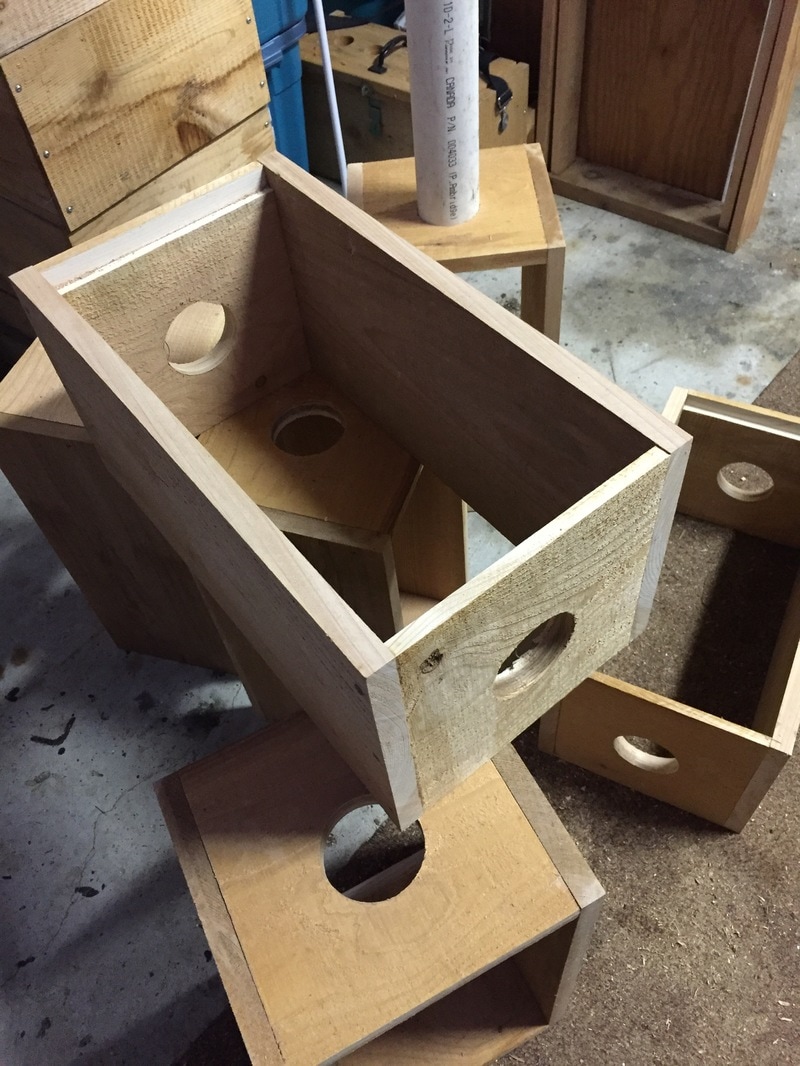
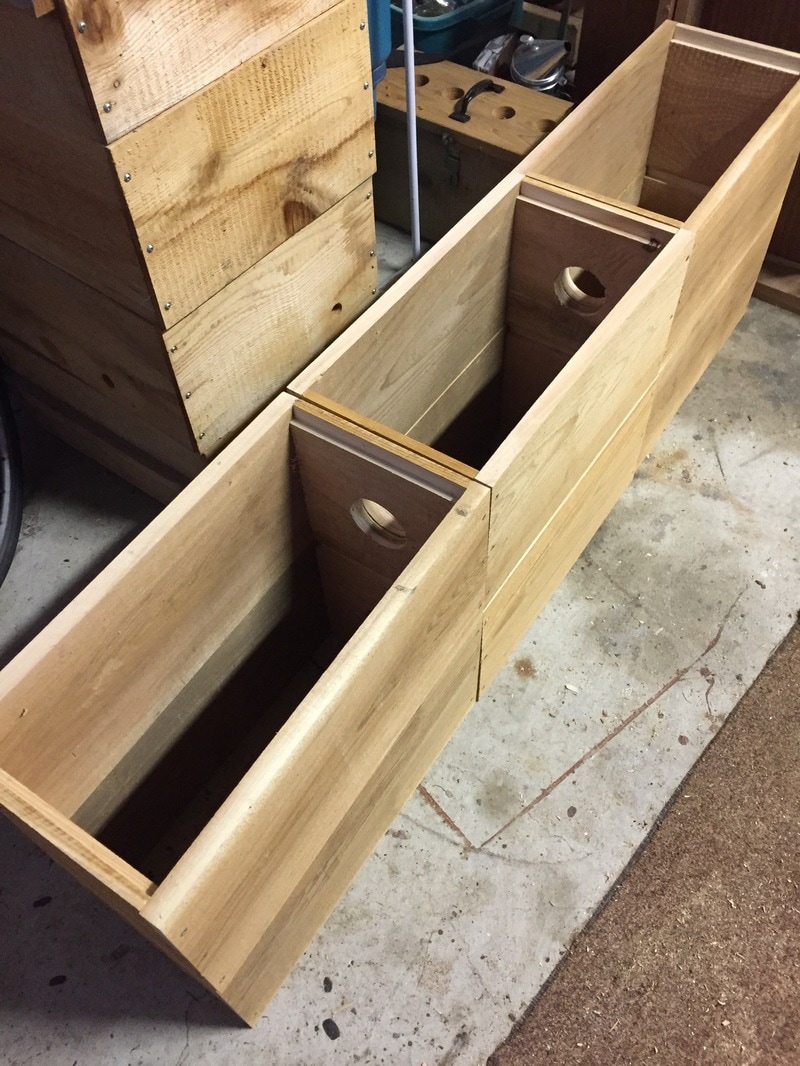
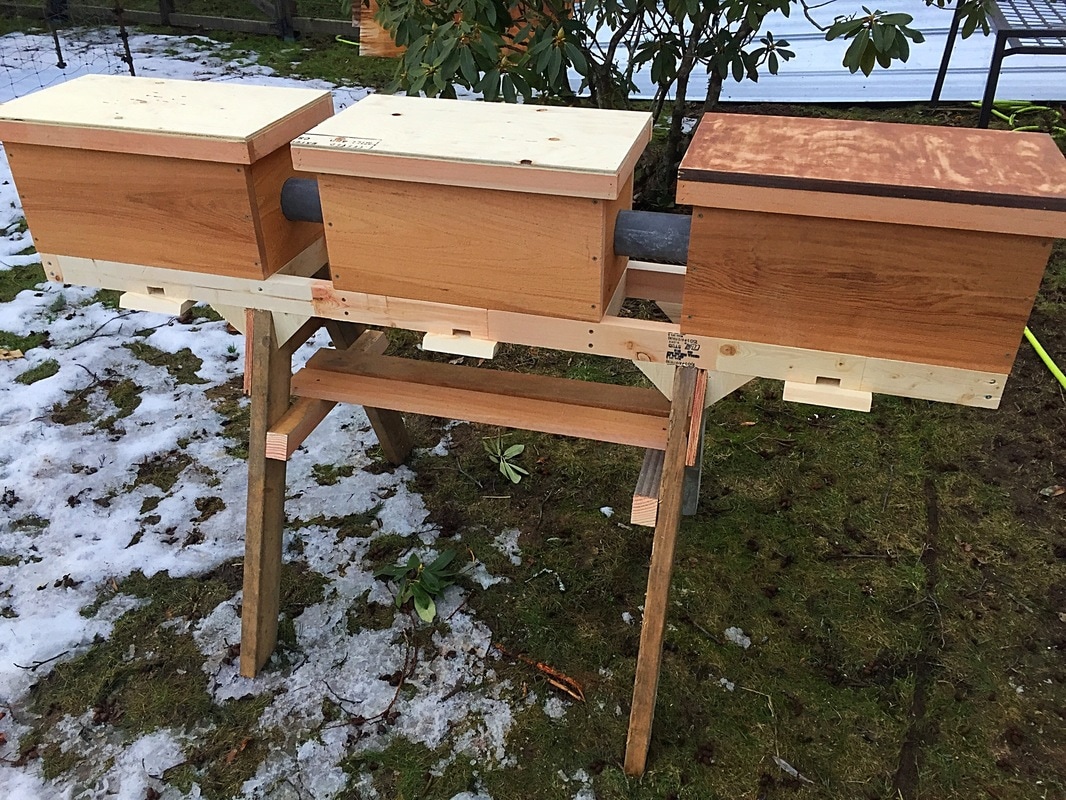
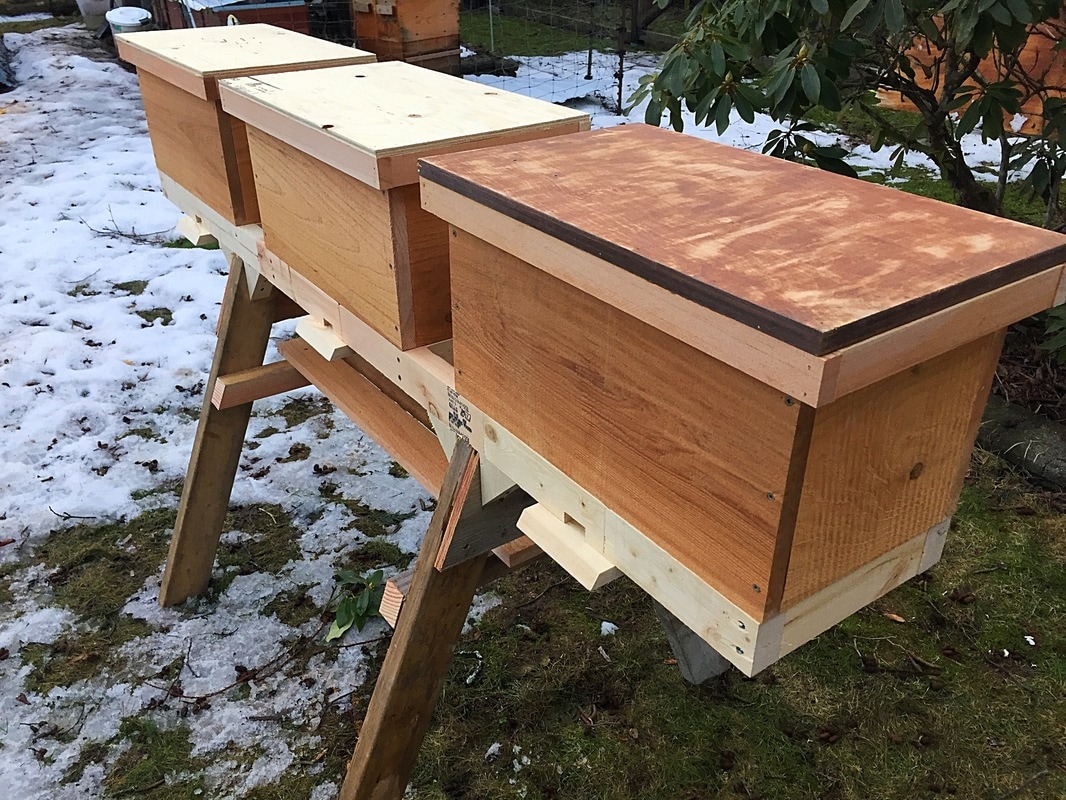
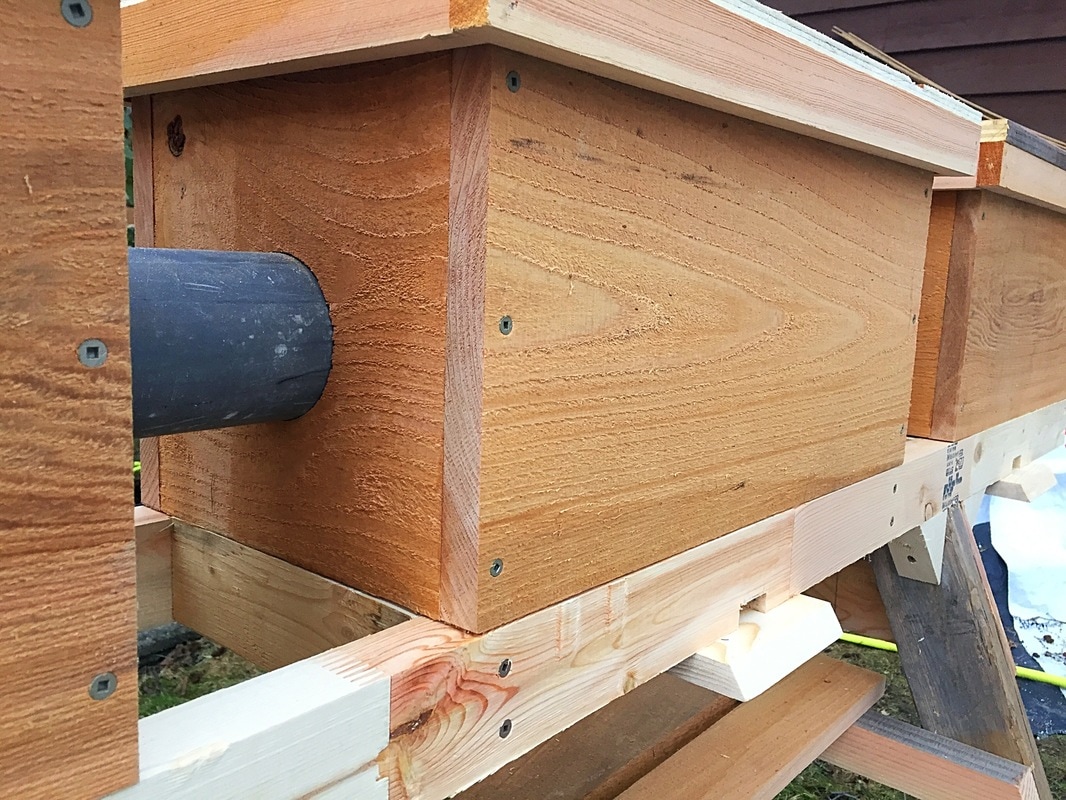
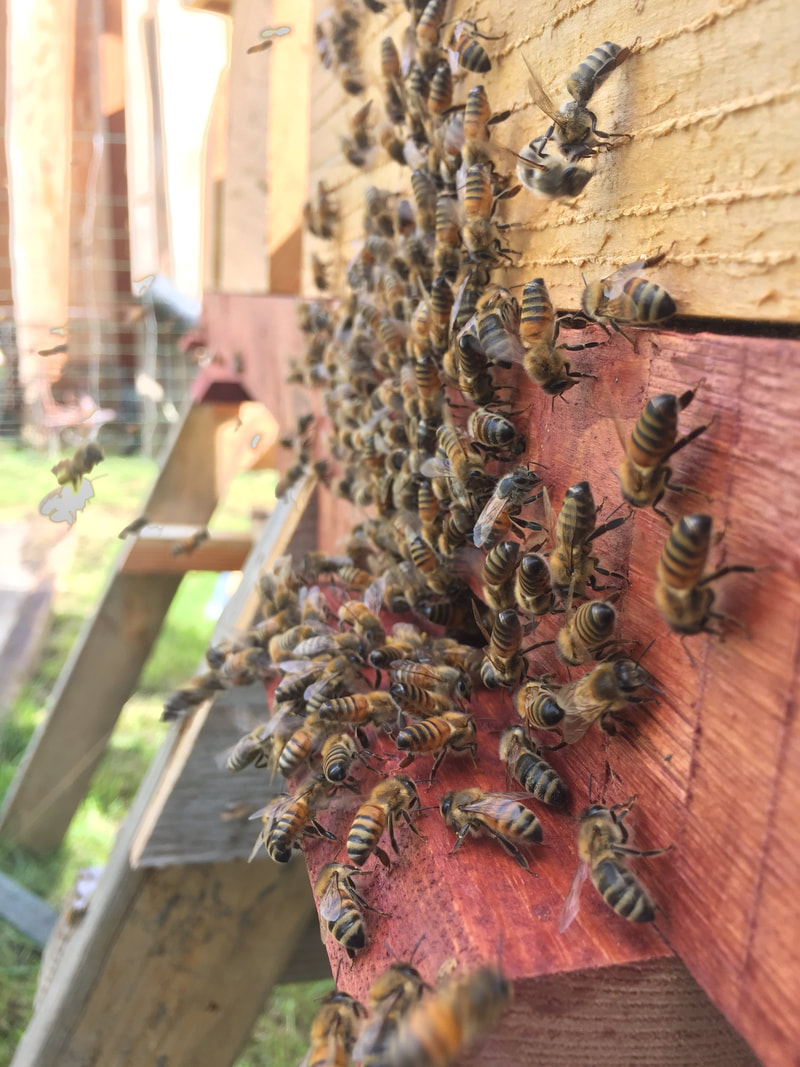
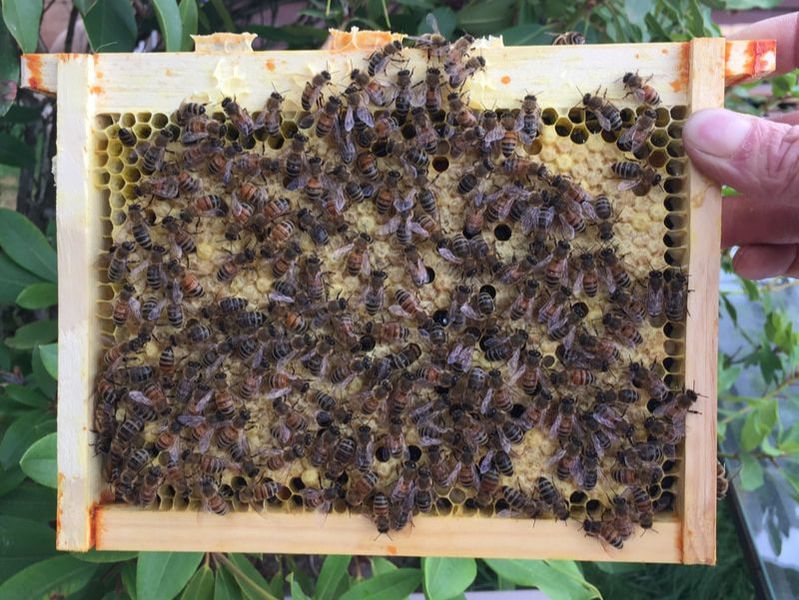
It is becoming widely understood that locally adapted honey bees are generally better suited to thrive in your region and climate. Often we hear about special “designer queens” bred across the world in exotic settings, and it’s tempting to want to buy packages or requeen our apiaries with these genetics. However, they might not be as good at surviving in your climate (not to mention the stress put on bees by shipping them), and it can lead to poor genetic diversity if all the bees in a region come from one breeder (in our case this would mean Hawaiian bred bees would not likely be well suited to Canadian winters... and yet there are so many tropical bees imported to our decidedly not tropical climate). If each community raises their own queens, we can have stock adapted to different regions, and in the case of changing climates and disease resistance, have different genetic pools to pull from that are resistant or adapted accordingly. It is is our goal to be self sufficient in this respect, provide locally successful queens and NUCs for our community, and encourage others to do the same—breeding bees in our own yards and communities rather than routinely importing our bees from all over the world. We first came across the John Harding system for queen rearing after a couple seasons using more commercially viable ways to raise our queens; i.e. by shaking many frames of nurse bees from one or a couple parent colonies into a ventilated queenless box, confining them for up to 24 hrs until hopelessly queenless, then introducing the grafted queen cells for them to start. We had success with this method, and with more passive methods such as Cloake board methods, etc. But we were not pleased with the impact that so many manipulations had on the parent colonies or the stress on the young bees, and we were not getting the consistent results that we wanted. Our bees are kept without the use of chemical treatments (we do feed sugar syrup if we think it’s needed, with the addition of organic apple cider vinegar, and sugar bricks over the winter months), and the Integrated Pest Management (IPM) that we employ for mite and disease control is primarily achieved through re-queening and providing breaks in the brood rearing cycle. In order to breed from successfully overwintered colonies with desirable traits and incorporate this frequent need for brood breaks in our colonies we need a reliable way to rear our own queens. **EDIT In the fall of 2017 we incorporated a formic acid mite control treatment (MAQs) into our varroa management regime. We treated approximately half of our colonies based on mite-counts.** While we did have success with these more commercial methods of queen rearing, we were determined to find a low impact approach. We had observed that our bees would raise queen cells from larvae that were placed too far away from the brood nest (by shuffling a brood frame away from the rest of the brood nest at the other end of one of our top bar hives for example), and speculated about ways to encourage this for our queen production. We learned about the queen mandibular pheromone, and that the queen’s pheromones become quickly diminished on frames of eggs and larva that she can not easily visit, which creates a supercedure scenario in the hive—the colony believes that either a) the hive has gotten too big for the queen’s pheromones to be strong everywhere, so they are motivated to raise another queen and swarm, or b) the queen is failing and they must raise another to supersede her. In our research there were various methods that seemed to make effective use of this behaviour in Langstroth hives; Cloake boards, Snelgrove boards, elevating brood above honey supers and an excluder, all seem to be effective ways to raise queens. These methods all seemed to have lower impact on the donor colonies, but still involved regular manipulations that we felt overly disrupted the colonies or did not produce a sufficient number of cells for our needs. And then we came across this John Harding Queen rearing system in a BIBBA (Bee Improvement and Bee Breeders Association) publication from several years ago. http://bibba.com/the-john-harding-queen-rearing-system/ We had never seen or heard of any other bee breeders or even hobbyists using this method, and there were so few mentions of it in online searches that it seemed never to have gained any traction. Regardless, the concept was the one we wanted to explore, and seemed to be very effective if this article was to be believed. We decided to build one and try it out. The System The system uses two distinct queenright (with their own mated queen) colonies on the outside boxes, both connected to a central grafting box that is permanently queenless. Three boxes in a row. There are queen excluders cut and installed vertically in the outer hives preventing the passage of either queen to the central grafting box, but allowing nurse bees and workers to pass through to the other boxes. As the boxes are all connected, smells and pheromones are carried throughout the entire system, and as in other two-queen systems, the colonies cooperate in harmony. Our first version (mostly) followed the design explained in the BIBBA article, utilizing 5 frame NUC boxes on a purpose built stand, each with their own entrance, and connected 6” apart by PVC pipe with a minimum diameter of 5cm (although you could use anything really, so long as the opening will not easily be propolized shut). 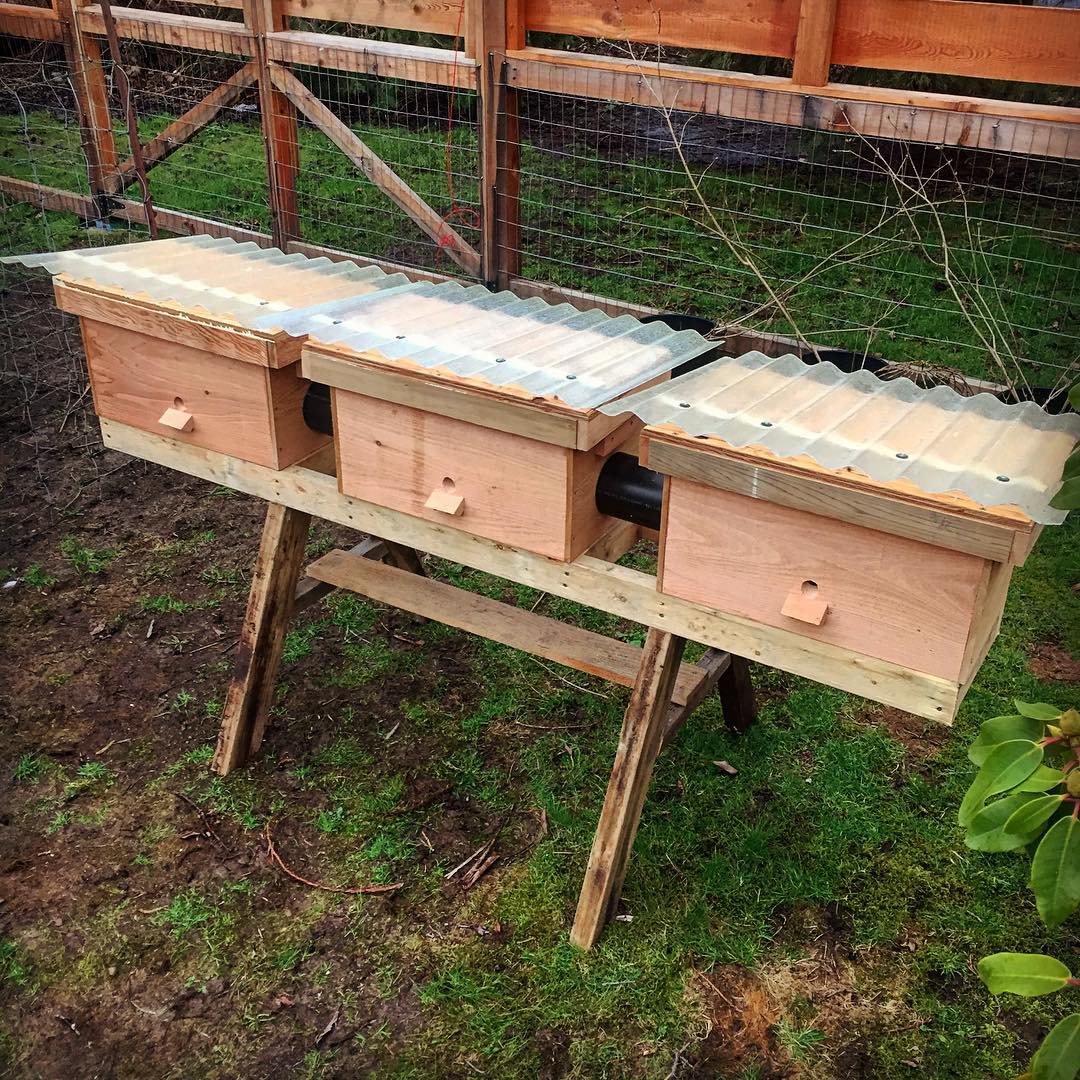 We prefer to use inner covers and a telescoping hive roof over migratory lids, as well as feed using frame feeders for queen rearing. We built screened bottoms into the stand with the slide-in bottoms for monitoring natural mite-drop. Our next versions will integrate slatted bottom racks to aid ventilation, and clustering. We decided to double-wall and insulate our PVC connections to assist with, and take advantage of any temperature regulation being performed by the two outer colonies. 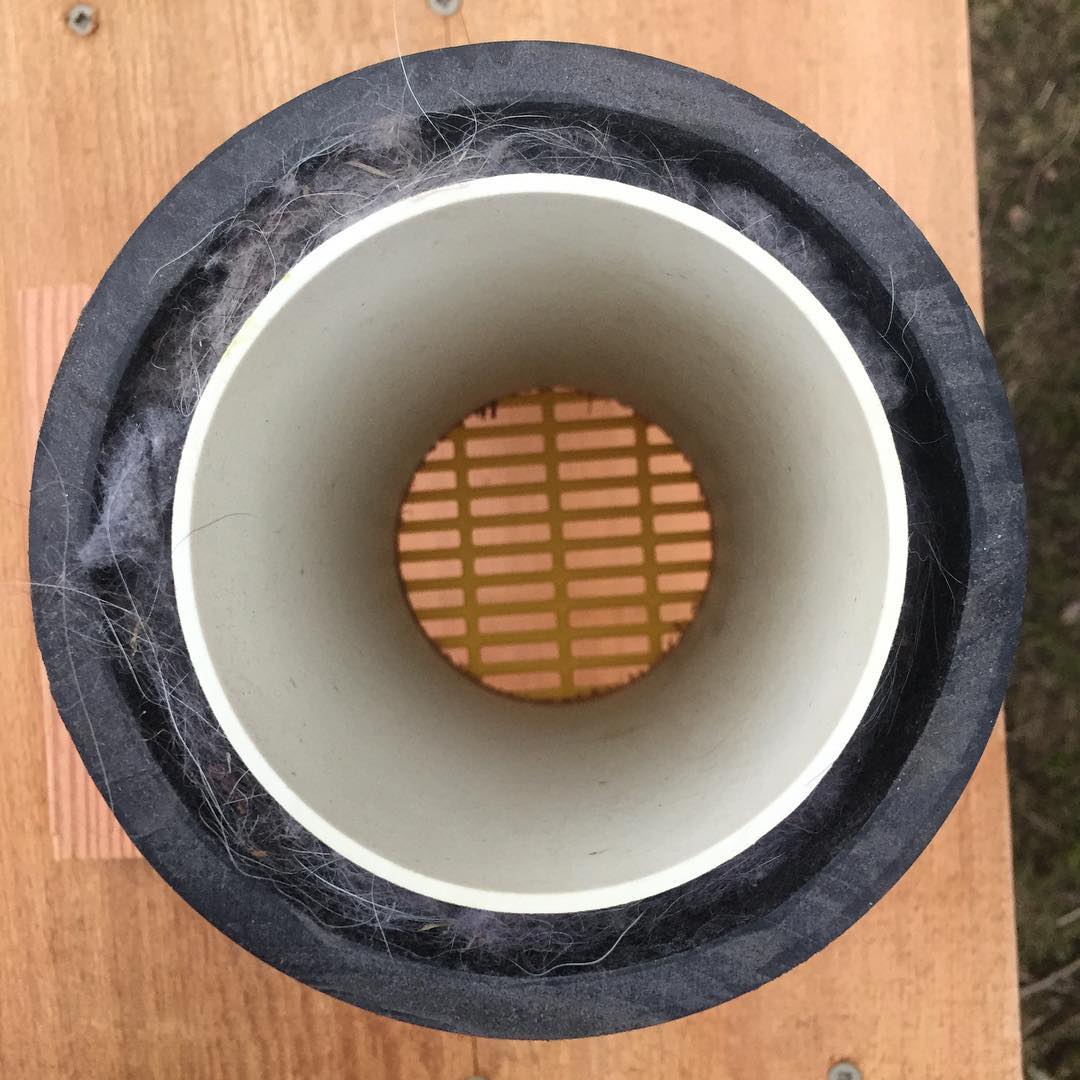 Because our short and moderate summers on the Pacific Northwest are generally cool in the evenings, grafting into a lid above the frames as described in the BIBBA article may not be as practical for us as it might be in warmer locations. We use a grafting frame for this reason, and have enjoyed great success. This photo shows one of our very first attempts at grafting into this system. 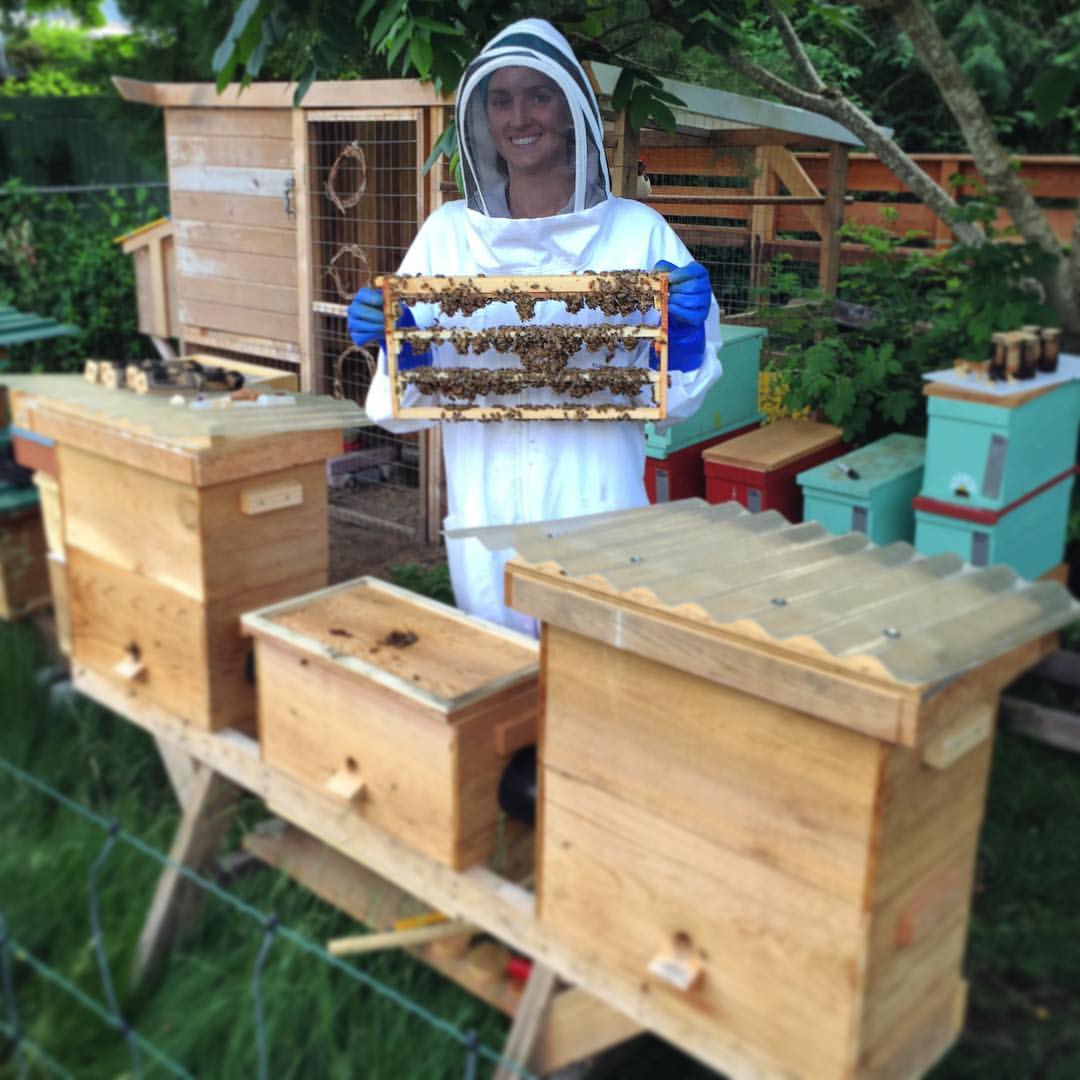 We experimented with this system during the summer of 2016, and quickly began producing nice large cells consistently. 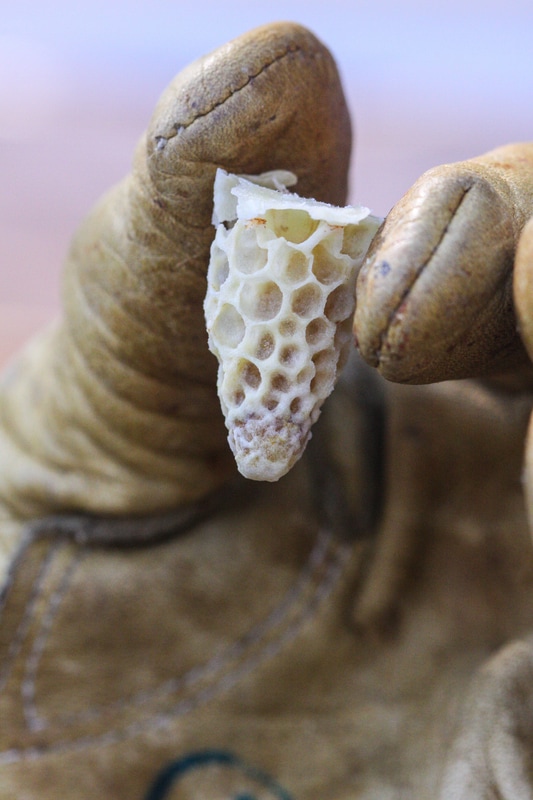 A queen cell produced in this queen rearing system The Virgin Queens were well fed, a nice size, and were for the most part happily accepted by the queenless colonies they were intended for.  A freshly-emerged virgin queen (right) and her attendant. We cut out the queen cells and put them in these cages in the incubator for emerging.
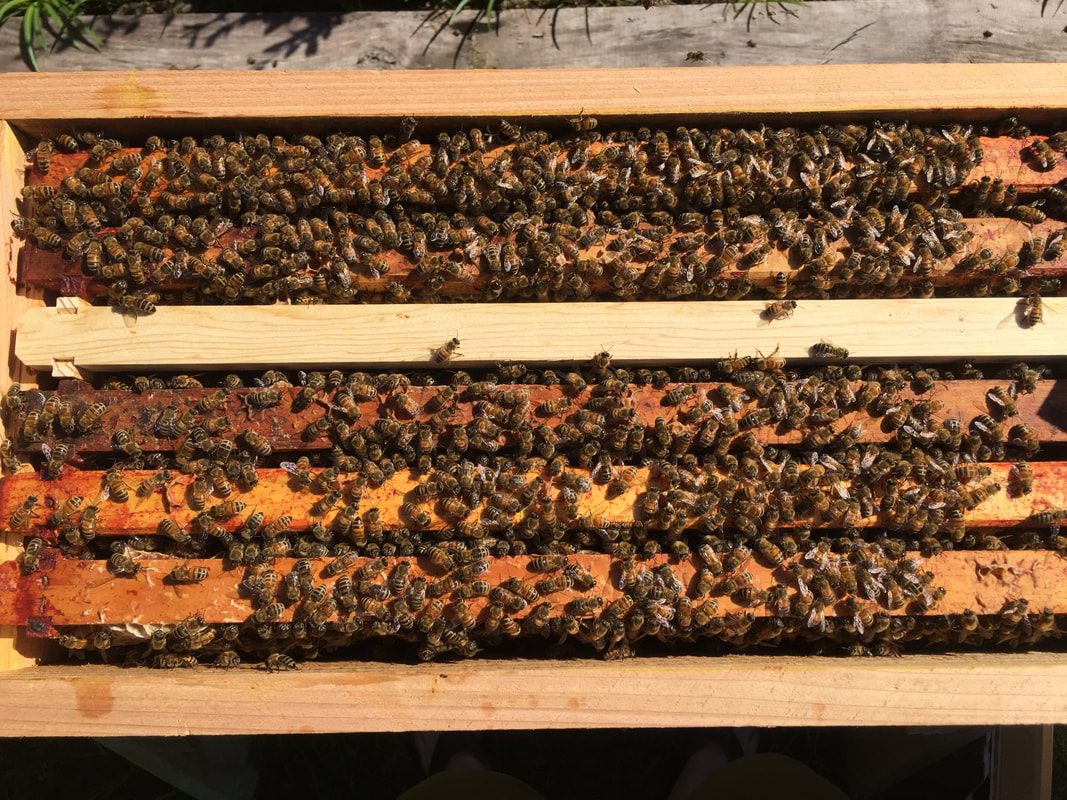
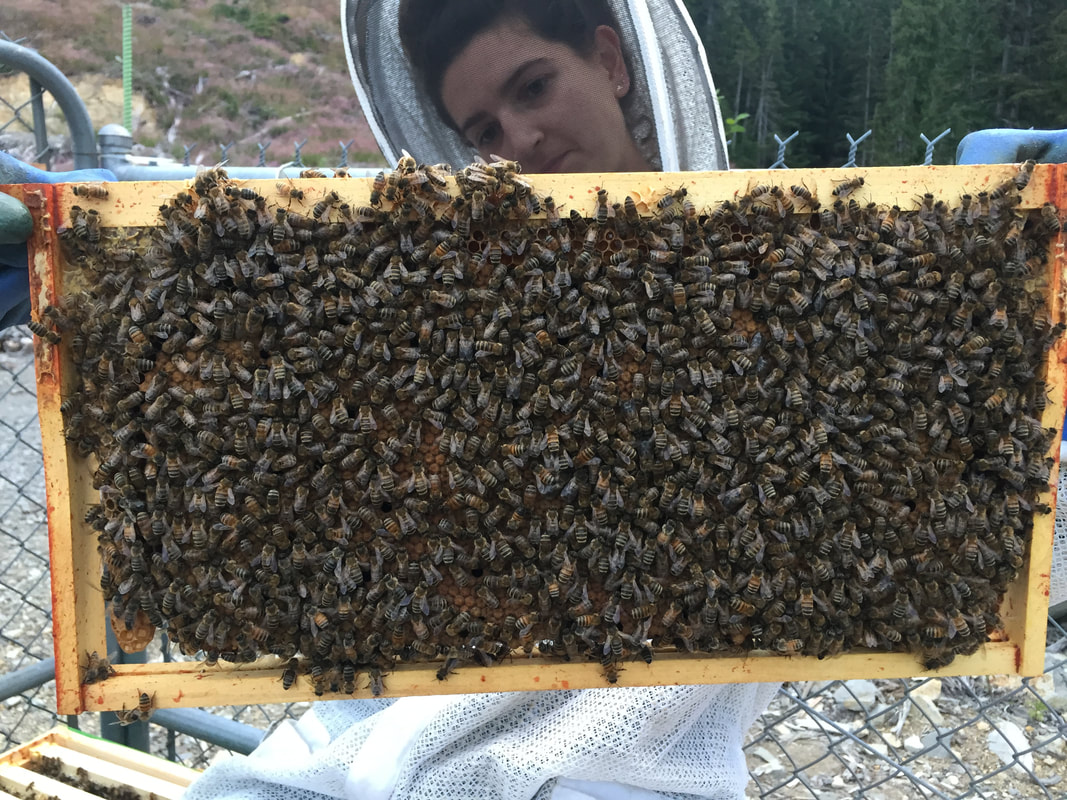
I hope you read the original post about this method by following the BIBBA link provided above, but in case you need any further convincing there are a few things we thought worth adding and reinforcing. Benefits of this Queen Rearing System A huge advantage of this system for folks that may not have the experience grafting, is that it is so forgiving. If you're just learning, grafting is one of those 'practice makes perfect' kind of things, and if you're shaking bees into a queenless box the day before your graft only to have that graft completely (or even mostly) fail- it can be very disappointing to the beekeeper and plenty disruptive to the bees. Because this system has a dedicated grafting box, checking or replacing your grafts does not involve completely dismantling a full-size colony, or confining any bees at any point. Generally, your bees should be happier (by that I mean less agitated or aggressive) because they are never actually queenless, which is fantastic if your apiary is near any human neighbours who don't like getting stung etc. And a failed graft can simply be tried again- on the spot. Generally no need to do any more manipulating than you already did to set up your box. This system can be used both as a cell starter, and as a cell finisher all in one- no need to move your grafts to a finishing colony. This alone means you're disturbing the process less, and the started cells do not have to be exposed or removed from the grafting box before they're fully capped, or even fully developed days later. This means that if you have somewhere for these cells to go, (like an incubator, or queenless colonies in the same apiary that you're wanting to re-queen) you could be grafting into this box every 5 days if conditions are good. This season we even banked queens in cages in this central box when we we had too many queens, and it worked wonderfully. We did not notice much difference in temperament when we caged and banked either mated, or virgin queens in the central box, and we did not have to do anything special to prepare the grafting box for use as a queen bank, as it already has all of the right conditions for such a purpose, as it is highly populated with well-fed young nurse bees motivated to care for young queens. If for some reason you don't need to raise any queens, these colonies don't need any attention in addition to your regular inspections. However, we did find a virgin queen in our grafting box last year that ruined a couple good grafts, so along with the usual manipulations it's worth being certain you don't have some rogue queen halfway down the connecting tubes by staying on top of any emergency or swarm cells that might get started on the brood frames in that central box. After using this system for a year...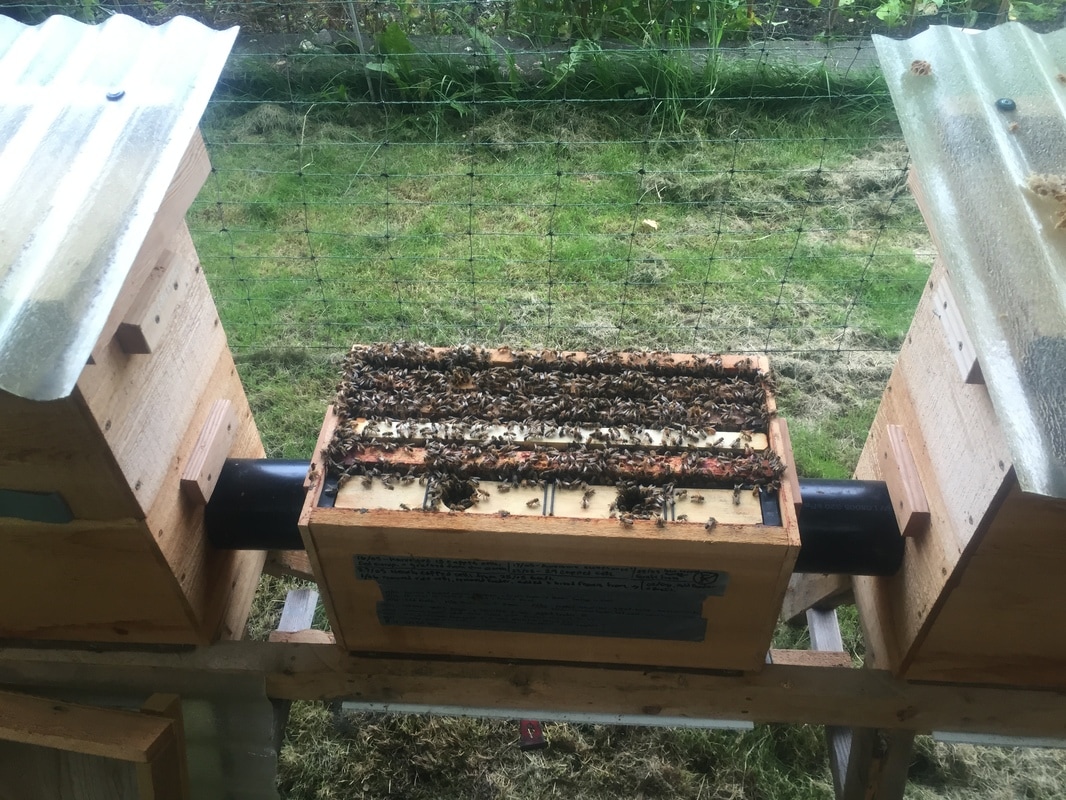 This is the kind of congestion we would be grafting into. Remember that these bees are there voluntarily! Each box has its own entrance, and the regular rotation of open brood frames from the outer colonies draws the nurse bees through the excluders to the central box with the brood pheromones.  There are some experiences we would like to pass on with regards to management of this system. Watch out for Moving Queens and Queen Pheromone Around As you can read in the original BIBBA article, rotating brood frames from the outer two colonies into this central grafting box draws nurse bees through the excluders to feed them. These are the bees that will raise your queens. Brood frames that have been taken from the parent colonies should of course be carefully inspected to ensure that they are not hiding the queen, before being transferred to the central box. It is worth noting that these 'new' frames will still have plenty of residual queen pheromone present on them (and the bees that populate those frames), and we always seemed to have better grafting success if we moved the frames in advance of the intended graft so that the queen pheromones subsided. Box Size Queen larvae have to be extremely well-fed, and we have had best success using a frame feeder as pictured- but it takes up more space than we would like in this 5 frame box. We have built two more of these systems for use next year, and have made them a frame and a half wider to accommodate the frame feeder. If you're using jar feeders (or something else) you may not feel that the boxes need to be any wider. A 6.5 frame box may seem like an awkward size to have kicking around, but we won't be using these boxes for anything else since they've all got large holes bored in the sides. We are feeling pretty confident that this size will be better for our purposes and the way we manage our bees.
It was tempting at first to ignore the advice in the article for having these boxes just be nuc sized, but having tried it, they really wouldn't benefit much by being built using standard 10 frame equipment. A note about design/function: The smaller width of the nuc forces the brood nest in each outer colony to be central in the box, right in line with the opening to the central grafting box. This seems like a simple concept, but if the frames were oriented the opposite way, as is typical, the smells and pheromones from the brood would not likely waft throughout all the boxes as effectively. What I'm saying is that you want to have the broodnest in each outer box directly in line with the opening to the central grafting box, and the frames oriented so that the ends are exposed to the hole so as to attract the maximum number of nurse bees to the larvae begging for food in the grafting box.
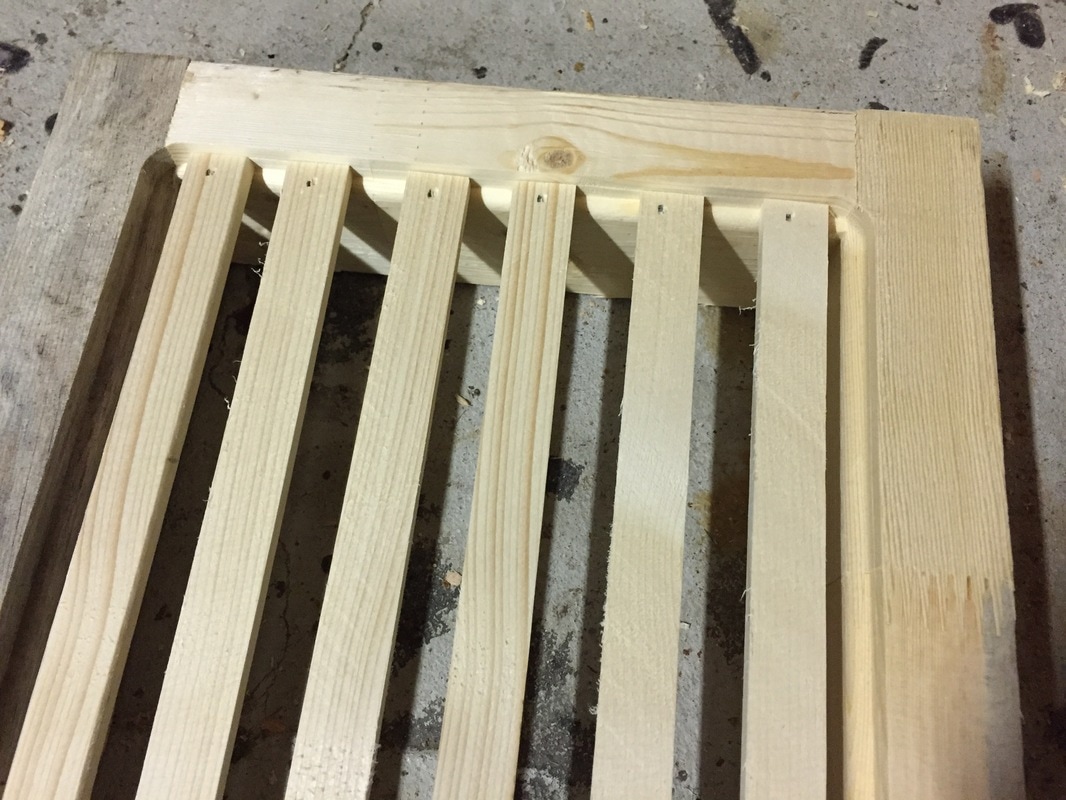
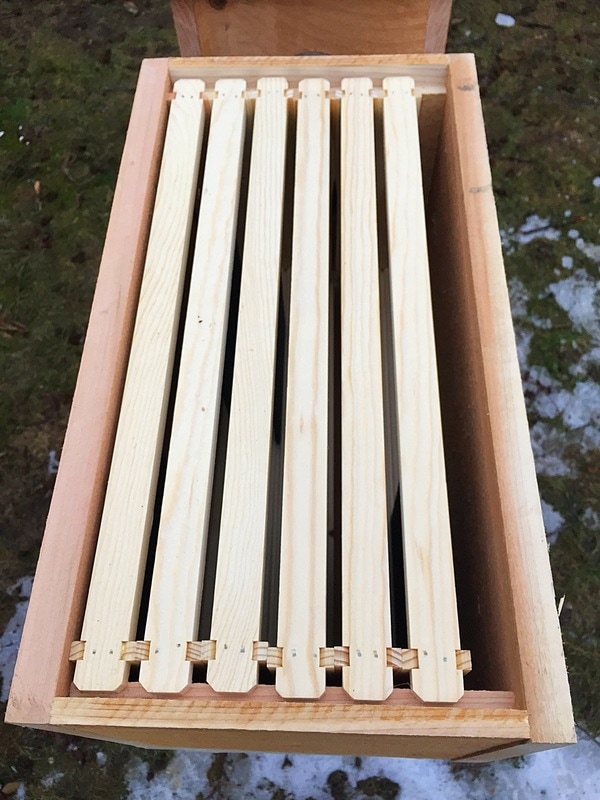
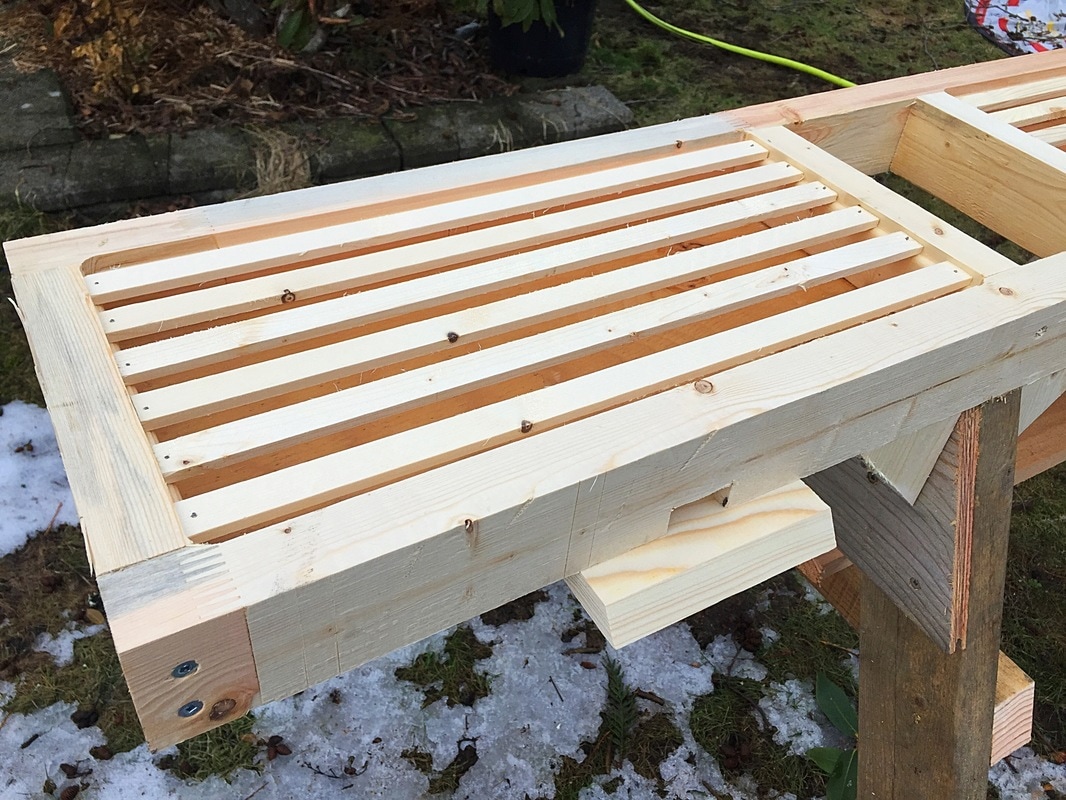
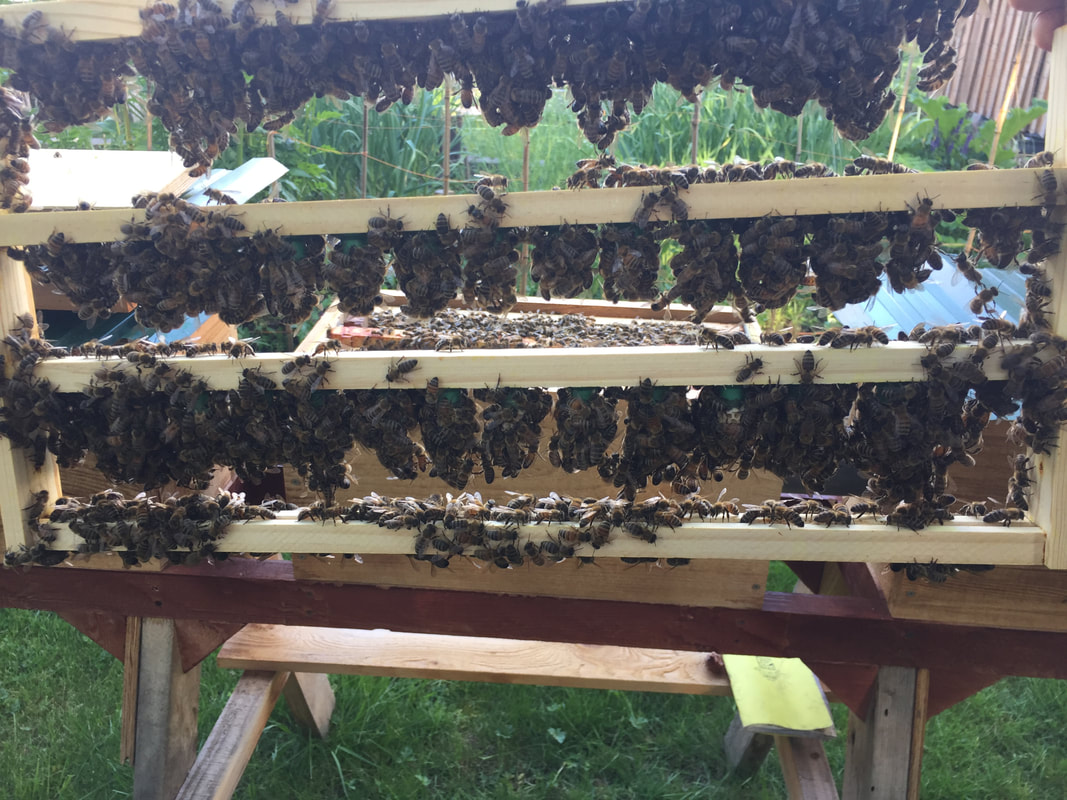
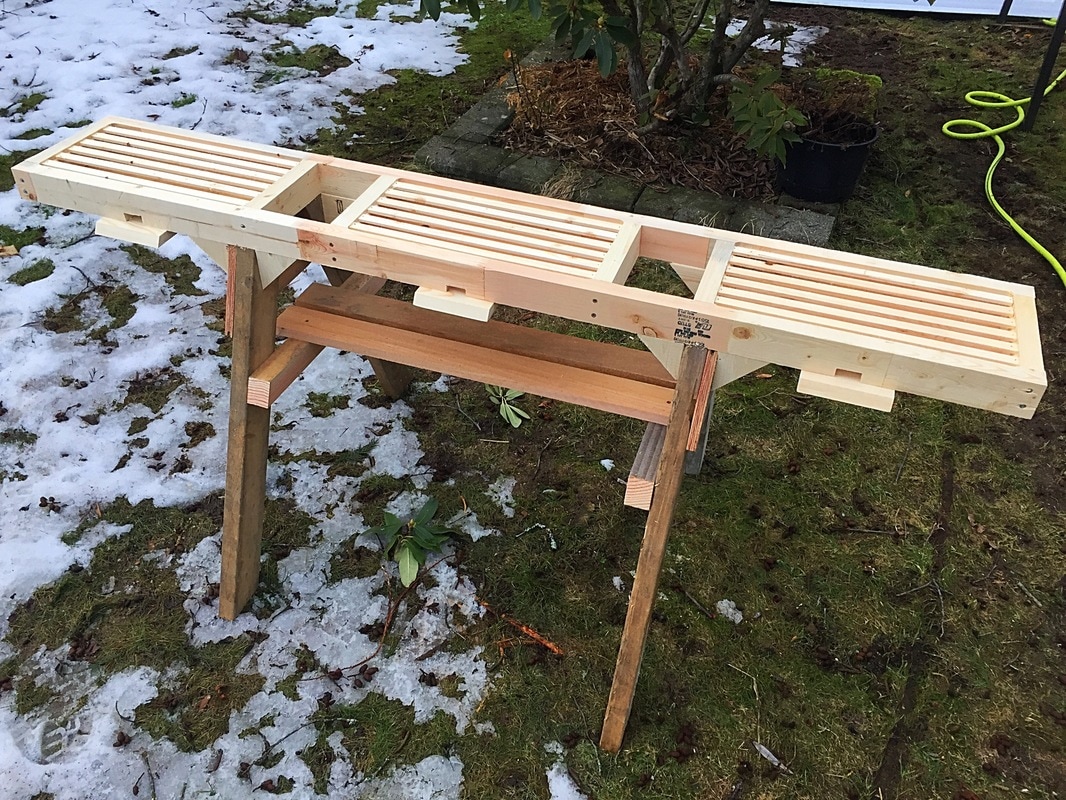 The slatted racks elevated to a comfortable working height.
The other thing to think about is congestion. In a 10 frame box it may take quite a bit longer to achieve the kind of congestion that we want for raising queens. Yes, you can always bring frames from other colonies to speed this process, but it's sure nice if the system builds up to that threshold at the right time in the season all by itself. Number of Queen Cells The last bit of experience with this system we want to share is also related to congestion, but that of the queen cells you ask your bees to raise for you. In this system, depending on the conditions, we found that we were happier with the size and evident nutrition of queens (known by observing leftover royal jelly at the base of the queen cells) when we grafted fewer cells. For us, that meant trying for 10-15 instead of 20-30+ like you might see the larger commercial frames of grafts sporting. With three of these queen systems in rotation next year and using the success we had last year as a gauge, we should be able to produce 30-50 high quality queen cells every week, if we want. And all of that without much disturbance to our bees, minimal hive manipulations, and so on. Friends of ours that have seen this in action are determined to build their own- we hope you will too- and we hope that this article might help encourage you to try it! Whatever method you use to raise queens, it's wonderful and rewarding to see them come back successfully mated, and heading their own colonies. The best queens are local queens, and it doesn't get much more local than your own back yard!!
|


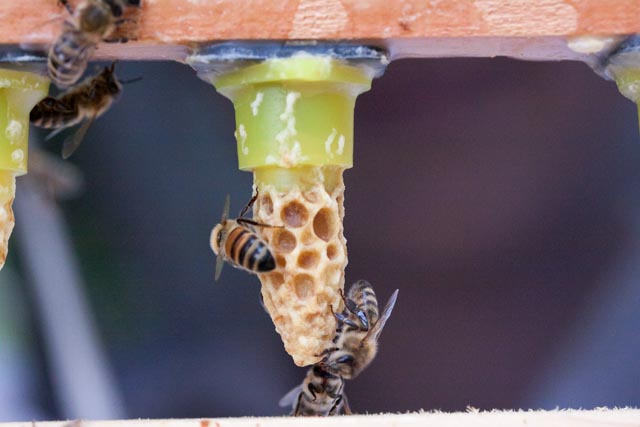
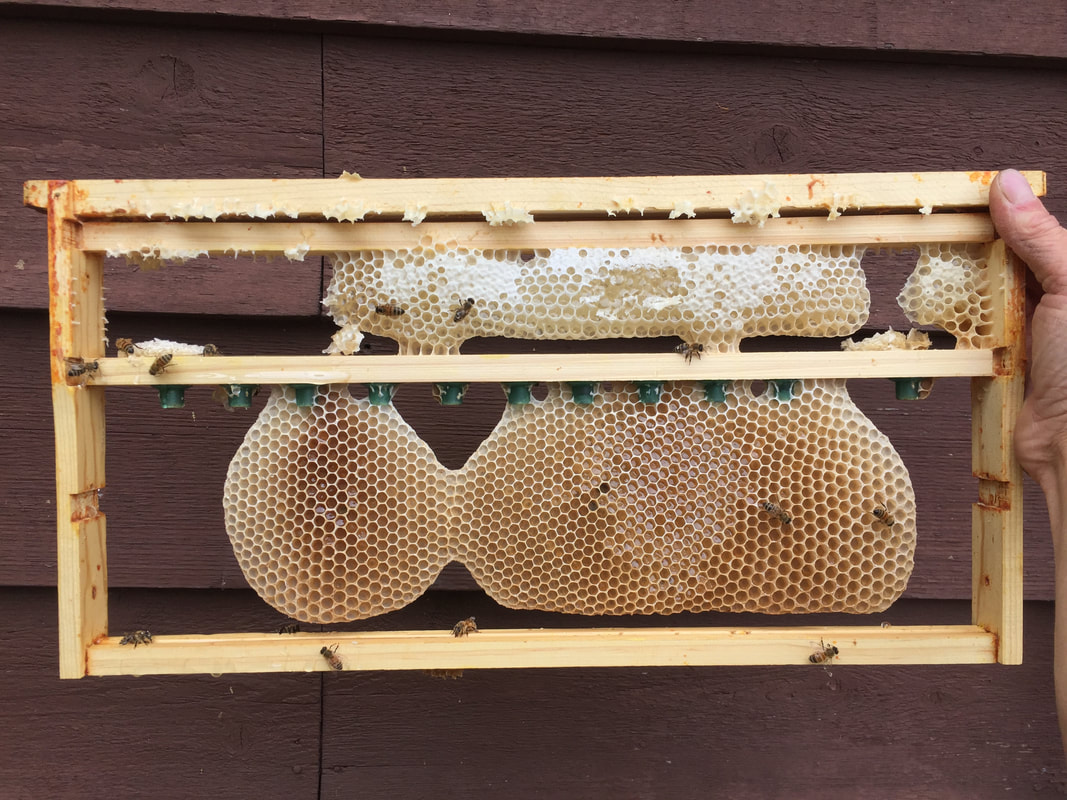
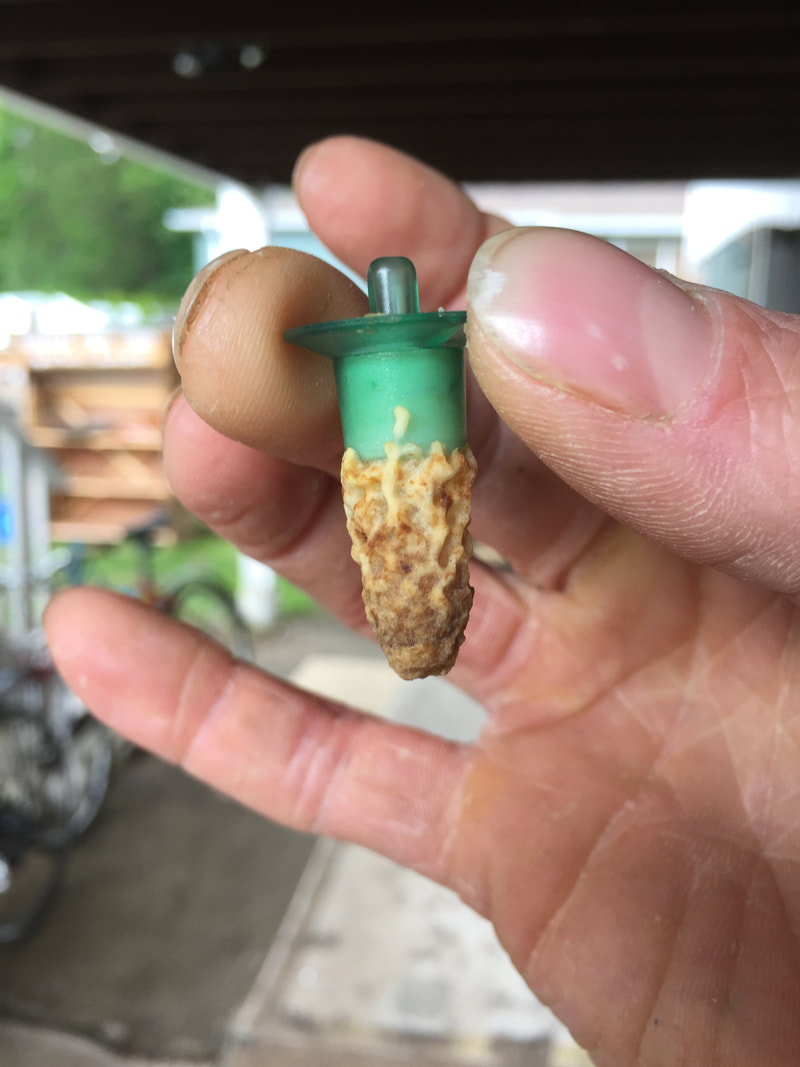 Jammed full of royal jelly, visible through the semi-transparent JZ-BZ cell cup | 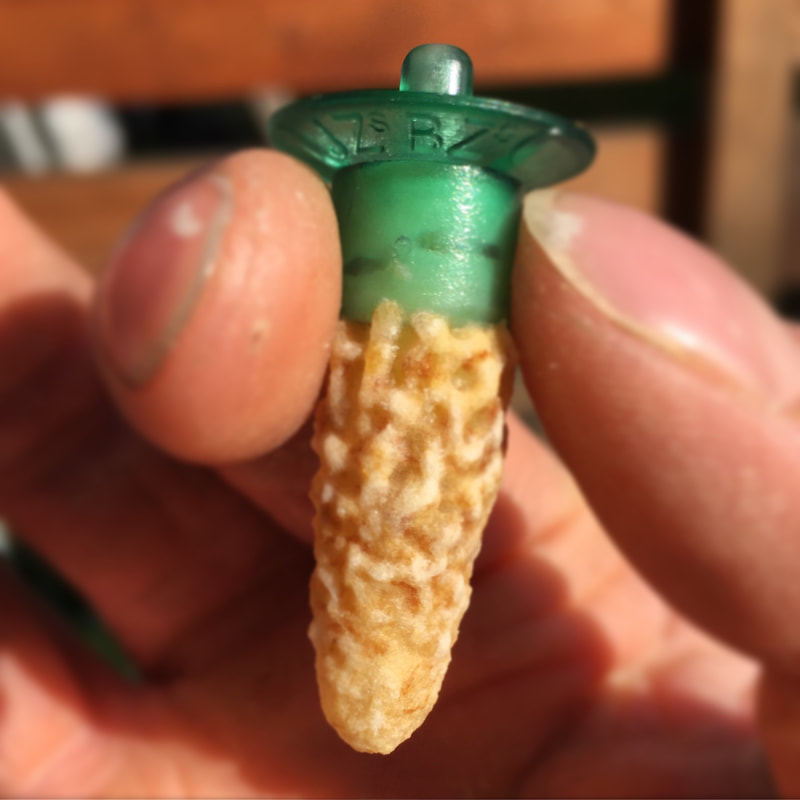 Bigger doesn't always mean better with queen cells, but these look very nice to me |
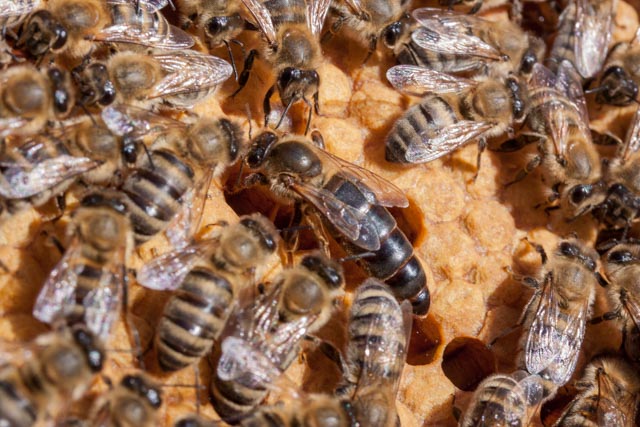
A newly mated queen laying nicely into a mating nuc frame
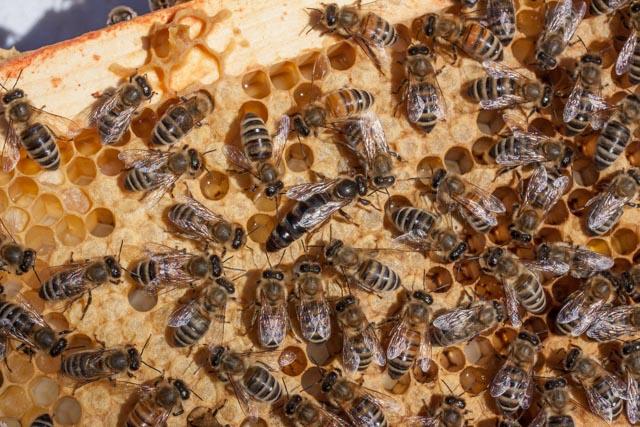
Michi inspecting some nice foundationless 'bricks' of brood from these new queens
We rotate empty or food frames out of the central grafting box as necessary and use them to boost other NUCs or colonies. We found it useful to provide the outer queenright boxes with new comb to draw, rather than re-introduce an drawn but empty frame from the central box. The regular addition of new frames seemed to help stave of actual swarming, although one of the systems did still cast 2 swarms this year.
Being able to so easily check the progress of a graft frame is one serious advantage to this system. Here I've grafted the bottom two bars of cells, and they're coming along nicely.
We use a sturdy music stand to hold our frame upright while transferring capped cells to our incubator (I built that using an old dead refrigerator).
 Our music stand graft-frame holder. We like to keep the cells upright and handle them as gently as possible. We find this stand very useful as it is easy to raise and lower and articulate as needed | 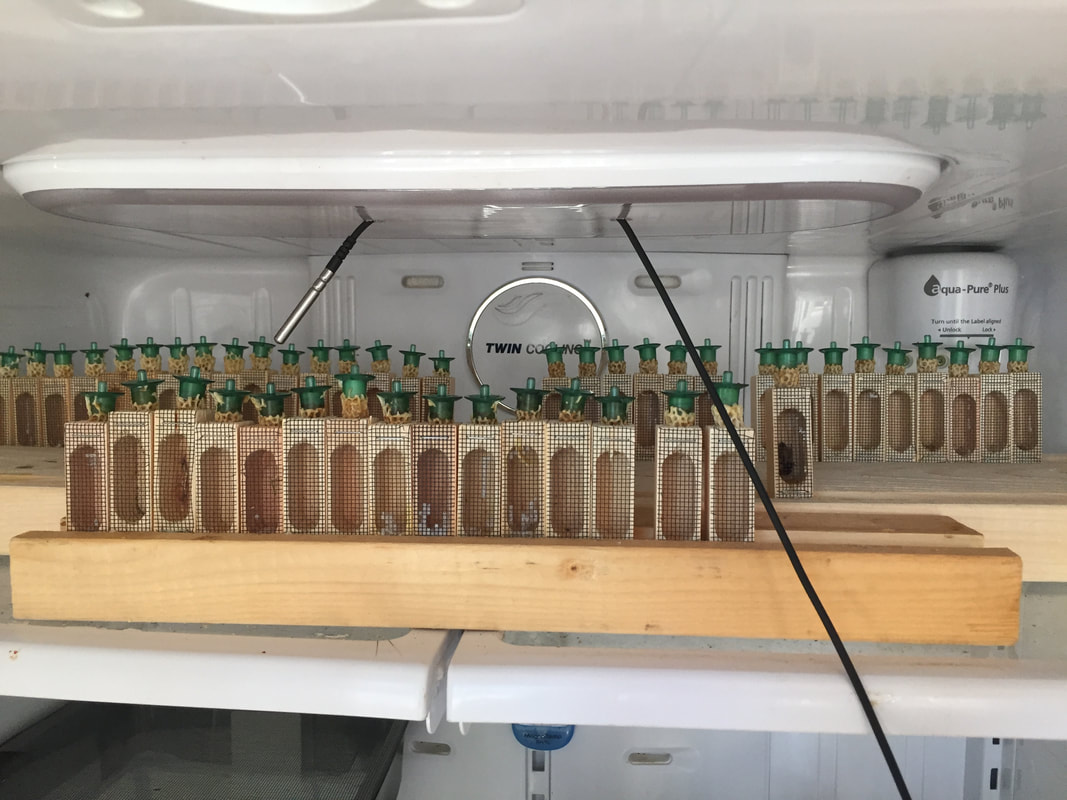 'Ripe' cells about to emerge- you can see I was just a little late in getting to these cells as one queen has already emerged. These cells are candled and placed in mating nucs or the cages can be primed with nurse bees to care for the emerging virgin for a short period before she is introduced to a colony |
Of course not all of the grafts are always successful, but it's nice to know your system is populated enough to quickly build comb. In this case there was a virgin lose in the grafting box, which just happened the one time this season but certainly ruined a small batch of grafts.
A virgin in the central grafting box prevented this small graft from taking- careful inspections can help prevent this, but a virgin can always fly in as well. Thankfully nothing much has to be changed other than finding and removing the virgin before another graft frame can be introduced.
We have experimented with supering the queenright 'towers' (as they are referred to by John Harding) as pictured earlier in this article but found that the queens would move their brood nest up into the supers- something that we thought to be undesirable if the goal is to draw nurse bees from the outer brood nests to the middle. We wanted to ensure the brood nest of each queenright box was directly adjacent to the grafting box to encourage the wafting of open brood pheromones from the central box to attract nurse bees from the outer boxes. Instead of supering the outer boxes, we regularly remove drawn frames from them as needed. This practice keeps the colonies building comb, and provides us with additional supply of frames we can add to other NUCs and colonies. We think that plenty of congestion is achieved this way where we want it, while inspections are faster, and there is less equipment needed for this system.
The boxes remained plenty congested throughout the season even with routine removal of brood frames and empty combs.
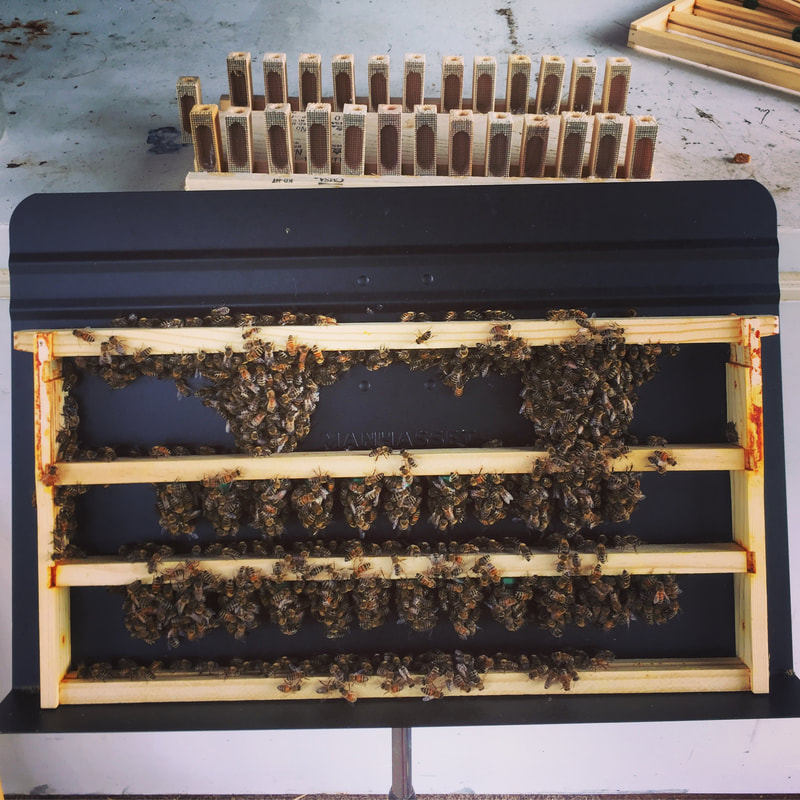
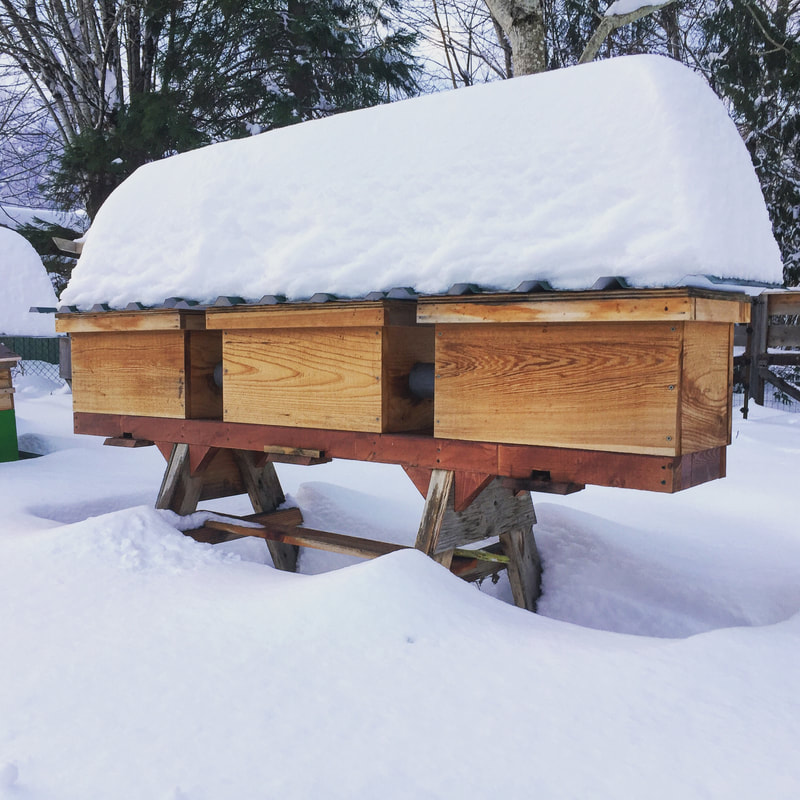
For a small operation, these boxes will provide you with not only queens, but a regular supply of new drawn combs and of brood/bees to populate mating NUCs or boost other colonies. At the end of our beekeeping season heading into winter, the central grafting box was full of capped honey, and the workers all retreated back to cluster around their queen in the outer boxes. We removed the honey frames from the grafting box and left it empty, but closed the entrance to the central box. We are wintering our bees in this arrangement, and today January 10, 2018 they were making cleansing flights despite substantial snow cover during a brief sunny period.
January 1, 2018
37 Comments
Author
Michalina and Darwyn are beekeepers on Vancouver Island, BC, Canada.
Archives
January 2018
March 2017
February 2017
January 2017
October 2016
 RSS Feed
