|
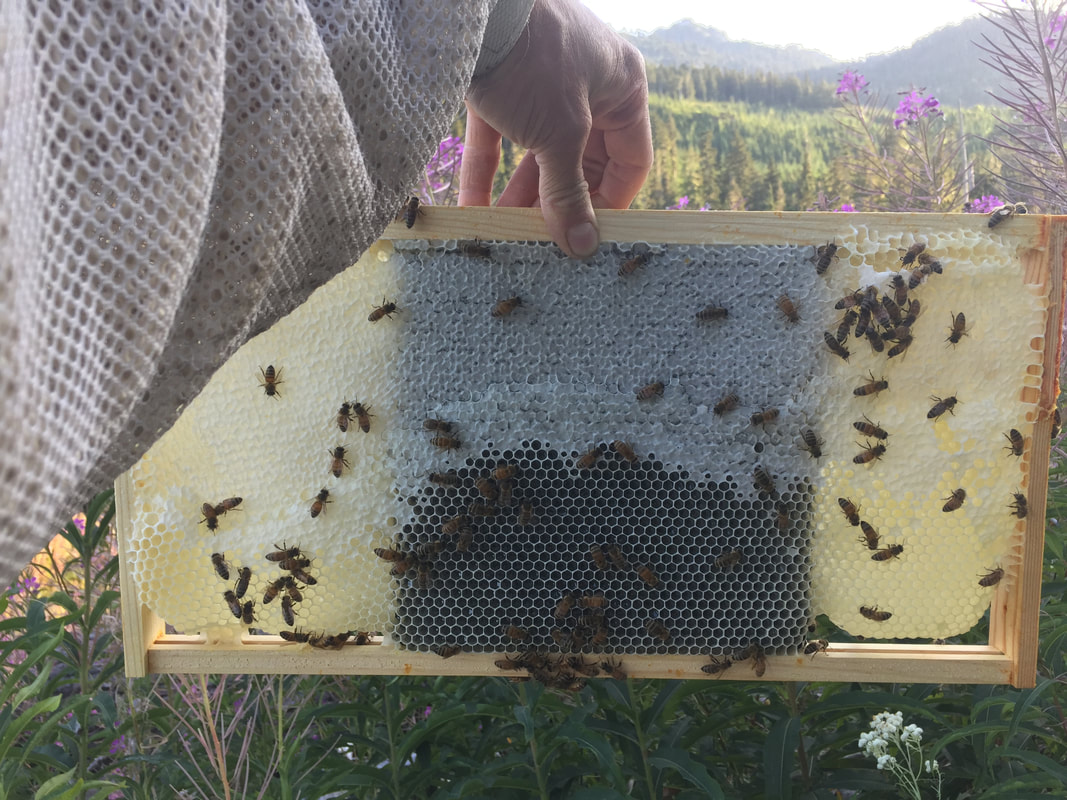
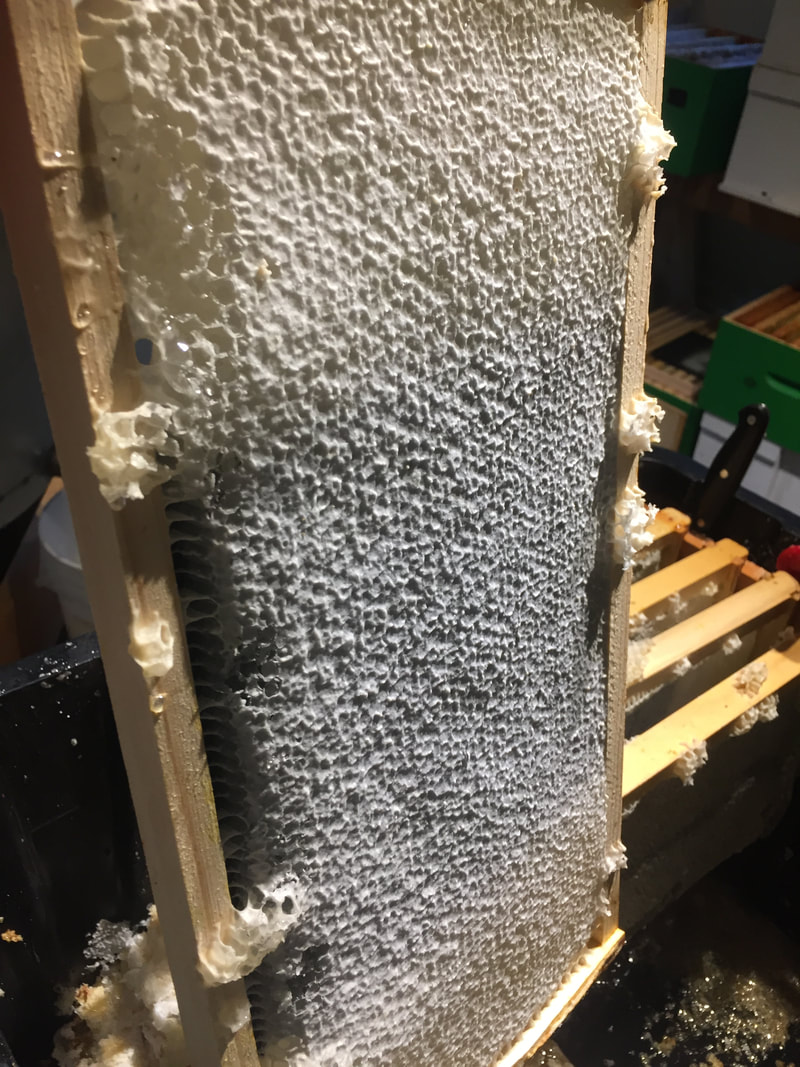
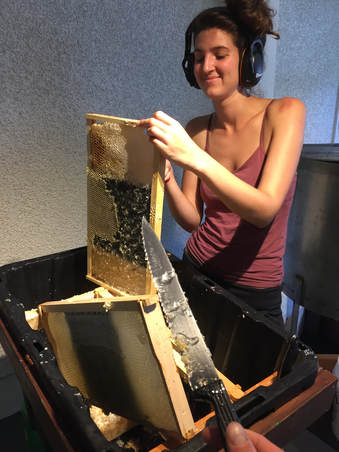
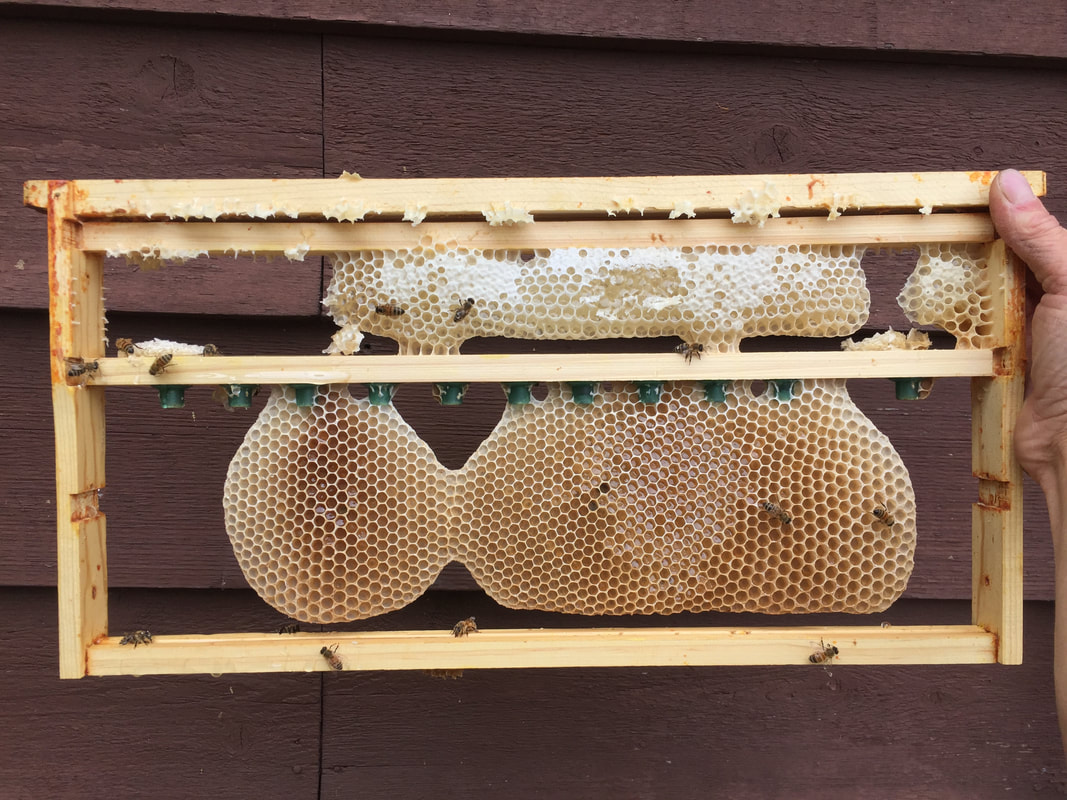
Lauri Miller from Miller Compound Honey Bees and Agriculture uses and promotes partial sheets of plastic foundation in her hives, and while we've had good success with foundationless frames, we wanted to try her approach with partial foundation to see how the frames stand up in the radial extractor. Benefits to partial foundation frames include:
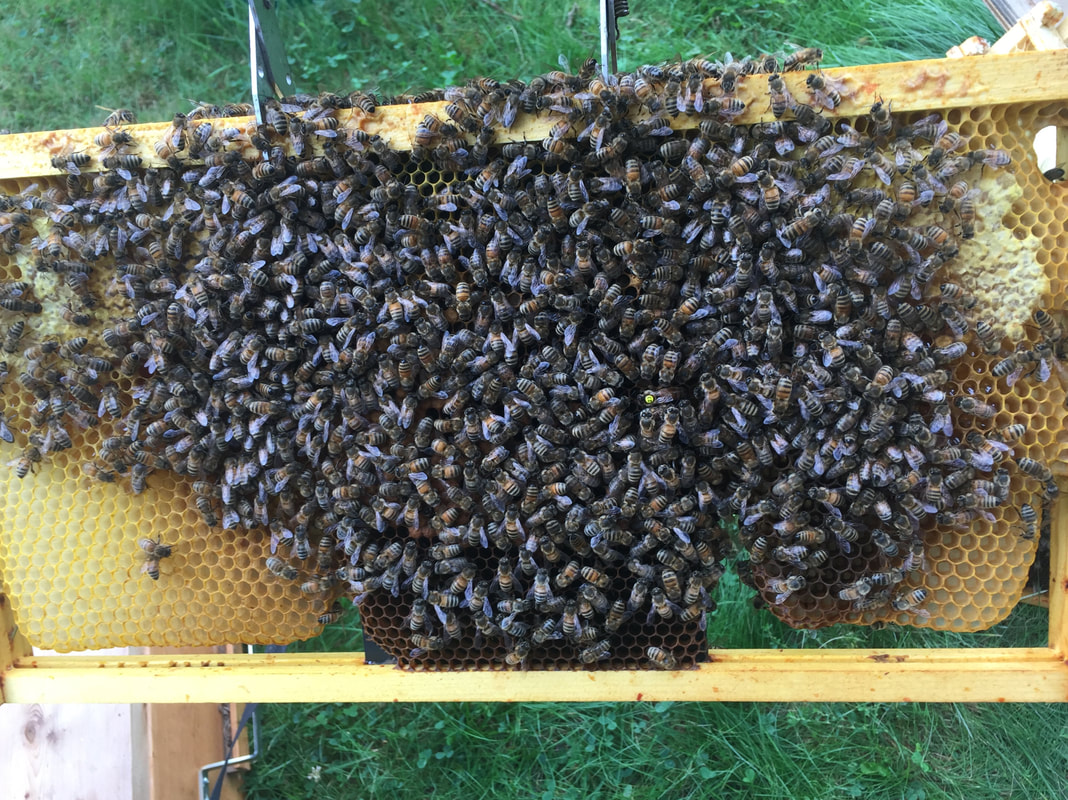
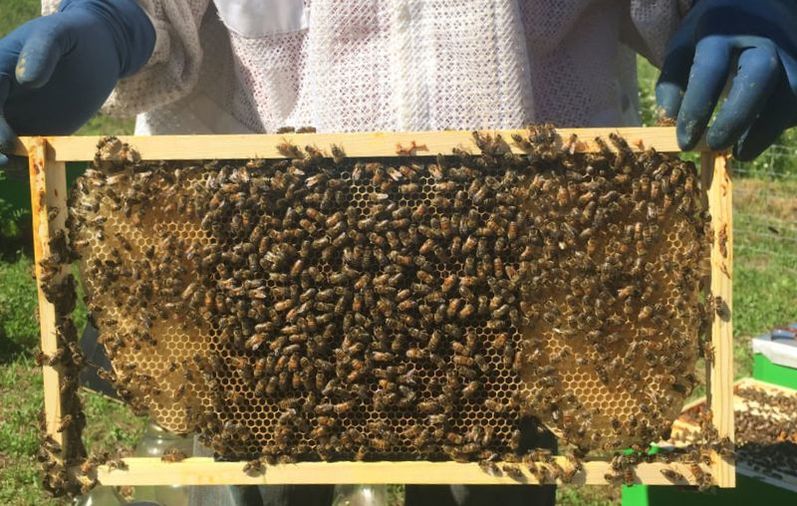
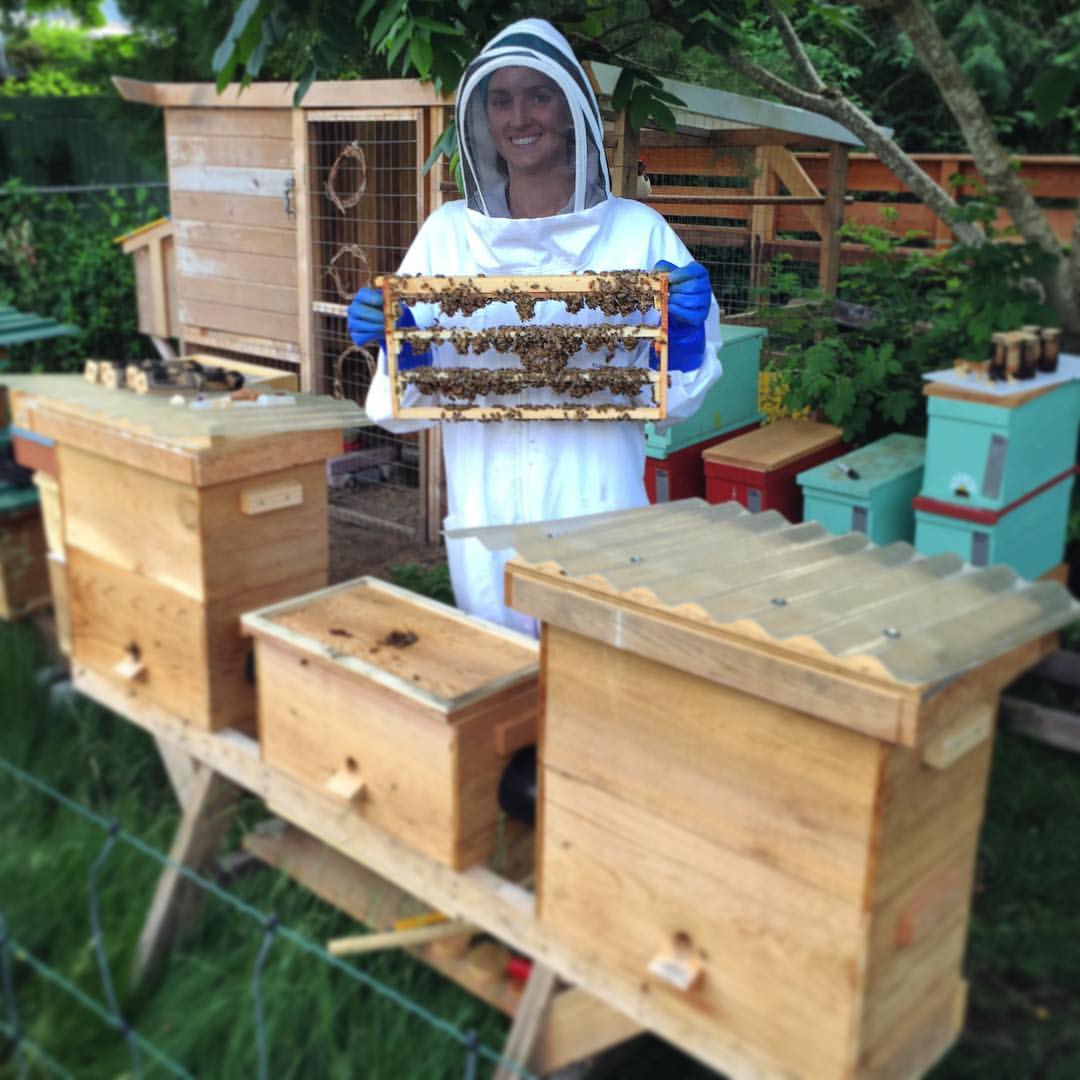
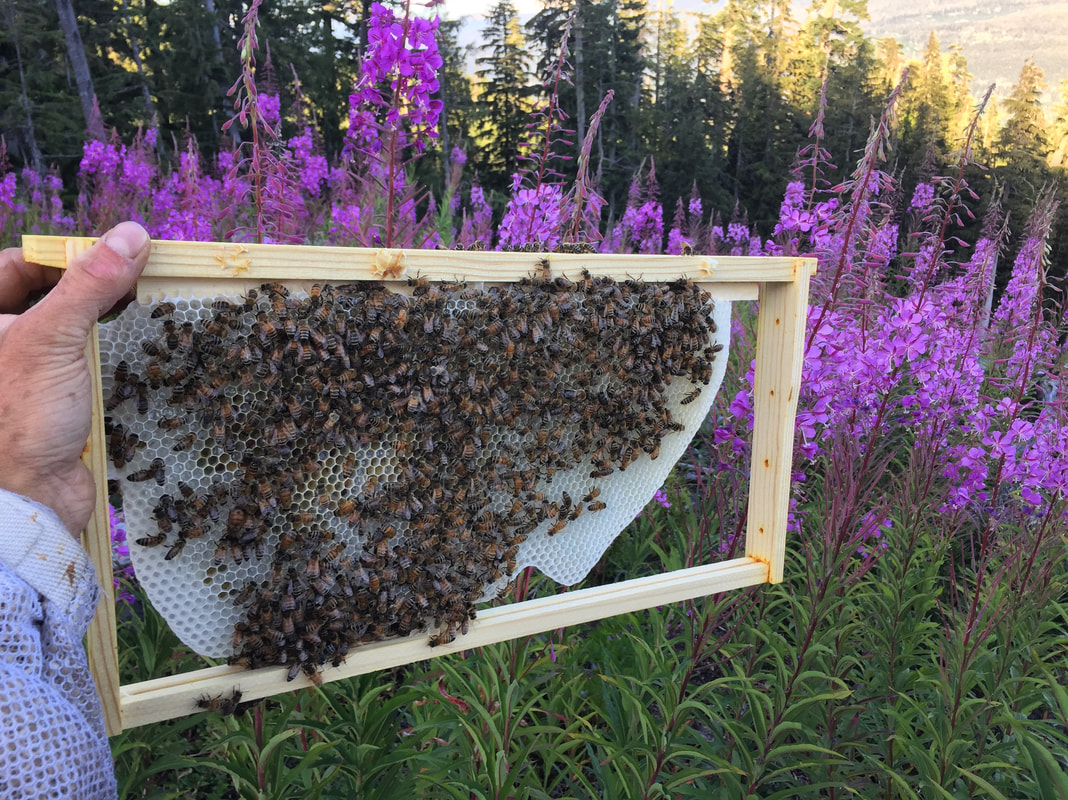 A new foundationless frame being built on the fireweed nectar flow. Foundationless frames require a little extra care and attention, but we really like letting our bees build natural comb. These frames are so beautiful but don't hold up well in the extractor or on their way down the bumpy road (some do) but they can make such great cut-comb or be used for crush and strain. The concept of partial foundation frames is pretty simple, the rigid plastic foundation that comes cut to fit standard langstroth equipment is cut in half, or thirds and installed in the wooden frame as normal. We used a chop saw to cut small stacks of the foundation very slowly with a sharp blade so as not to shatter the plastic- allowing the blade to speed up all the way before beginning the cuts seemed to help. The installation of the partial sheets is very fast and easy, but we do have some recommendations for installation in the hive and for preparing a hive for any kind of foundationless removable comb. Before introducing any kind of foundationless options for our bees, we do our best to level the hive or stand. We learned the hard way that our bees are as subject to the laws of gravity as we are, and any new comb being drawn will typically hang straight up and down. If your hive is a little bit slanted from one side to the other (forward or back is fine) the bees will build comb straight downwards, coming away from (and sometimes disconnected from) the bottom and sides of the frame. If your comb isn't hanging straight in the frame it can make inspections very difficult or damaging, and it will affect every other new frame that it is placed next to. (We actually try to slope our hives a bit forwards to help with drainage, but are now very careful to avoid side to slide slanting! There were some very angry hive notes from that day...) Handling frames like this also require some consideration of temperature and gravity. Consider how heavy the two foundationless pieces of comb are on either side of the foundation, and looking at how well they are or are not attached to the frame side bars can give you some indication of how best to handle a frame like this. If its really hot out, all of that new wax will be slightly more prone to sagging and breaking. Generally, free-drawn comb is very strong if held upright, but if you're accustomed to flipping frames back and forth (the bottom of the frame towards you for example) then all of that weight is distributed much differently and the comb can crack and break off. Tipping the frame from left to right or even upside down is usually just fine, but habits can be hard to break and some folks have told us they get too frustrated by more delicate comb during inspections or extracting. We are not a large scale honey outfit, and we try to make our inspections as calmly and carefully as we can- these partial foundation frames don't change much for our hive manipulations, as long as we have taken the time to install them carefully as I will explain below. Considerations for installing these frames into your hive body...So if you'd like to try this out please let us save you a little bit of headache with a few simple considerations:
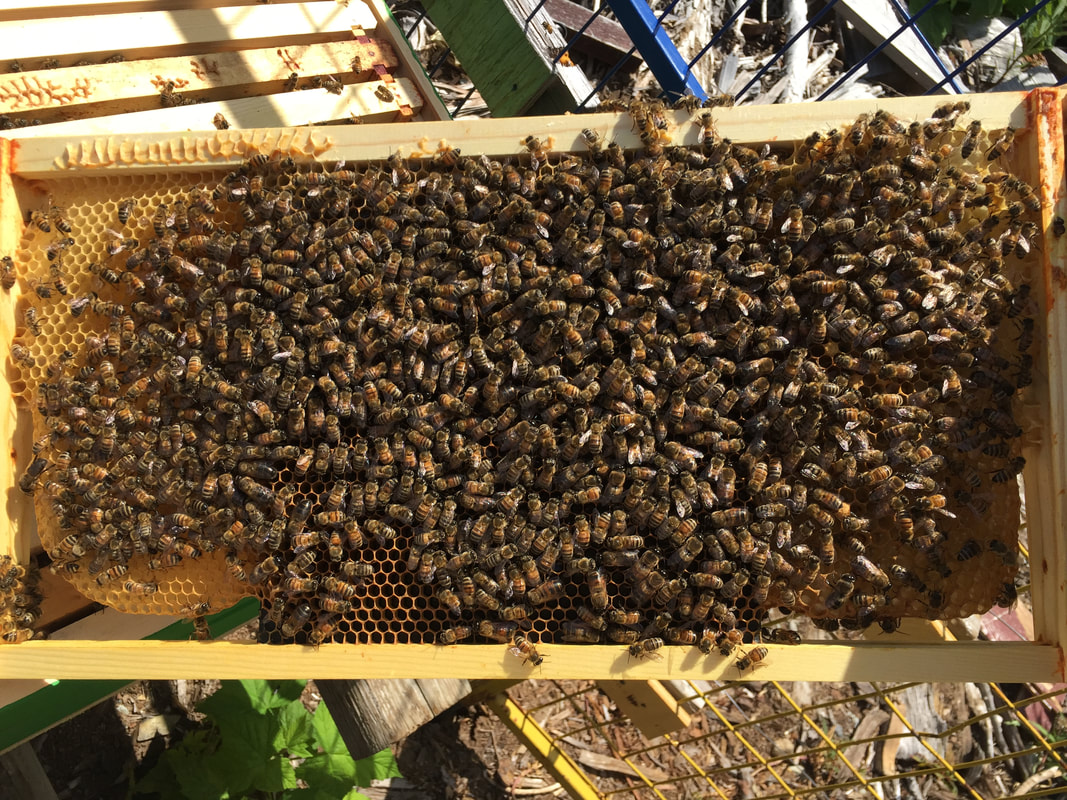 We liked using these frames in the broodnest too, the girls didn't seem to mind at all. There tend to be a bunch more passageways between combs with any amount of foundationless comb- something that we think might be important in our typically cold dark winters when it may be difficult for bees to stray too far from the cluster to retrieve food. Overall we were pretty happy with these partial foundation frames, and will build some more next year. We liked the option of cutting out comb for specialty comb honey jars as they sell well in our region. As beekeepers that value foundationless frames for various reasons, but transport their hives on bumpy roads and use a radial extractor, this little equipment hack seems to be good middle ground.
1 Comment
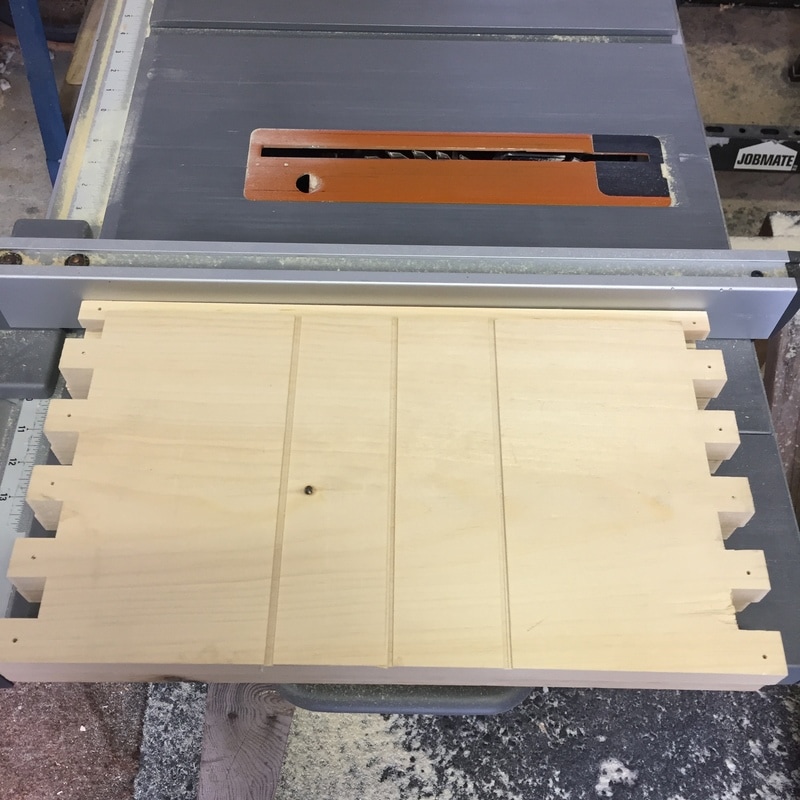
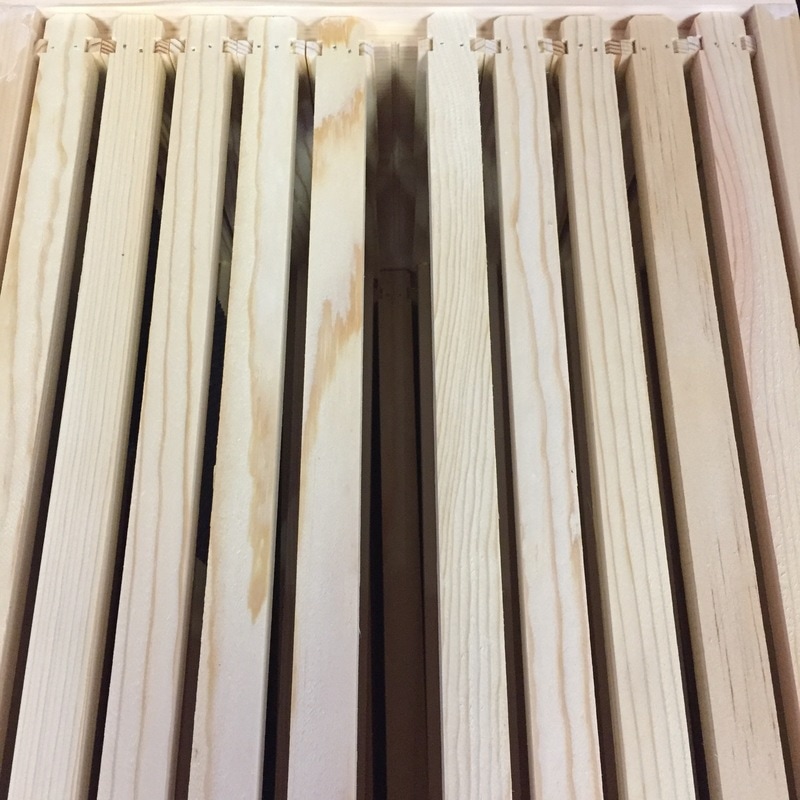
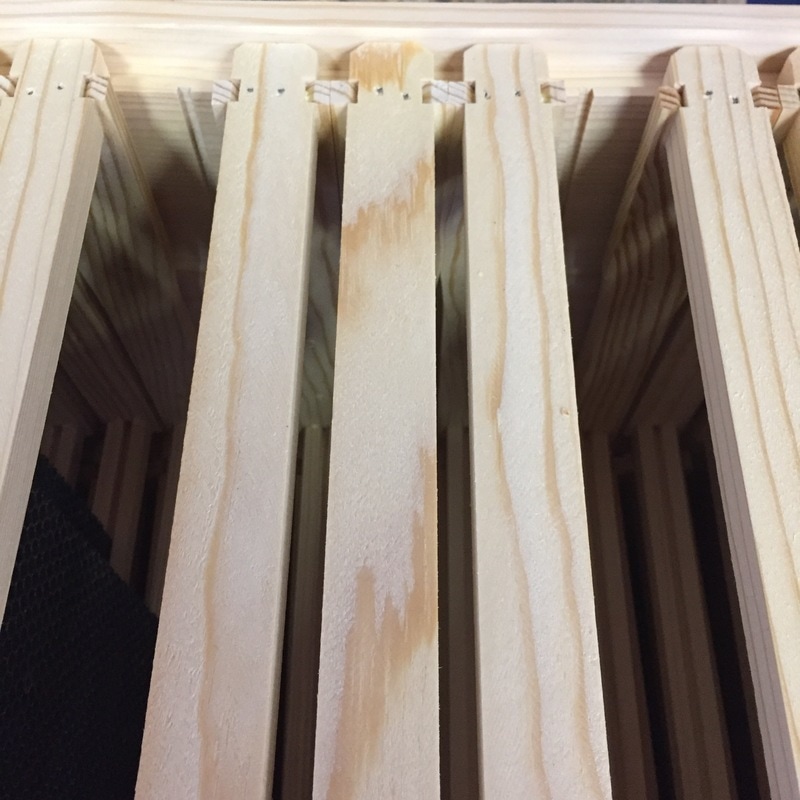
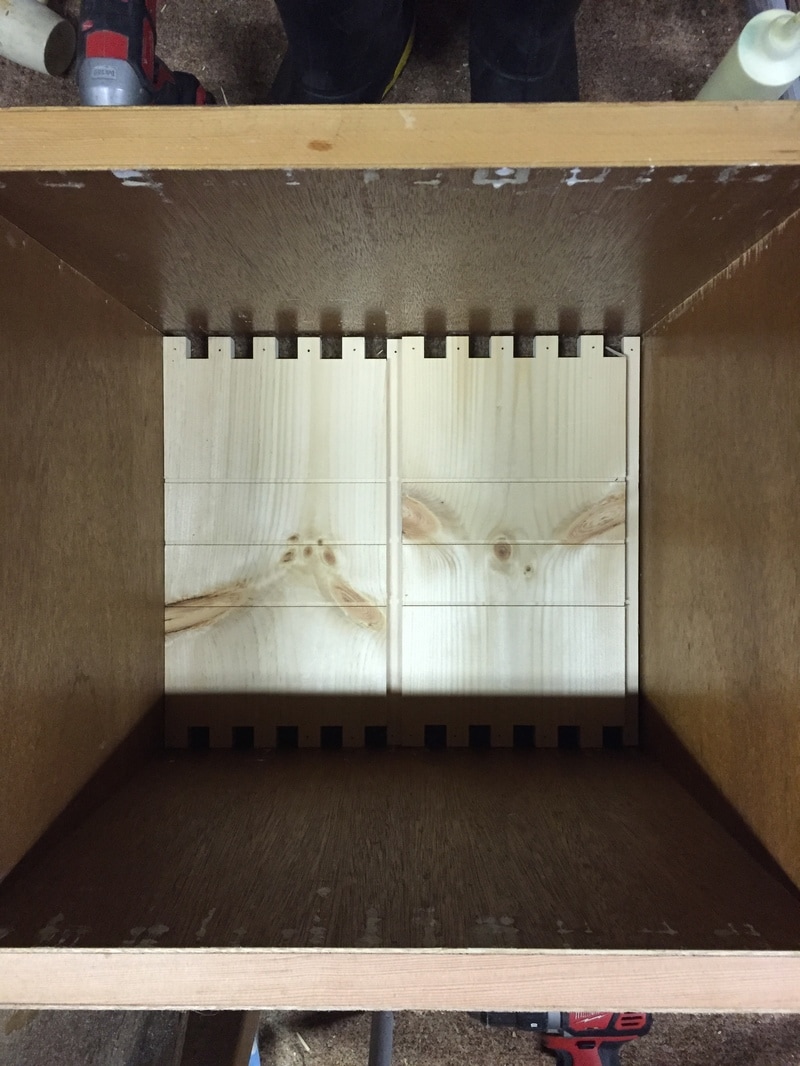
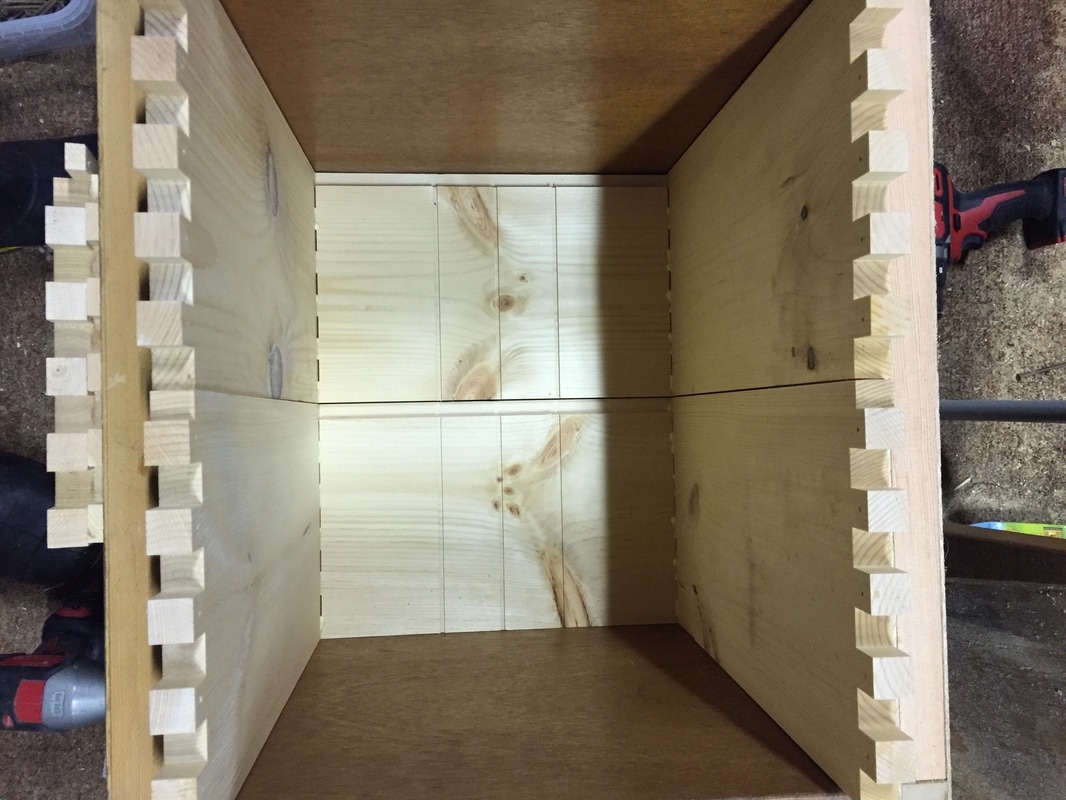
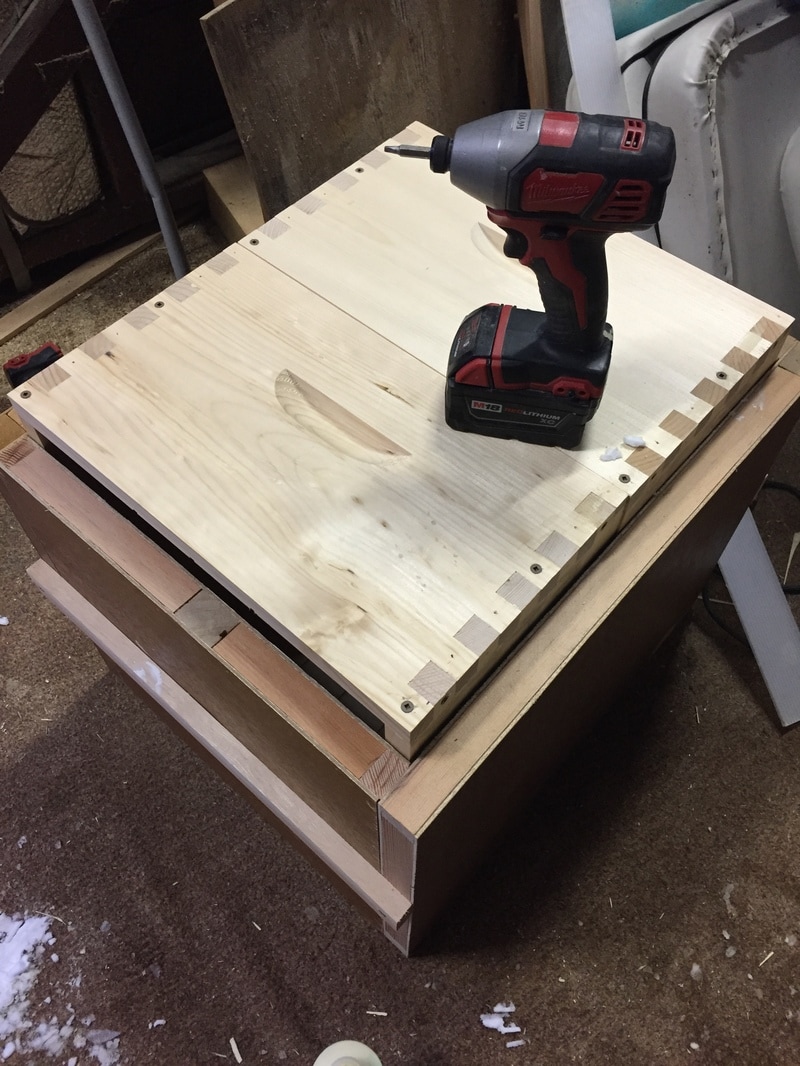
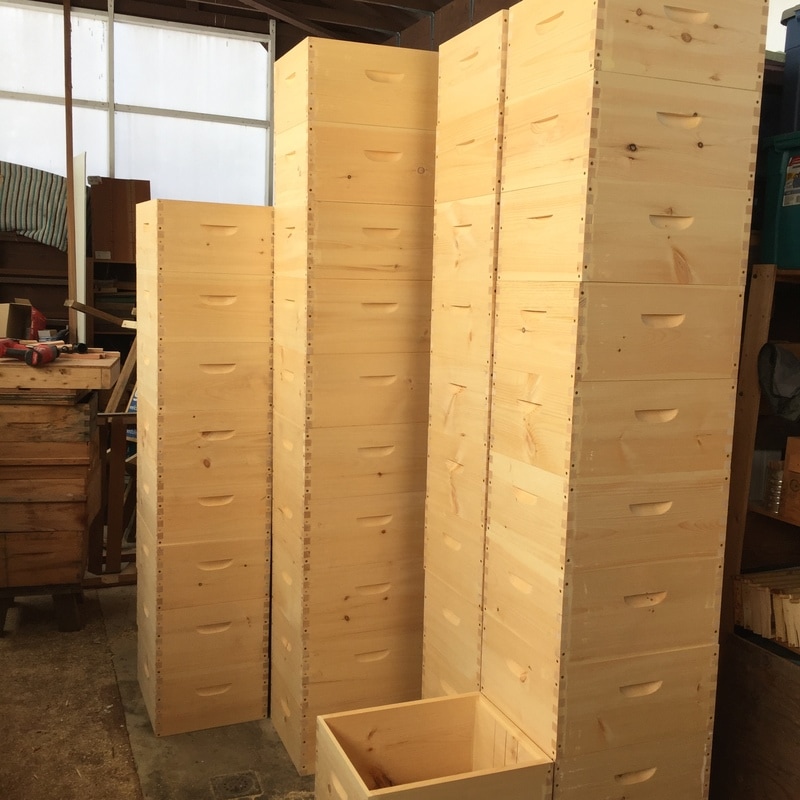
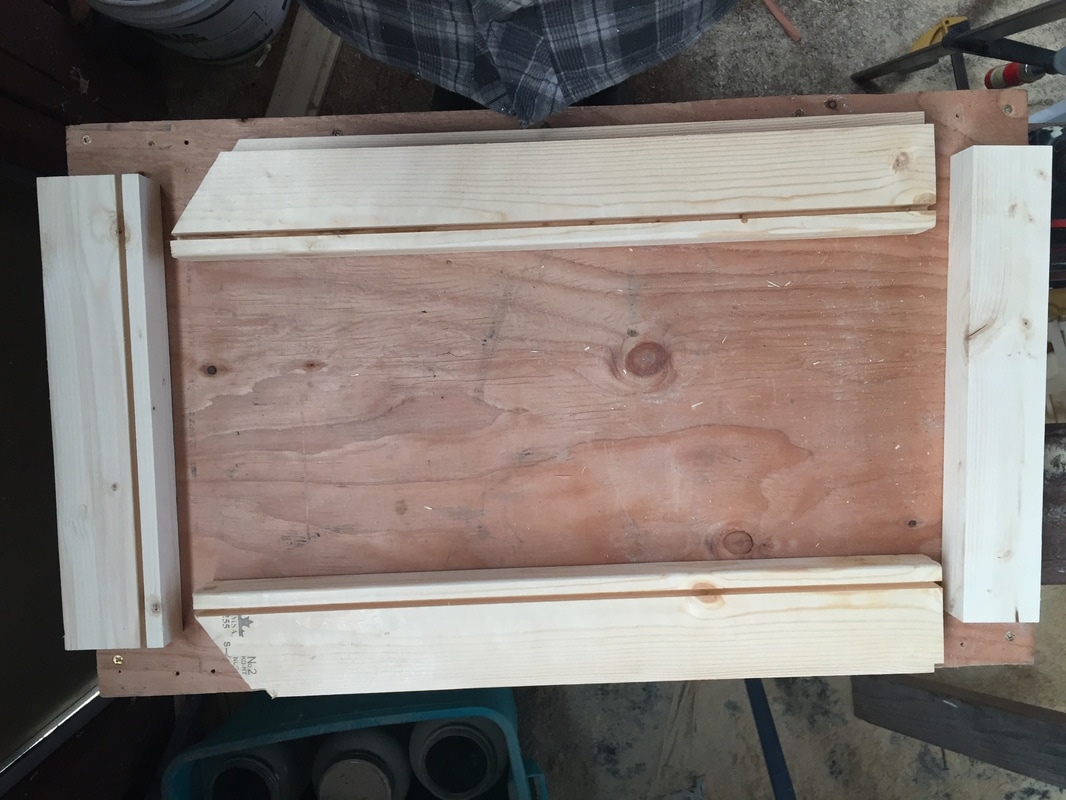
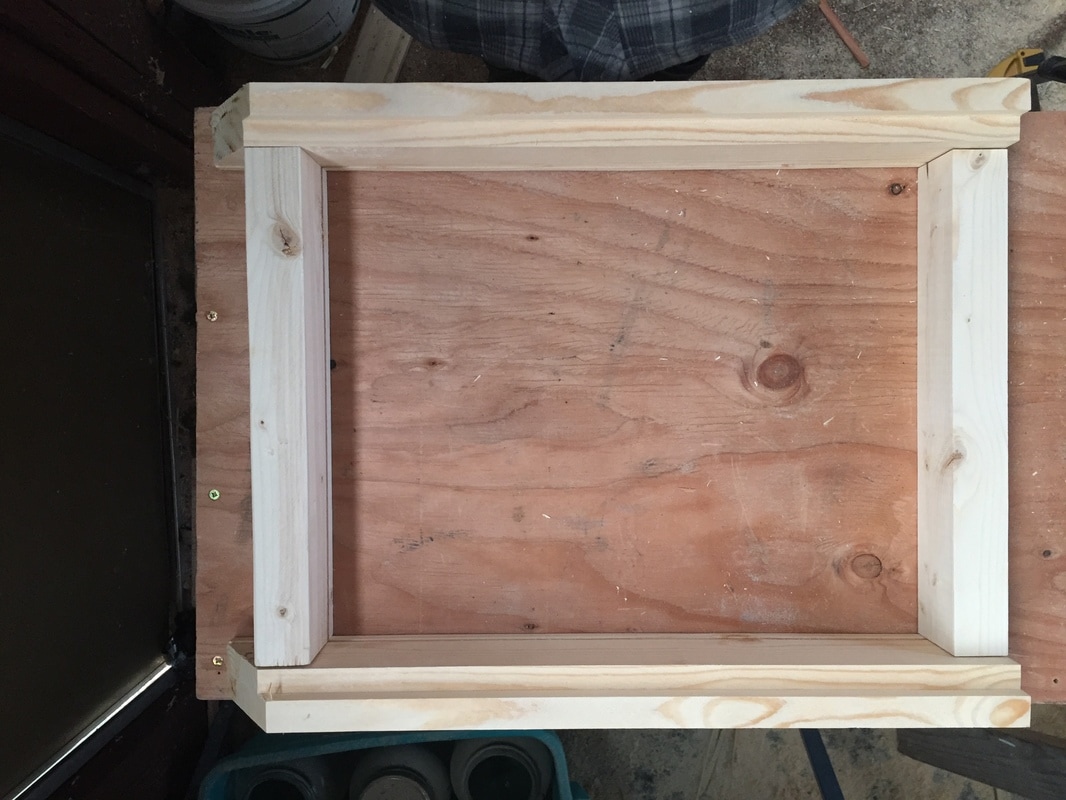
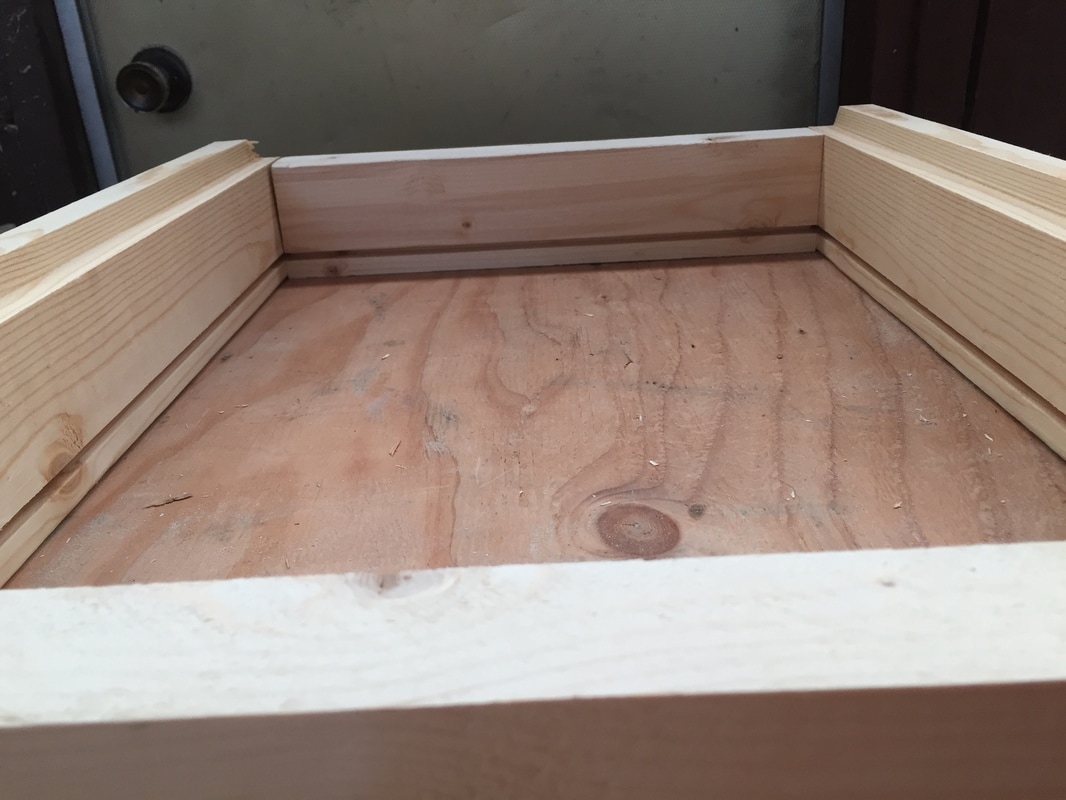
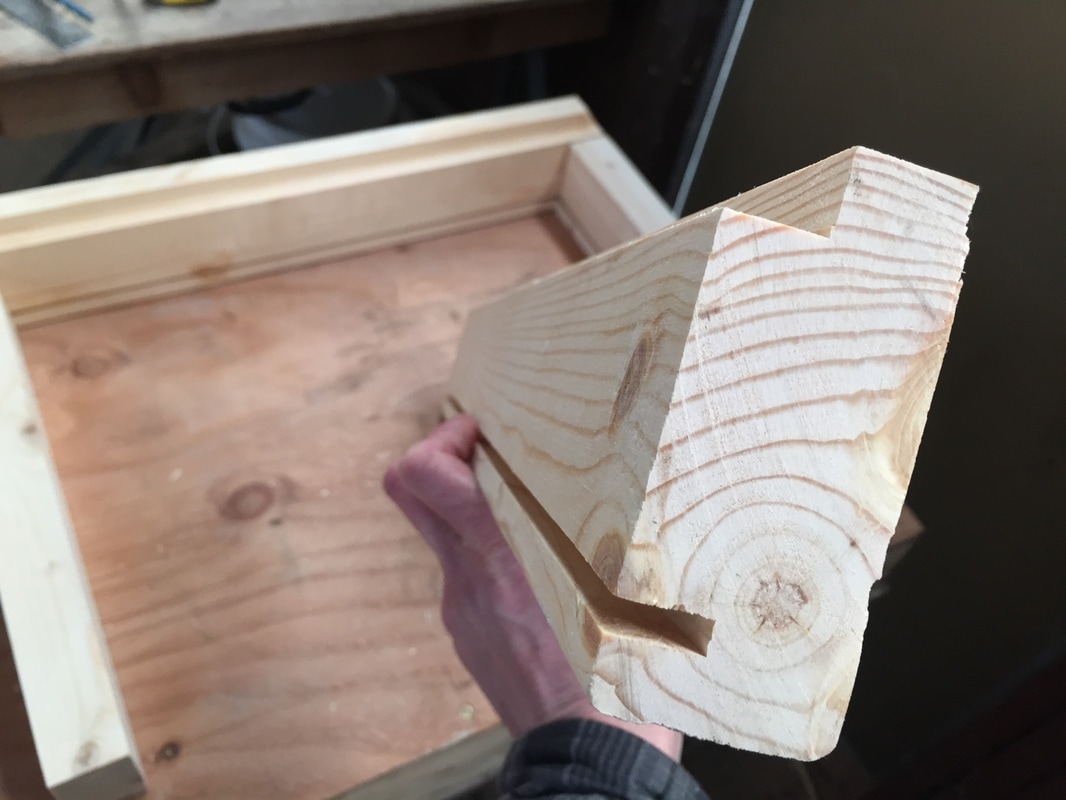
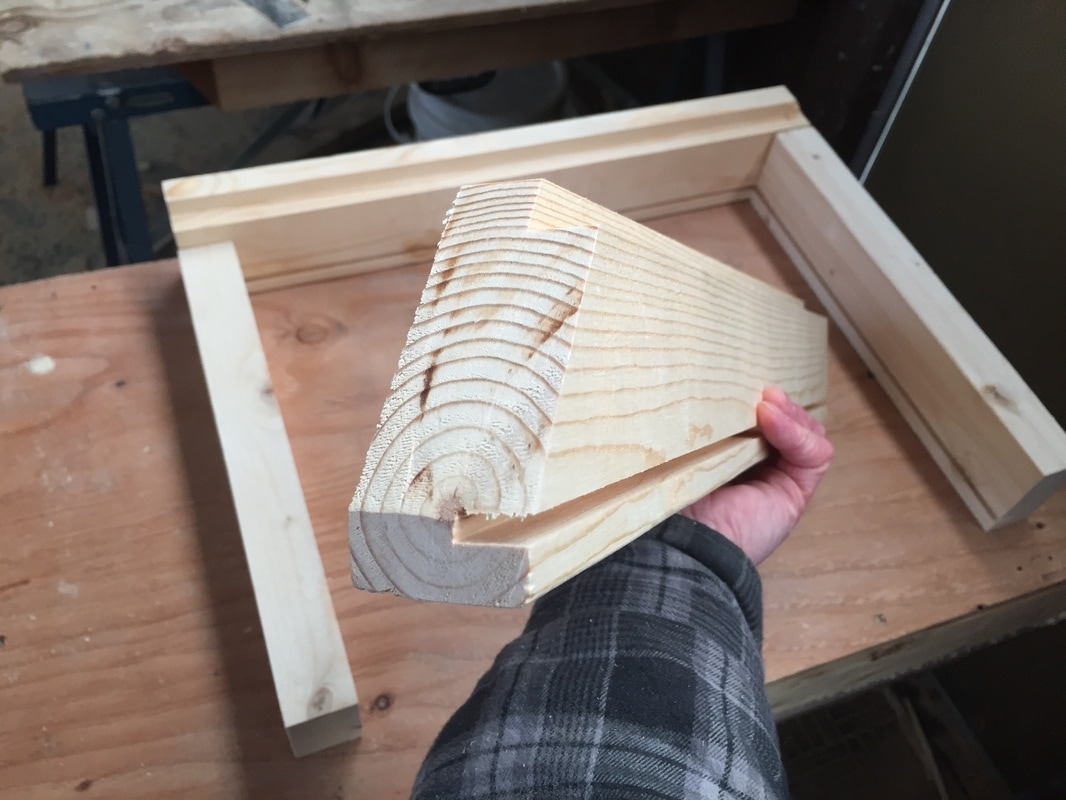
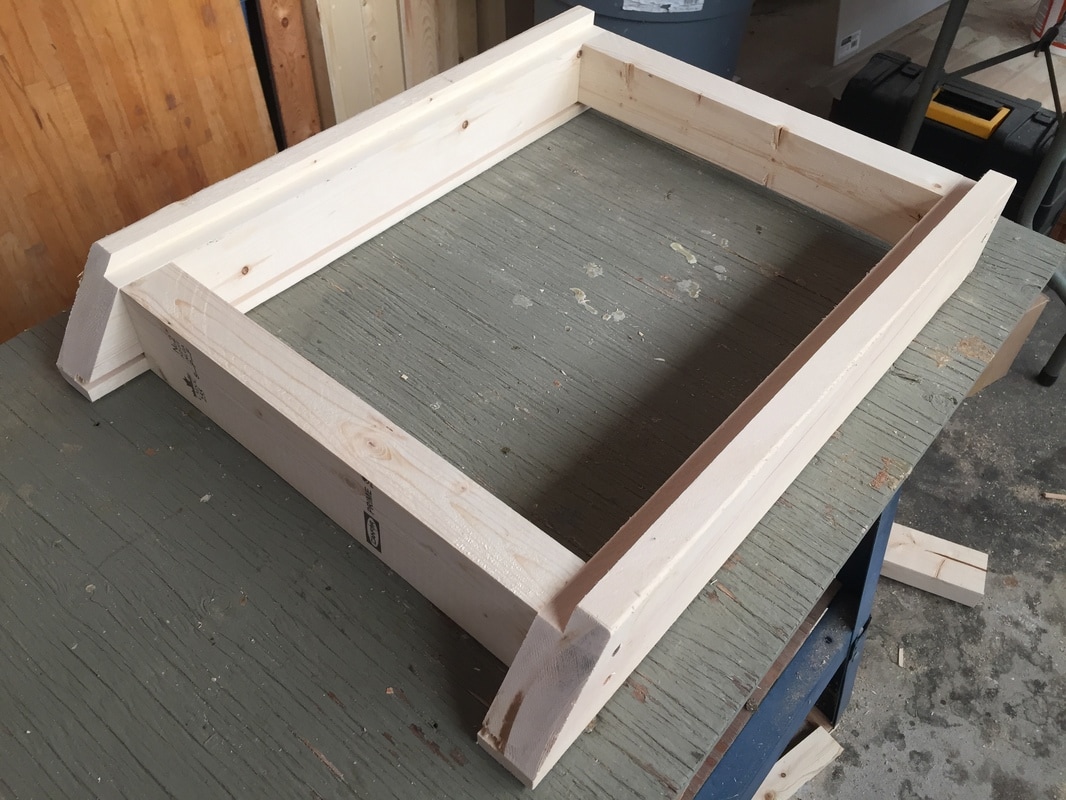
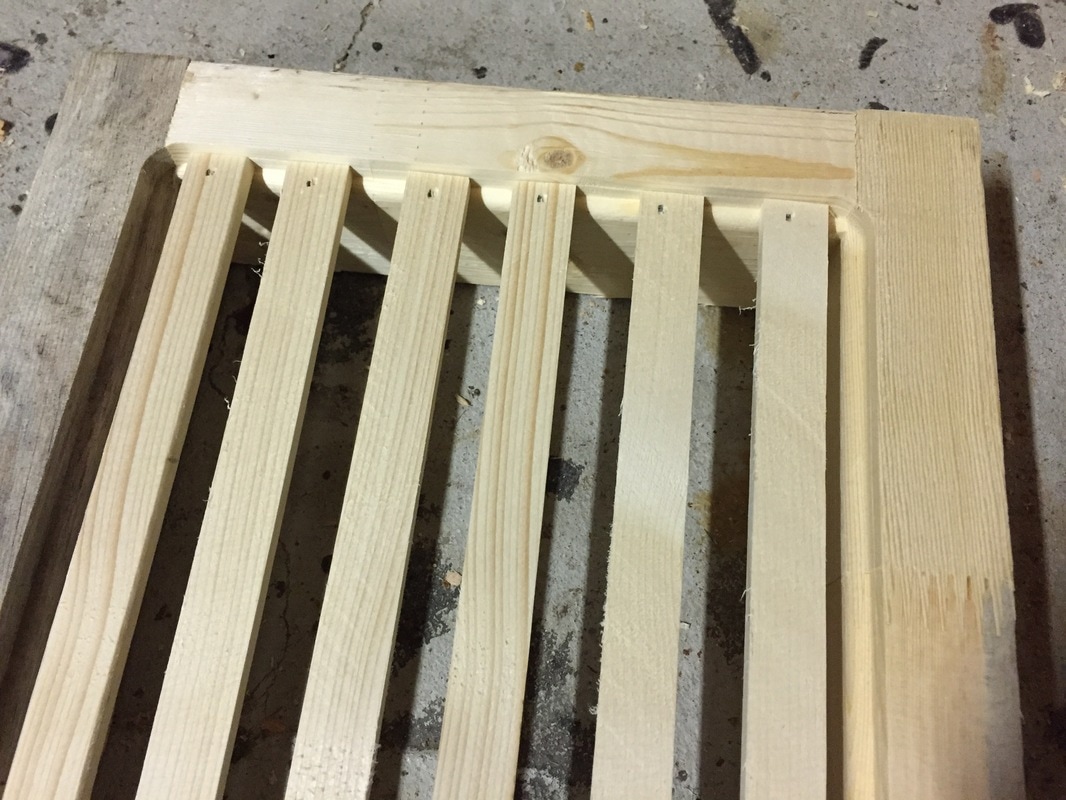
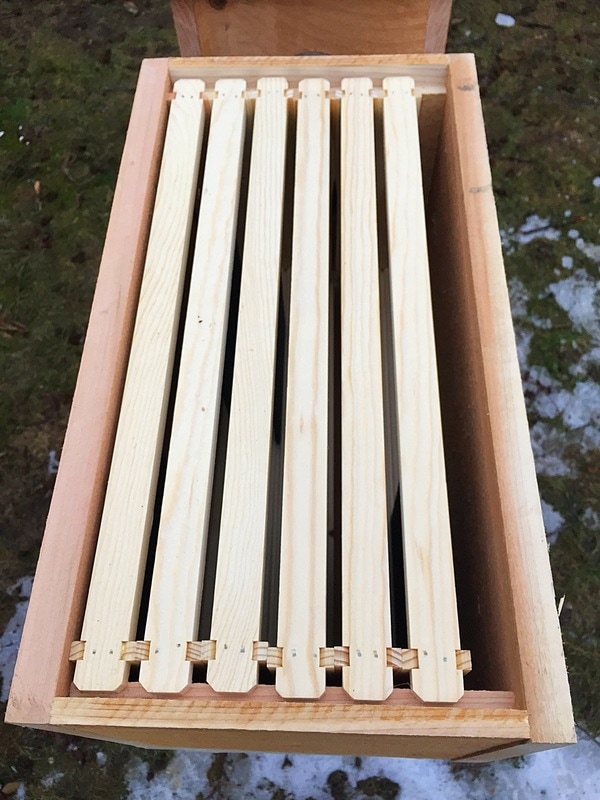
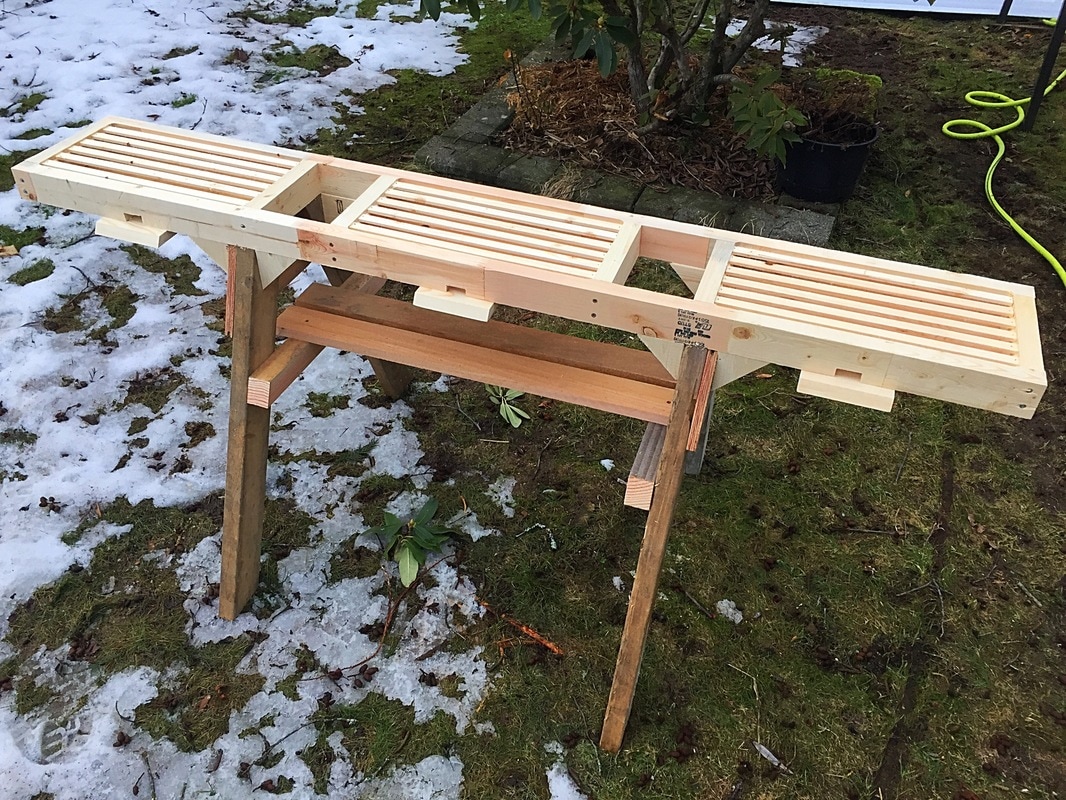
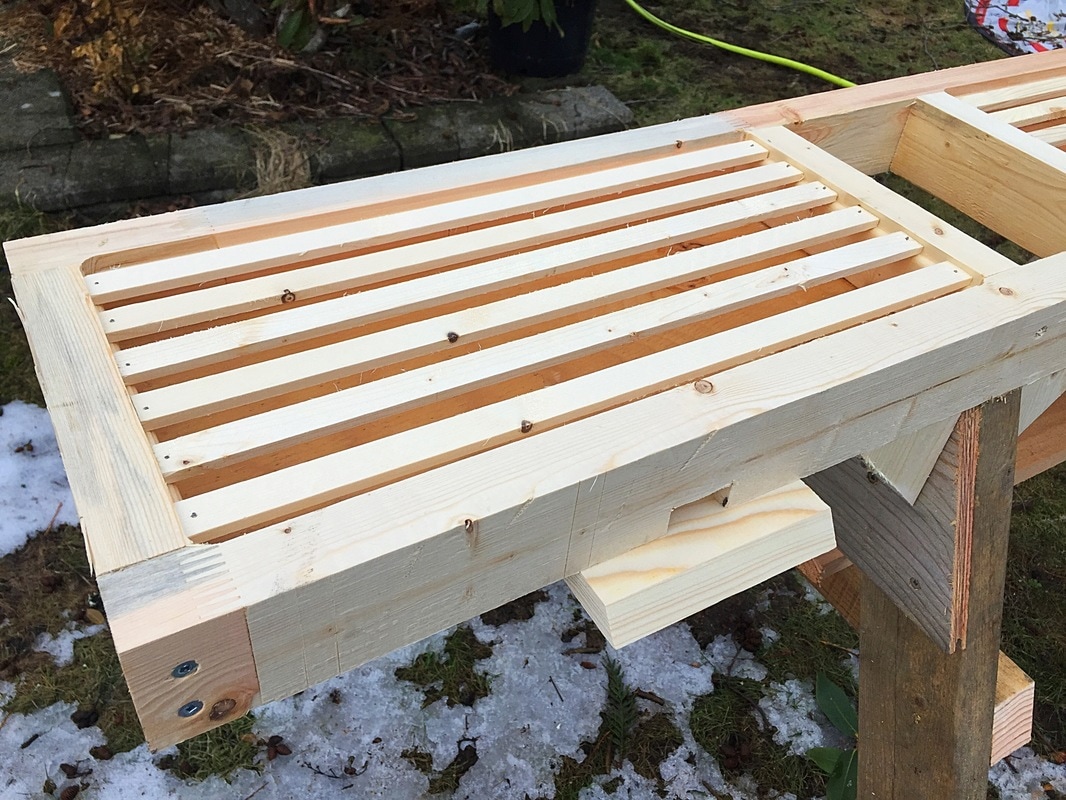
We had a lot of hive bodies to assemble this winter season, in preparation for the nucleus colonies we are buying to boost our numbers this year. Because we are just starting into a slightly larger-scale operation (don't quit the day job though!), we are figuring a lot of things out as we go. Something we have been considering about trying to raise chemical treatment-free bees that can survive Canadian winters, is that our equipment needs to support our bees (and be versatile enough for our growing apiary). We need to expect larger winter die-offs than we might if we treated our colonies with chemicals, and plan to winter more colonies than we will need for our operation to replace colonies that perish over the winter. So we want to be able to configure our boxes to accommodate a full sized colony, as well as multiple colonies in one box. In the past, we've built everything out of rough local cedar, but this year we are expanding too quickly to source and mill all that lumber ourselves. Winter is cold here compared with south of the border, and the 5/8" woodenware we typically see for sale from large US distributors like Mann Lake are not as well suited here. We sourced 7/8" woodenware from a Canadian company called 'Propolis etc.' and we are pretty happy with their product. The 2/8" thicker hive bodies are a little better insulating, which won't matter as much for our full sized colonies, but may make a world of difference for overwintering nucs. So before assembling any boxes, we run the inside of each hive end (the pieces that the frames will rest on) through the table saw a few times to create some division board grooves. These grooves will later allow us to configure each box into 1, 2, or 3 separate colonies with the addition of division boards cut to fit the grooves. This step is a pain, but now each of our new boxes can be used for making/wintering nucs, mating/banking queens, or as a standard hive body. In the case of a 3 colony box created by adding two division boards, we will have to use a different hive bottom, or integrate upper entrances. Once all the grooves had been cut, we finally began assembling the boxes. Three boxes into the assembly, we realized there must be a better way. We use an assembly jig for the frames, and the same idea can apply to these commercial boxes (because everything is milled to be very nearly identical, unlike the rough cut cedar I'm used to working with). It's not perfect, but this box assembly jig I threw together helped keep things straight and square, and allowed for the construction of two boxes at a time (more would begin to get heavy/awkward to flip and rotate). I sawed up an old semi-hollow interior door that was nice and light but surprisingly rigid for this assembly box. The concept is simple enough- if you build your jig perfectly square and to the right dimensions for a tight fit, the hive bodies you assemble within the jig will come out right almost every time. We glue each finger joint, and then use a rubber mallet to persuade the joints together. We did decide to use some long screws to pull the finger joints together even tighter, before adding nails to the remaining finger joints. You could definitely get good results just with nails, or using clamps, but we liked the way the screws fixed any warping or cupping in each piece (especially since we will plan to slide division boards into those very shallow grooves we mentioned earlier. This was about half-way there. Just a couple coats of paint left to apply, and then we have 75 versatile boxes to support our growing operation. Now we just need the snow to stop falling so we can put these to use!
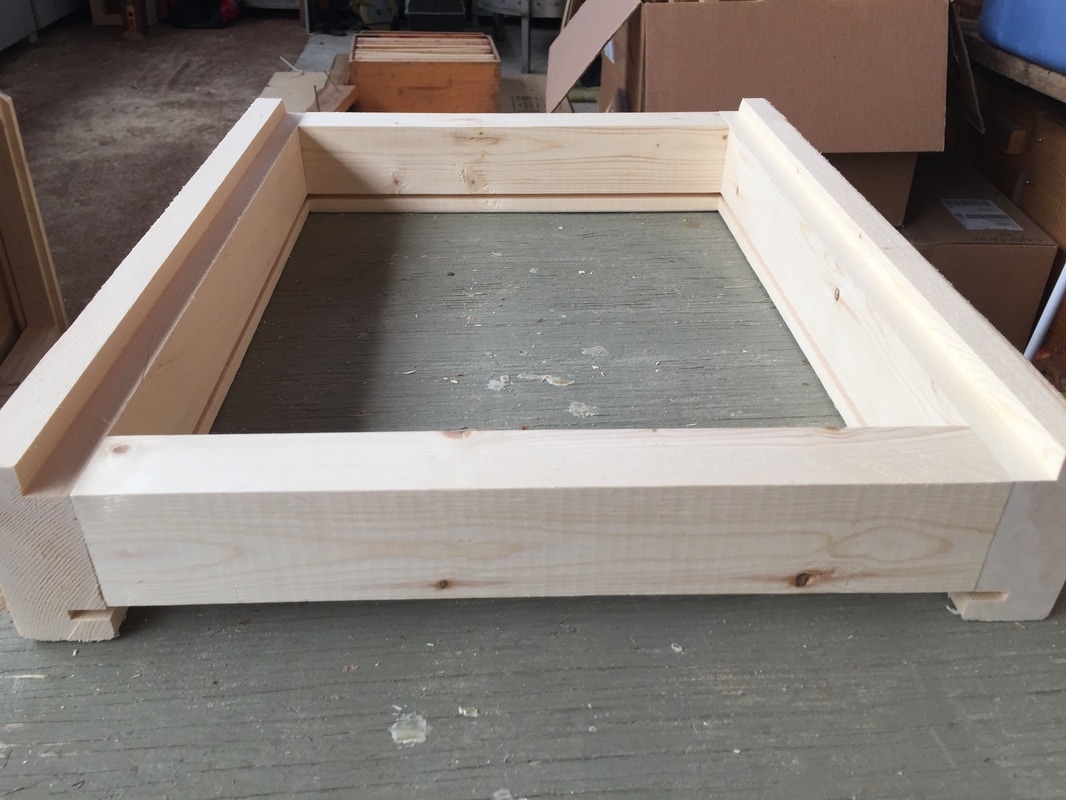
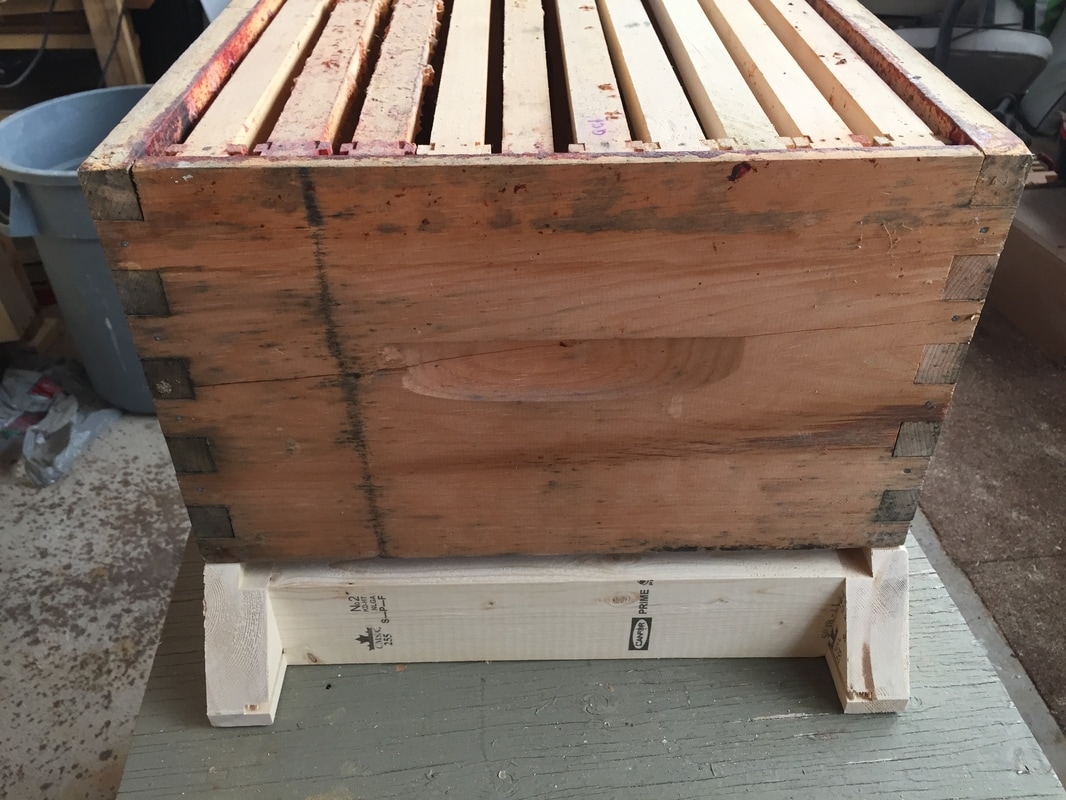
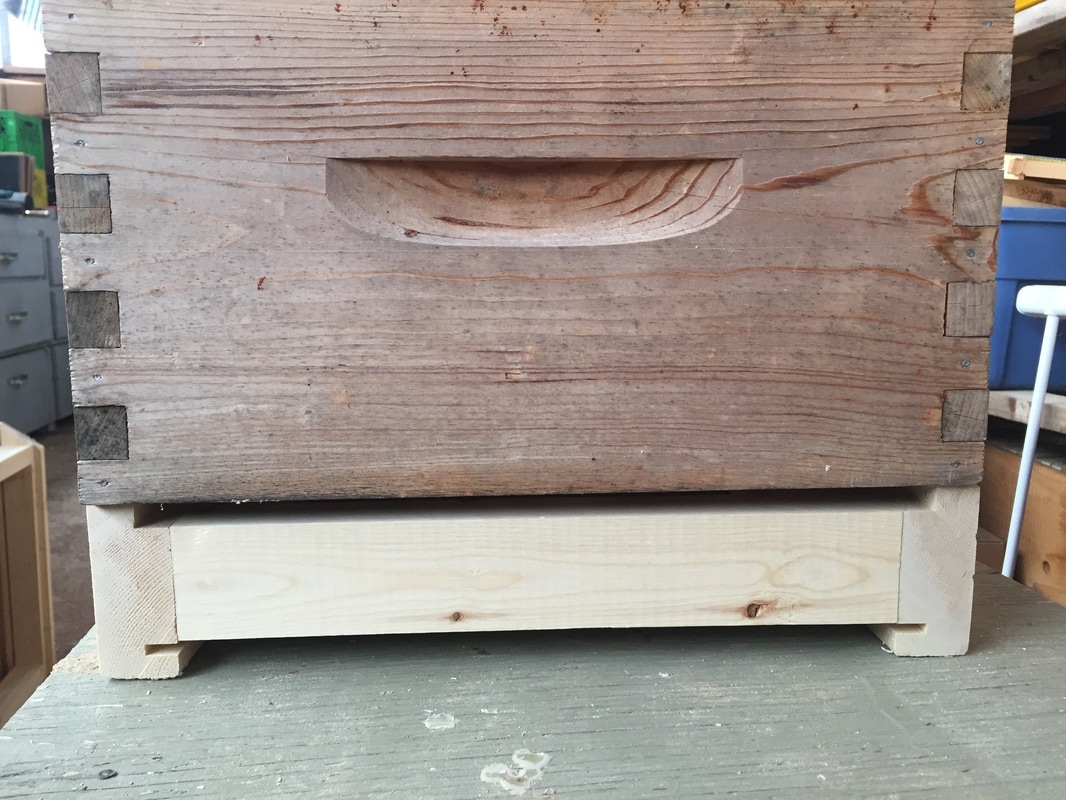
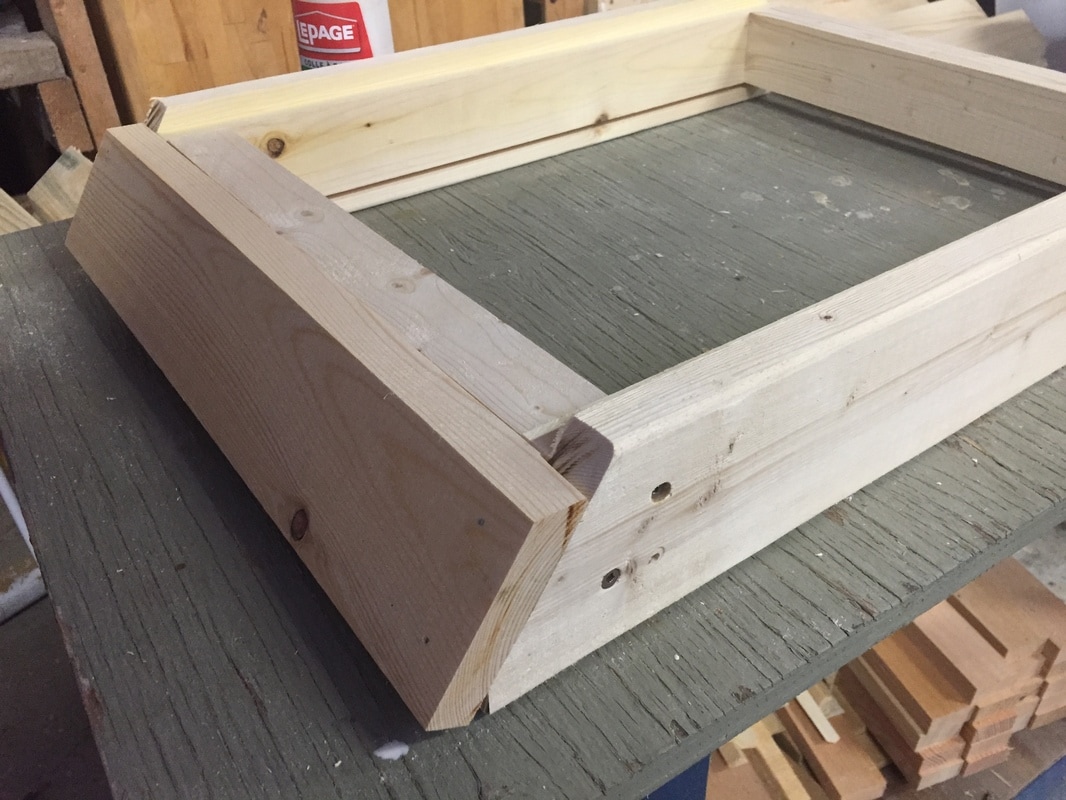
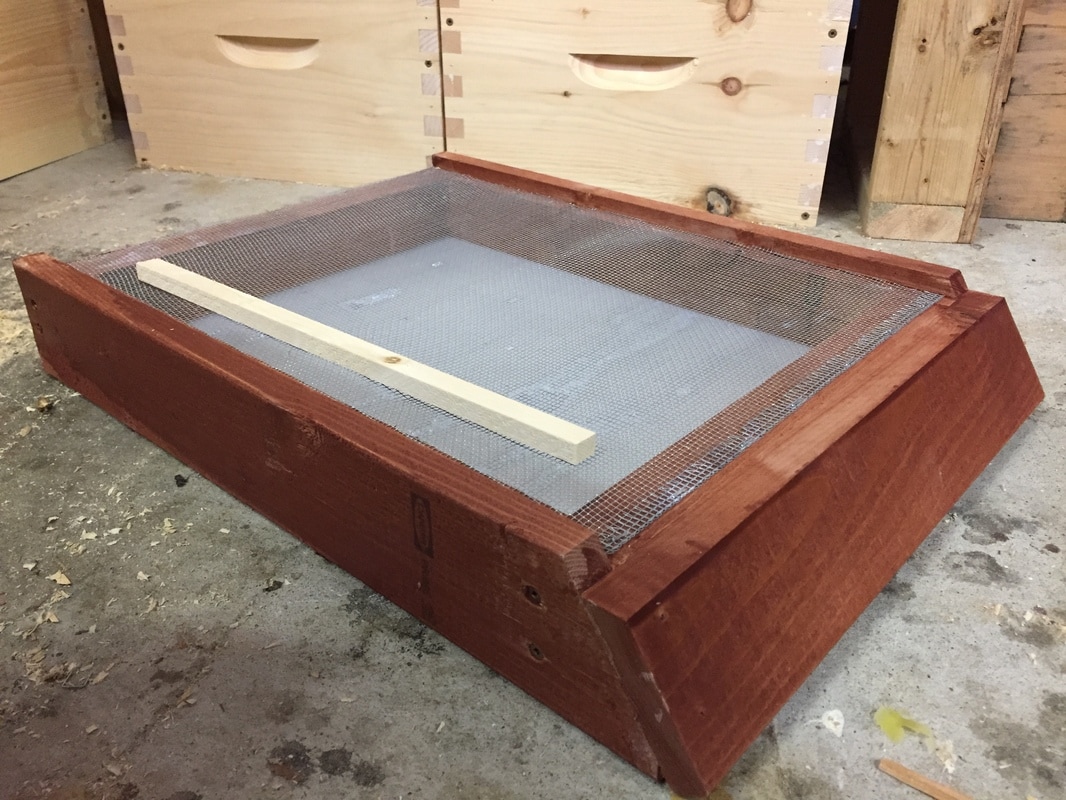
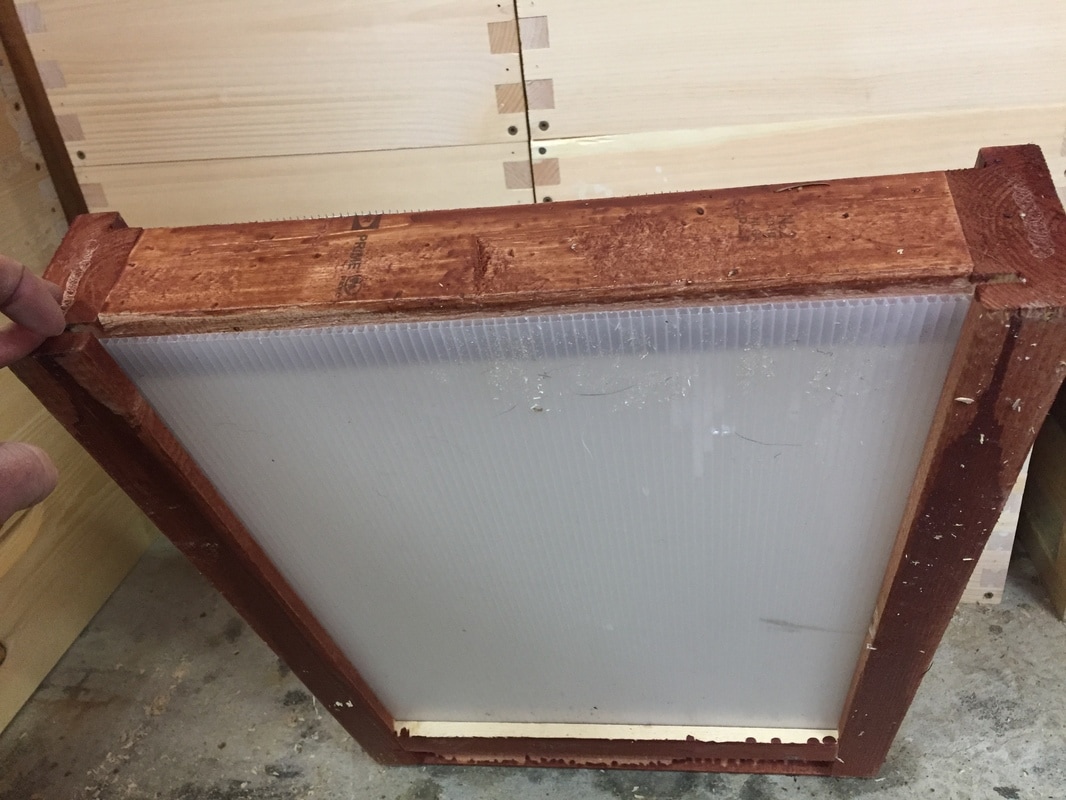
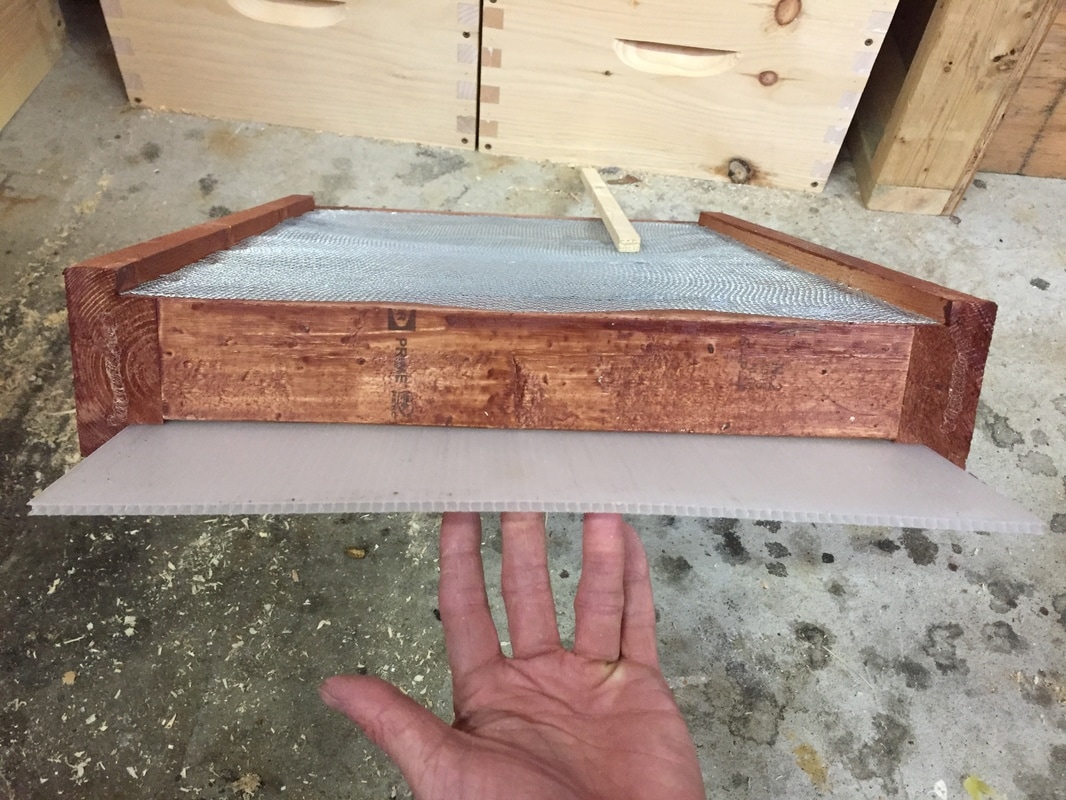
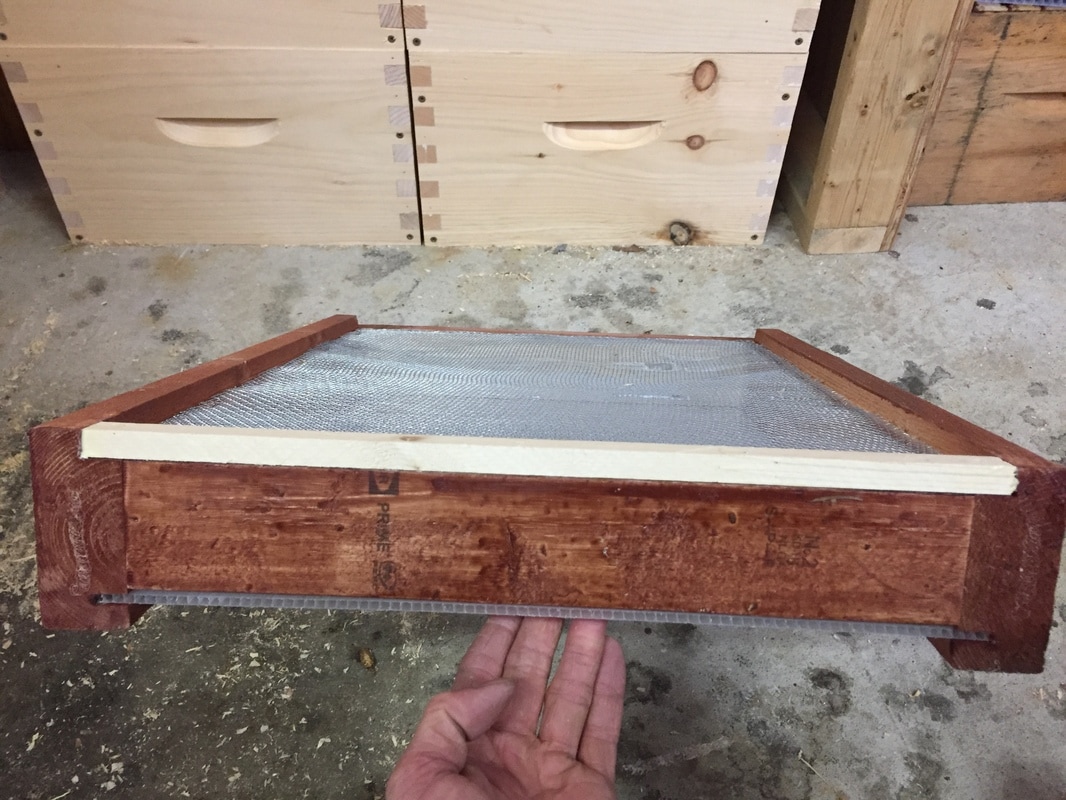
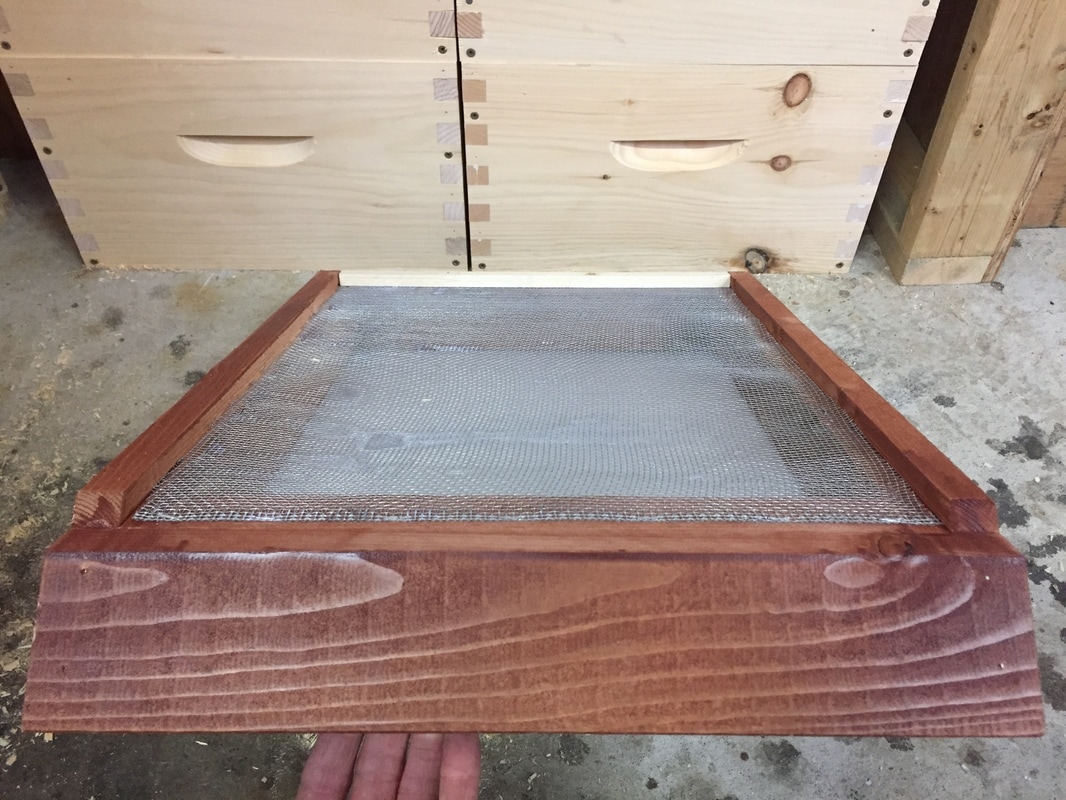
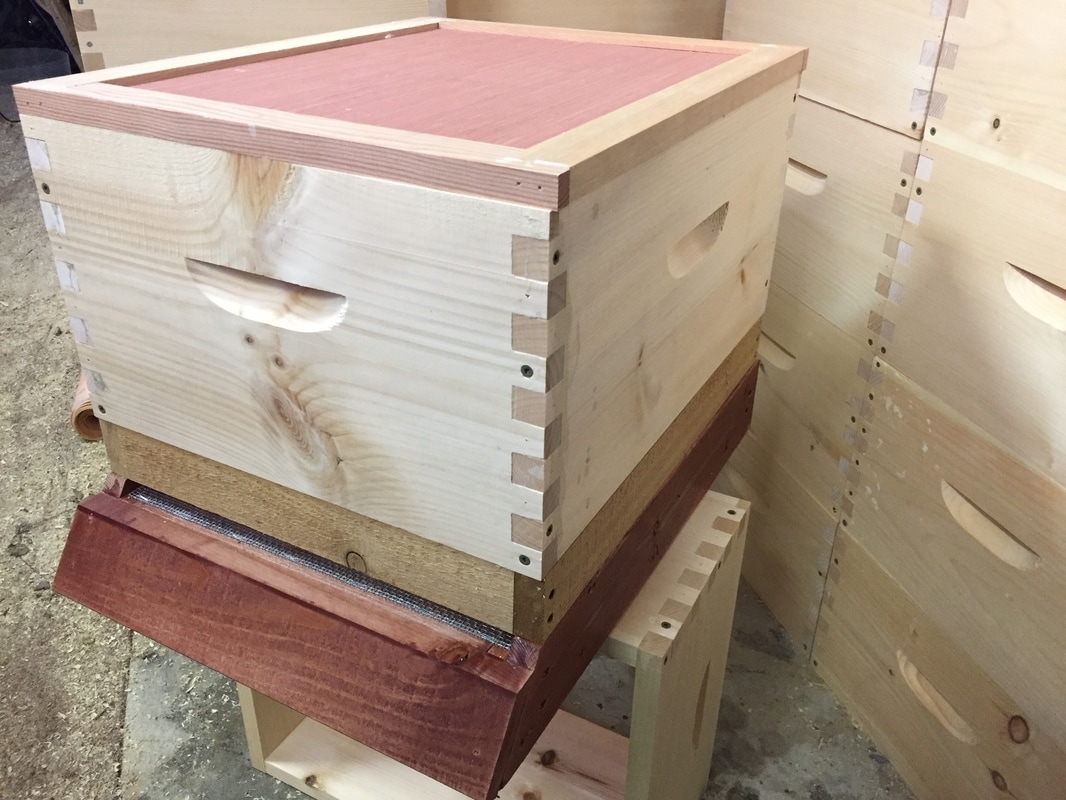
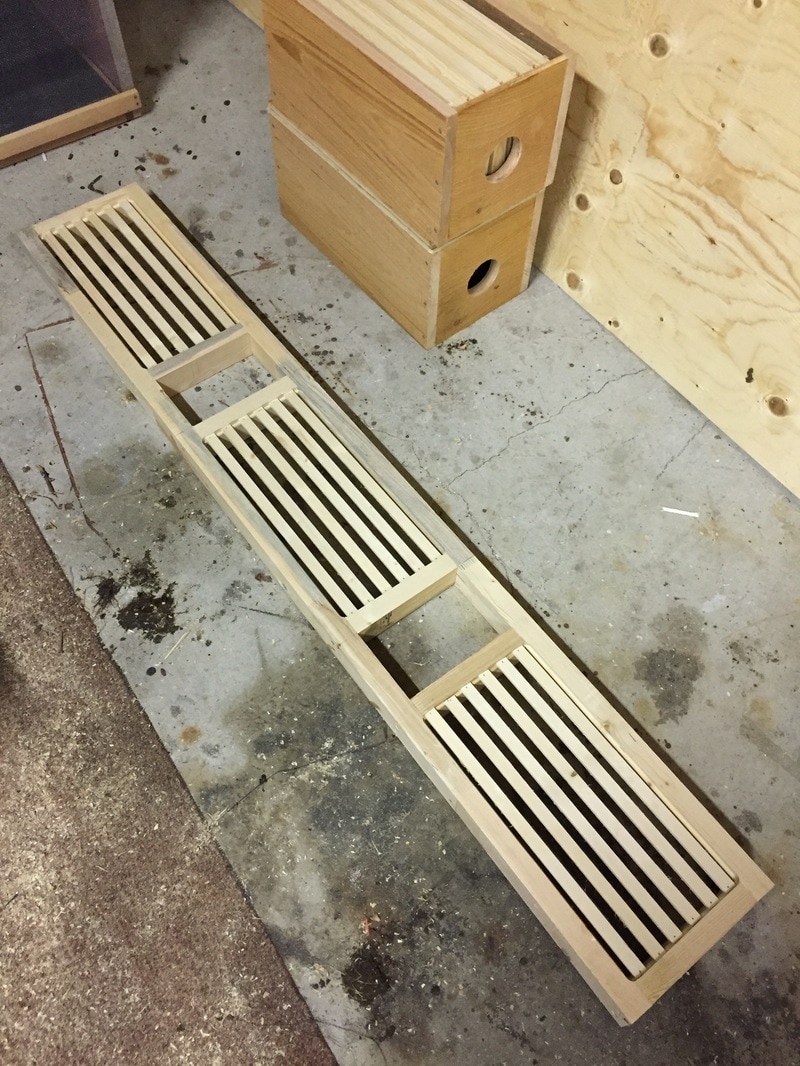
The debate for and against screened or solid bottom boards is ongoing. Certainly there are articles supporting the use of one over the other, and as usual there are many considerations to be made about the climate and geographical location of your bees, as well as the management practices of individual beekeepers. In our Langstroth hives and nucs we use solid bottom boards, solid bottom boards with slatted racks, screened bottom boards, screened bottom boards with slatted racks, and compare what we like or don't like about each. There are a couple of advantages to Screened BB, like ventilation and more passive monitoring of Varroa, but one big advantage whether you treat or not is the mites that become dislodged through grooming behaviour, icing sugar dusting, or chemical treatment, fall through the screen and don't make it back. Solid bottom boards would seem to encourage resistance to treatment through the survival of any mites that were dislodged but recover and are allowed to crawl back onto combs/bees. Still, there are plenty of folks that report no significant increase in winter survival comparing Solid BB to Screened BB, and many beekeepers that have previously used Screened BB are switching back to Solid. Screened bottom boards can be a real pain to sterilize, are generally more fragile, heavier, and take up more storage space compared to Solid BB. Screened BB are generally going to cost more to buy, and if you're building them yourself they're going to cost more and take more time to construct than solid BB. This post is not intending to persuade you to use either style of bottom board! There are many designs for making Screened Bottom Boards online, and this design may not be that different from many, but sports a few features that we wanted for our wet Pacific Northwest seasons. We wanted our bottom boards to meet several requirements: 1. Sturdy construction using inexpensive materials. 2. Reduce the exposed parts of the bottom board that rain and snow can accumulate on. Sloped landing board for rain and snow runoff. 3. Distance between screen and sliding insert must be 2+ inches to increase mite mortality. 4. Sliding insert for monitoring mite drop and adjusting bottom ventilation- must slide out the back of the hive. Not the side where another hive might be in the way, or the front to needlessly disrupt the flight of foragers. Must not hang out of the bottom board when fully inserted. 5. Easy to build using only a table saw, chop saw and screws. Working with scraps of material left over from other projects, these stands were relatively easy to produce. I did 25 of these for this season, and they feel sturdy enough to last a good while as well as hold up under the heavy stacks of honey we have to be optimistic for!
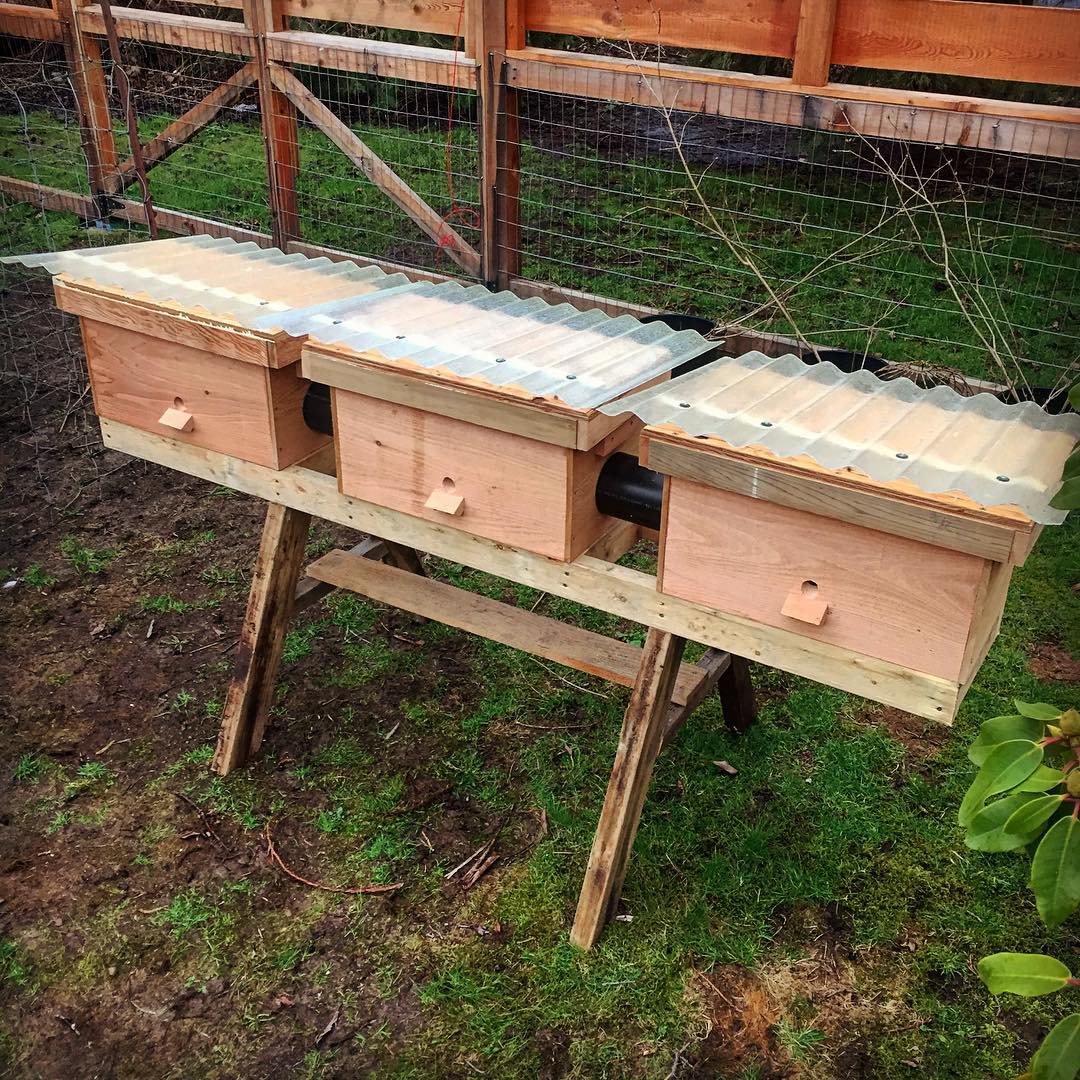
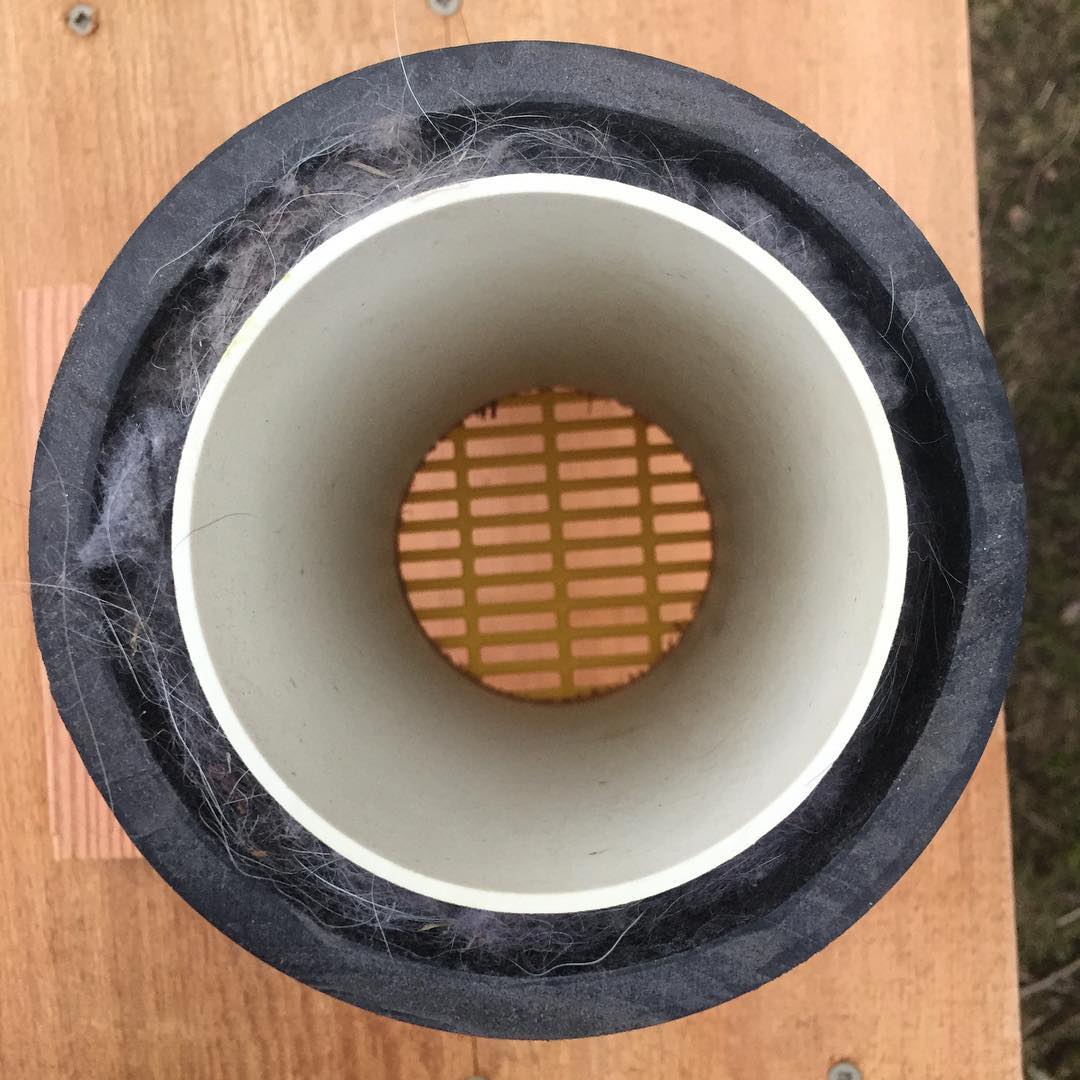
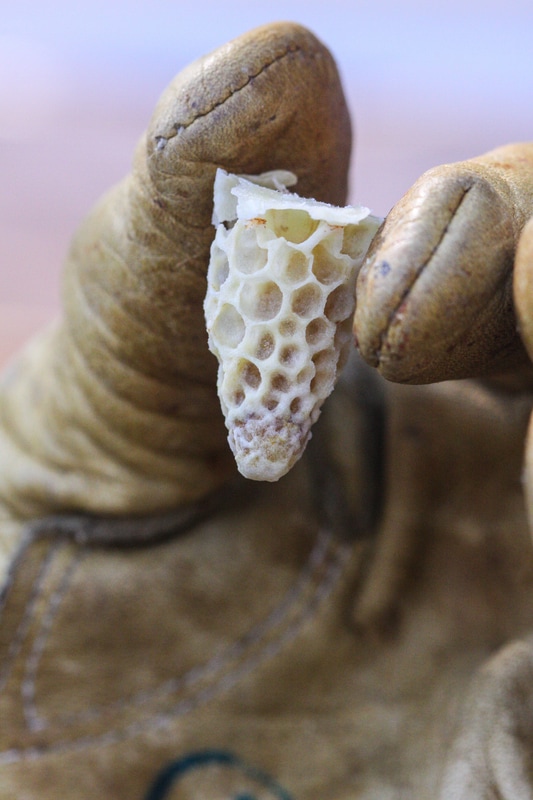
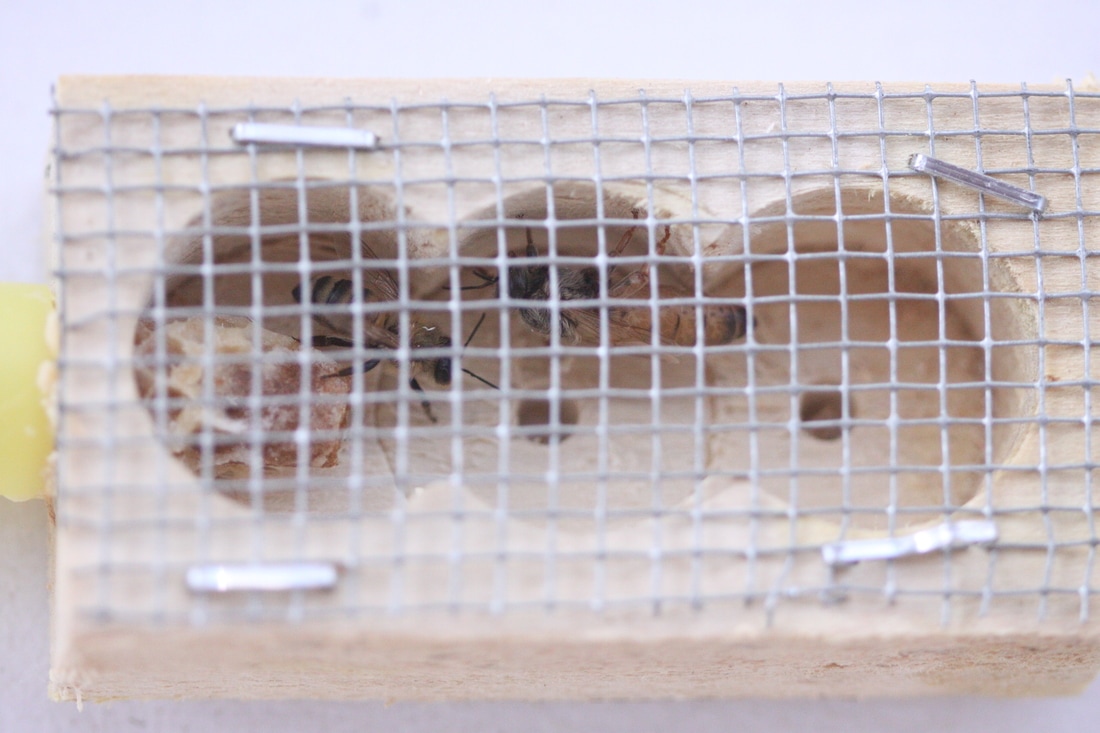
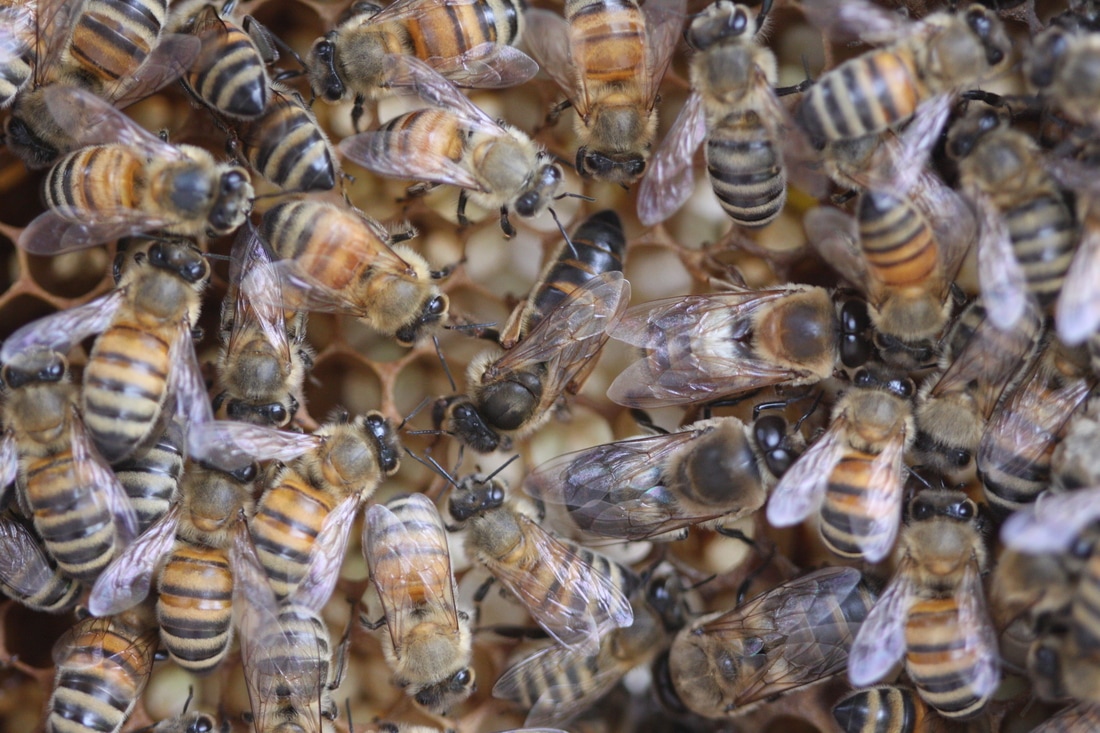
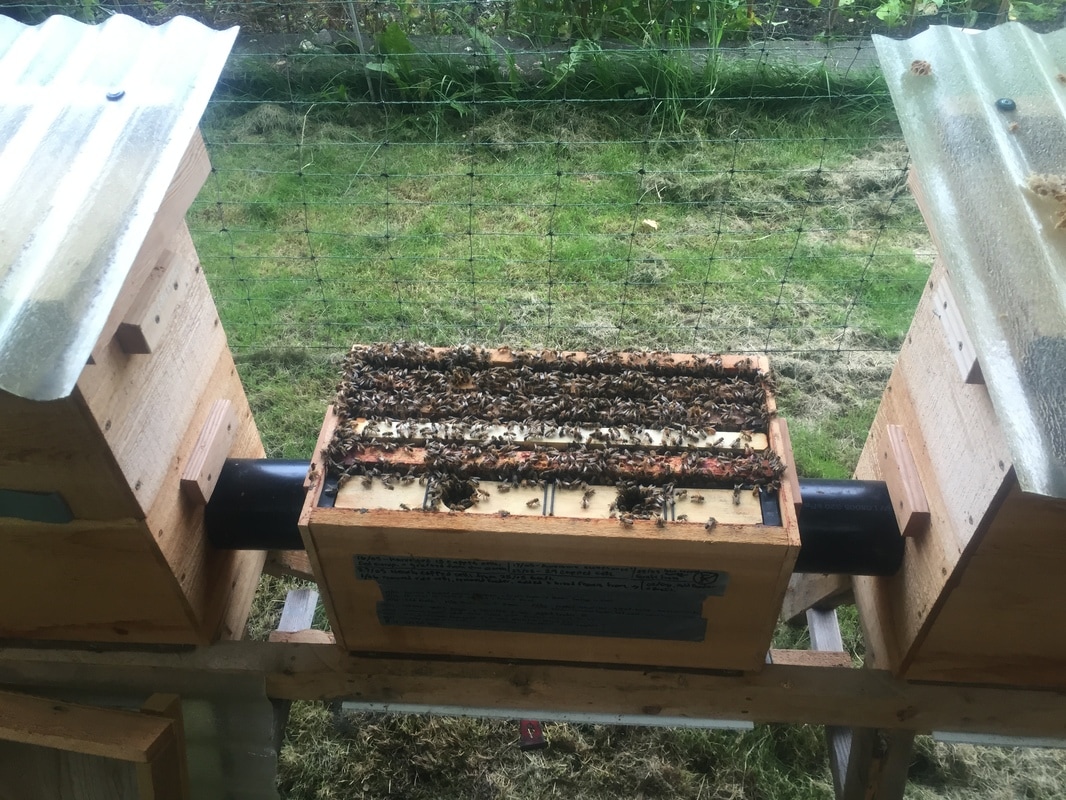
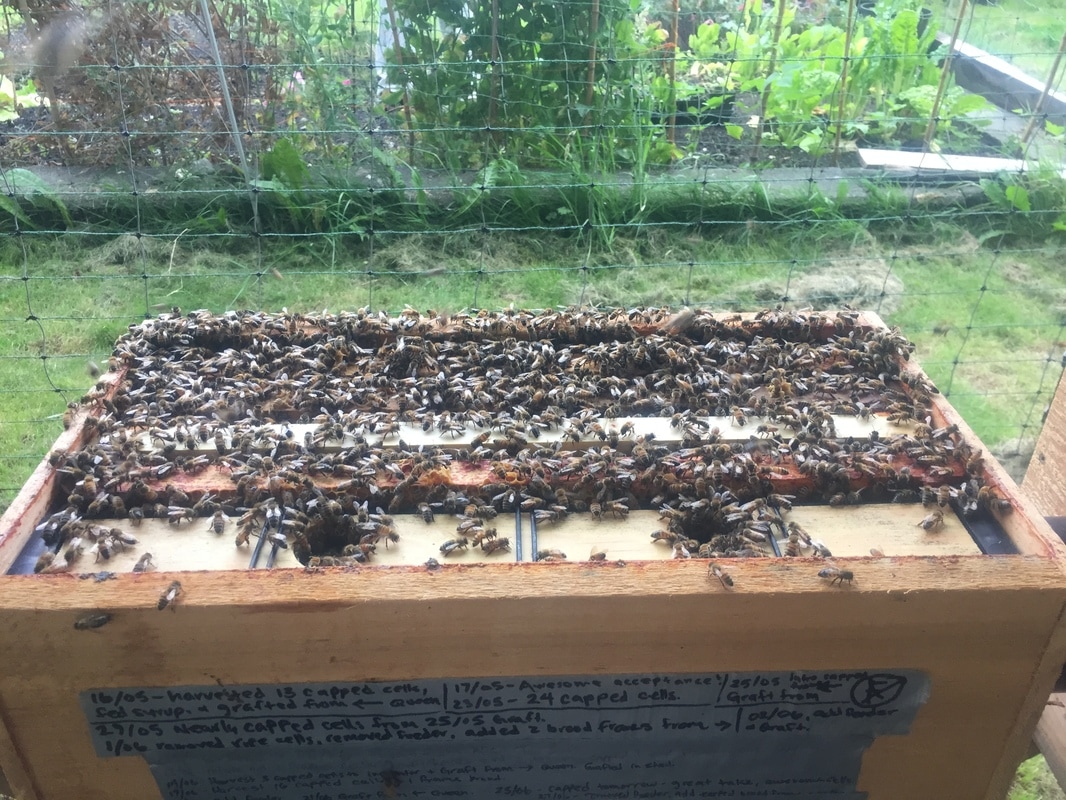
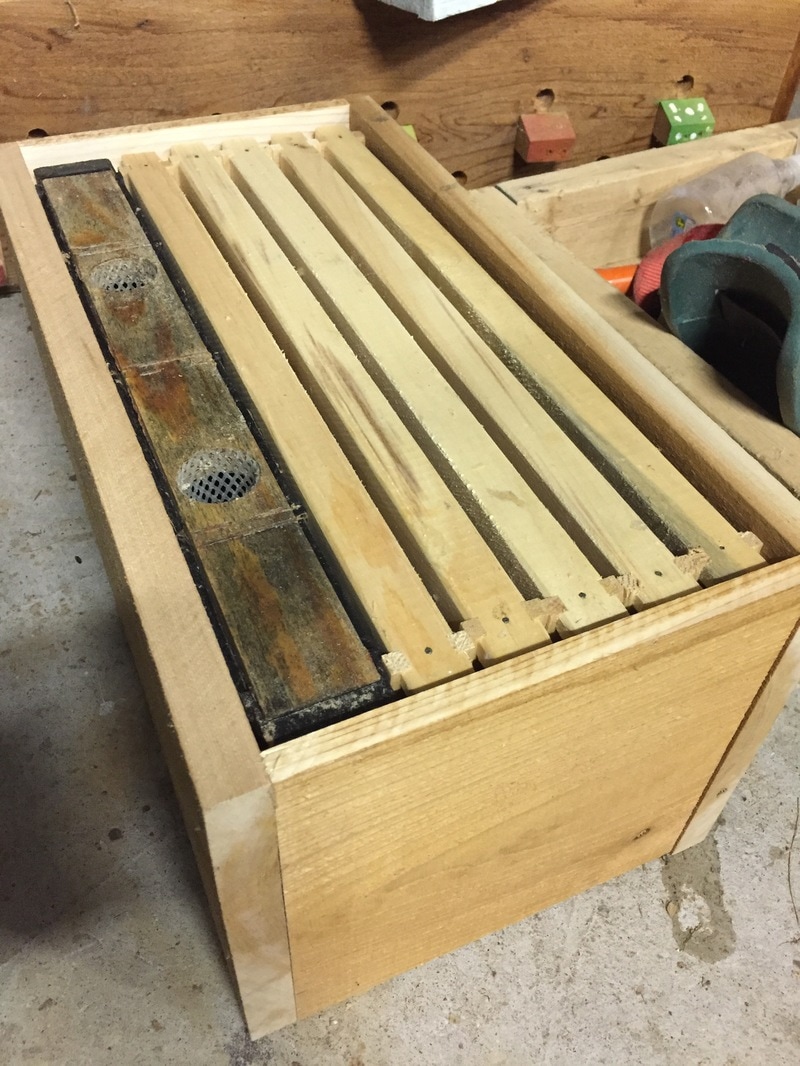
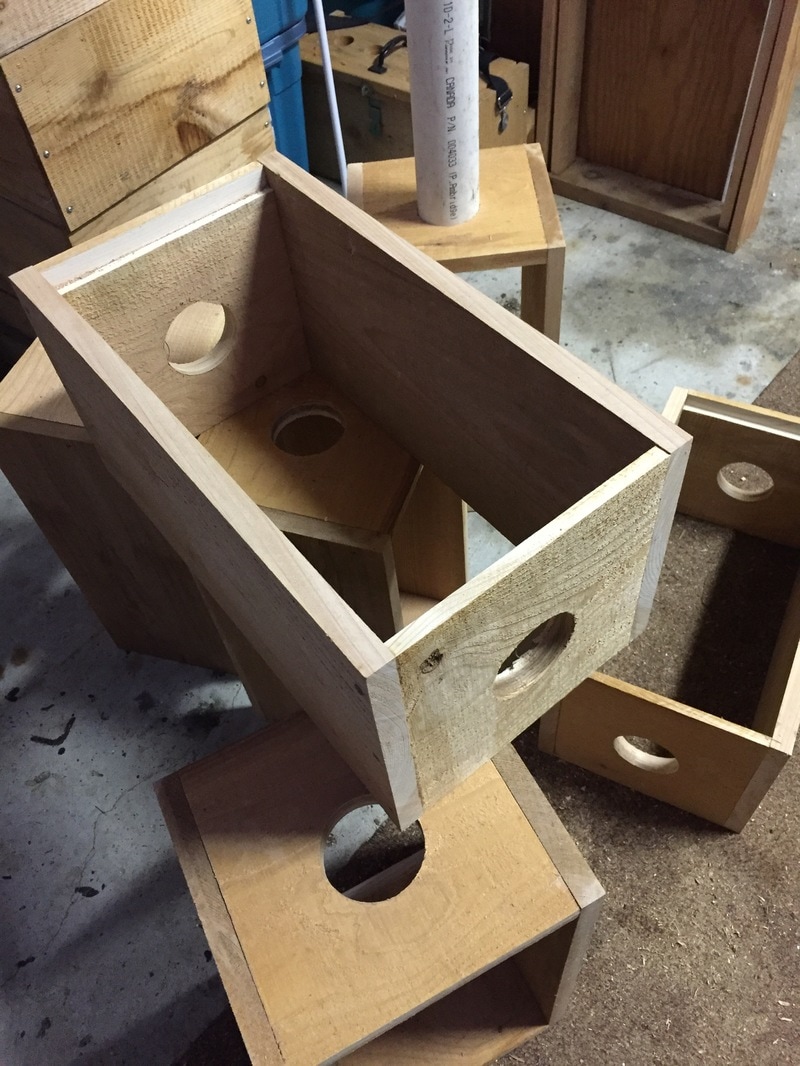
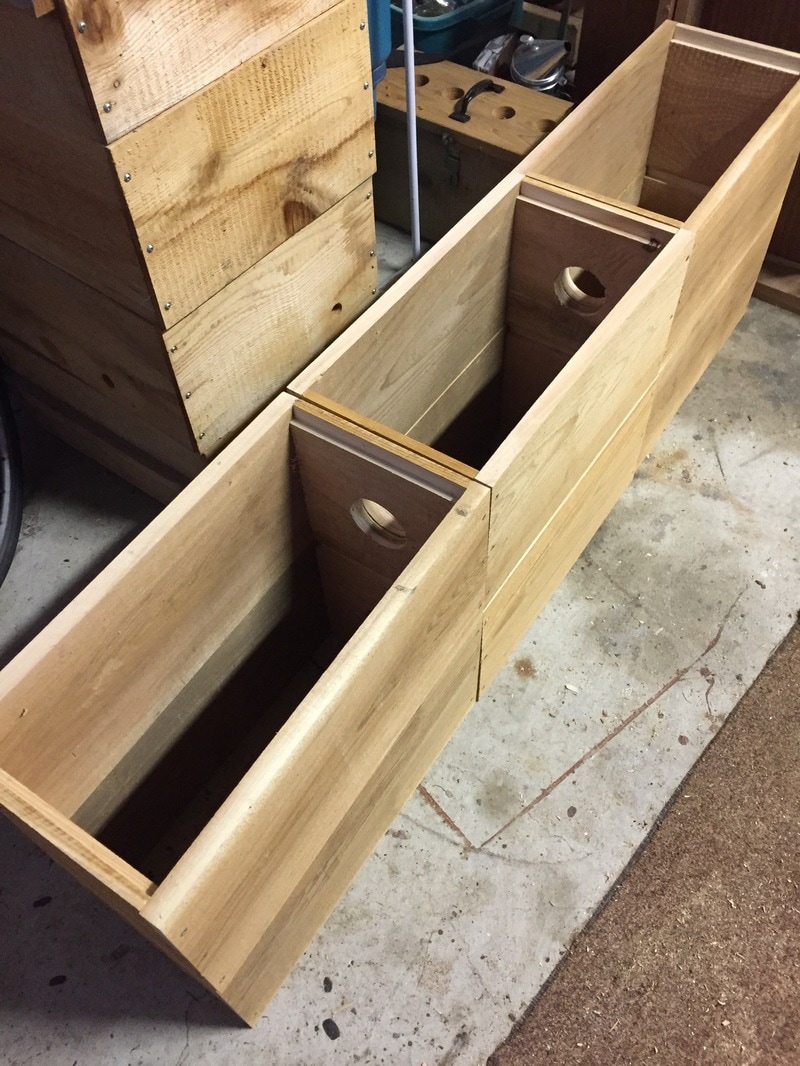
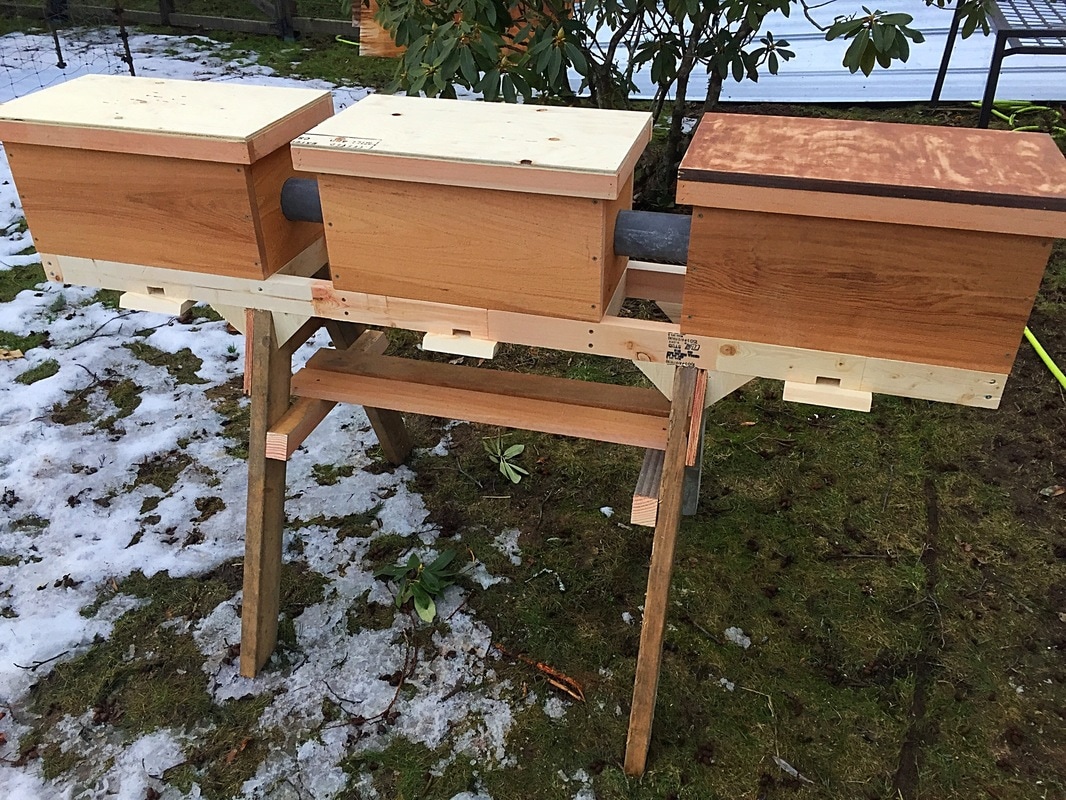
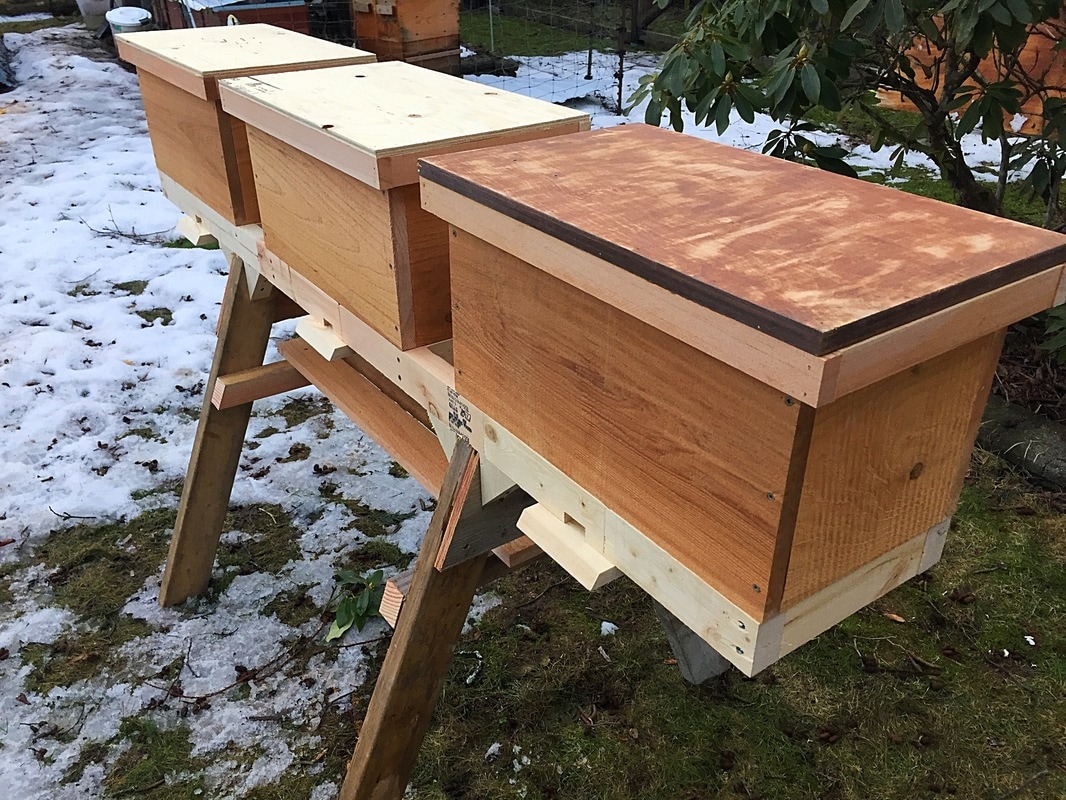
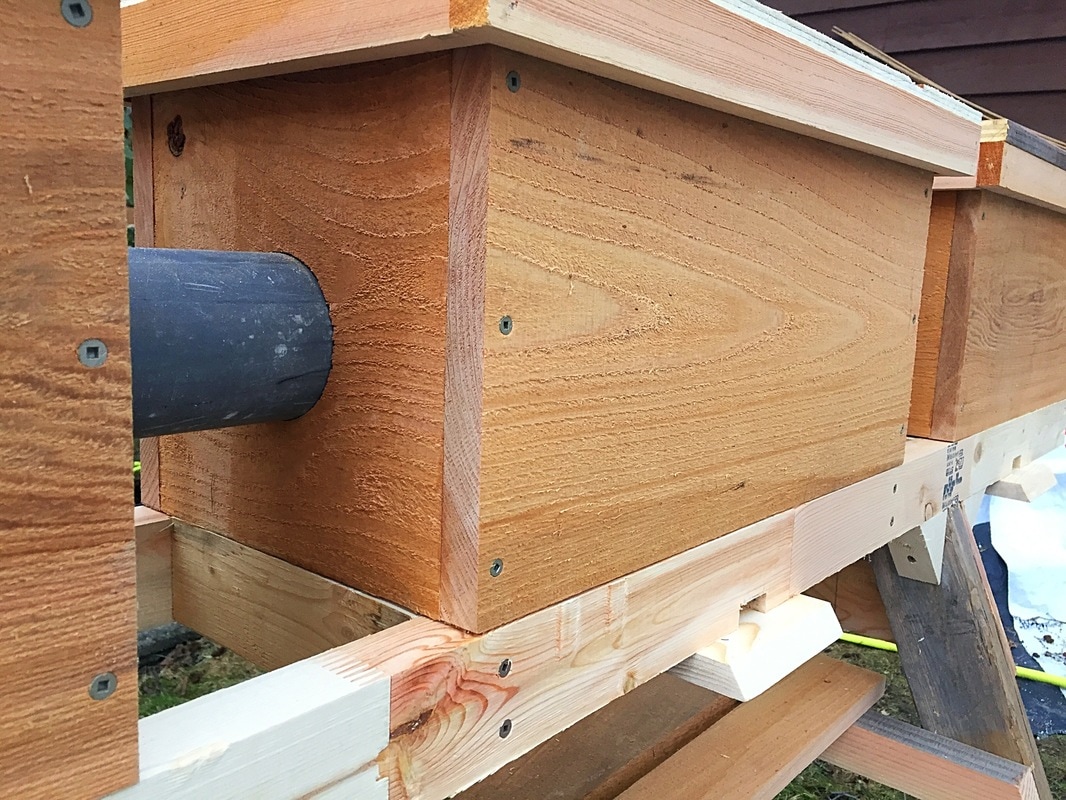
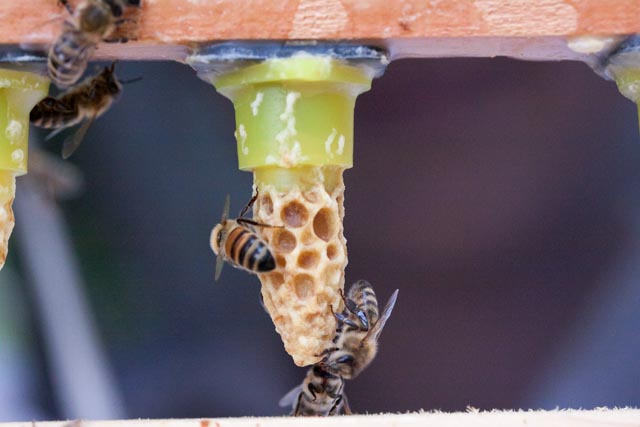
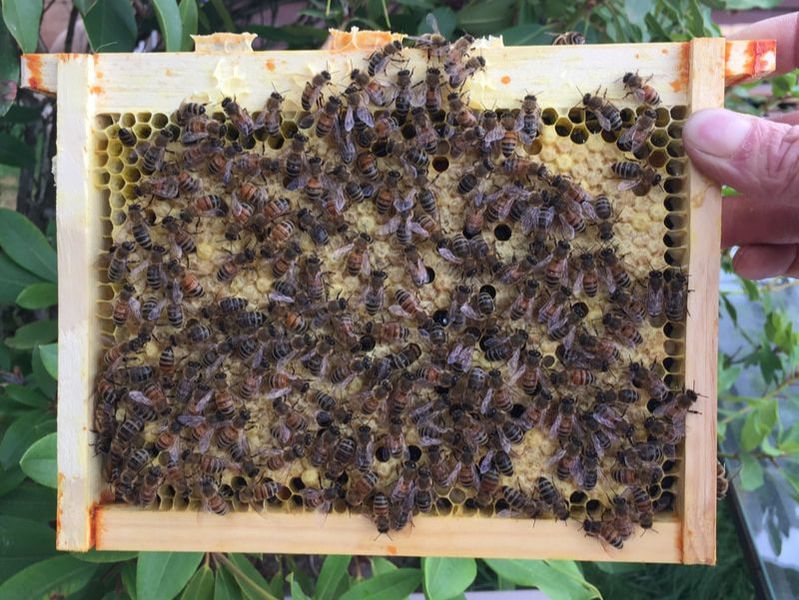
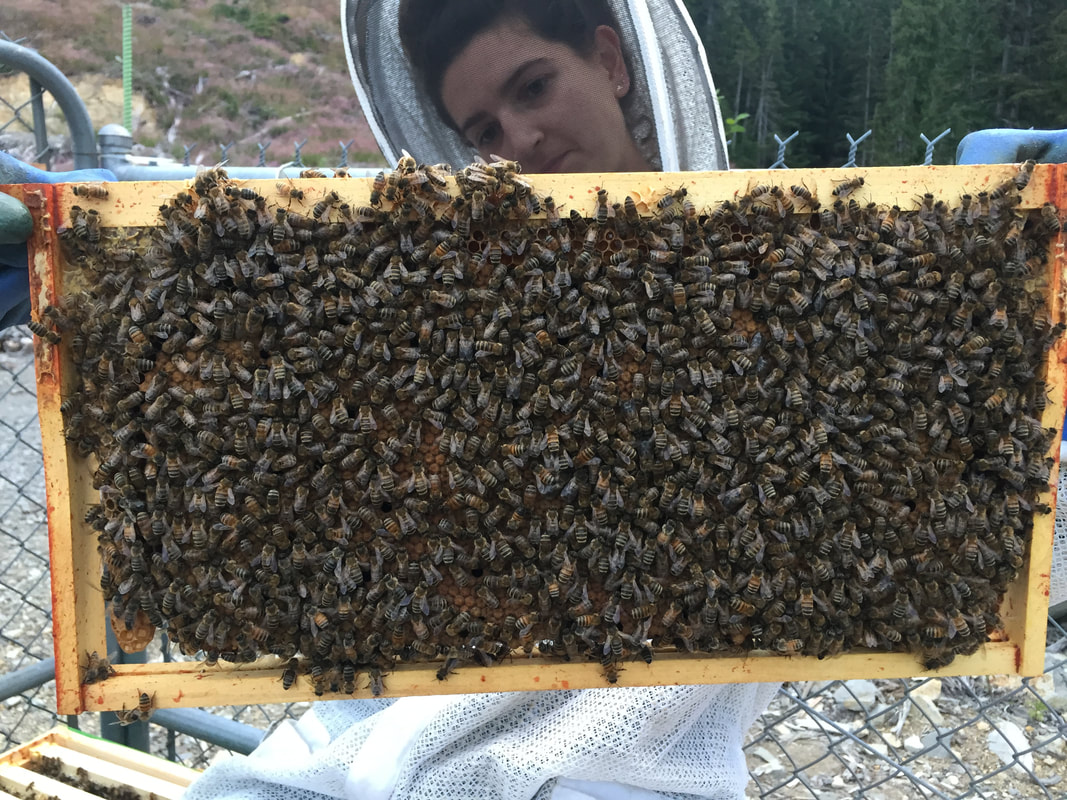
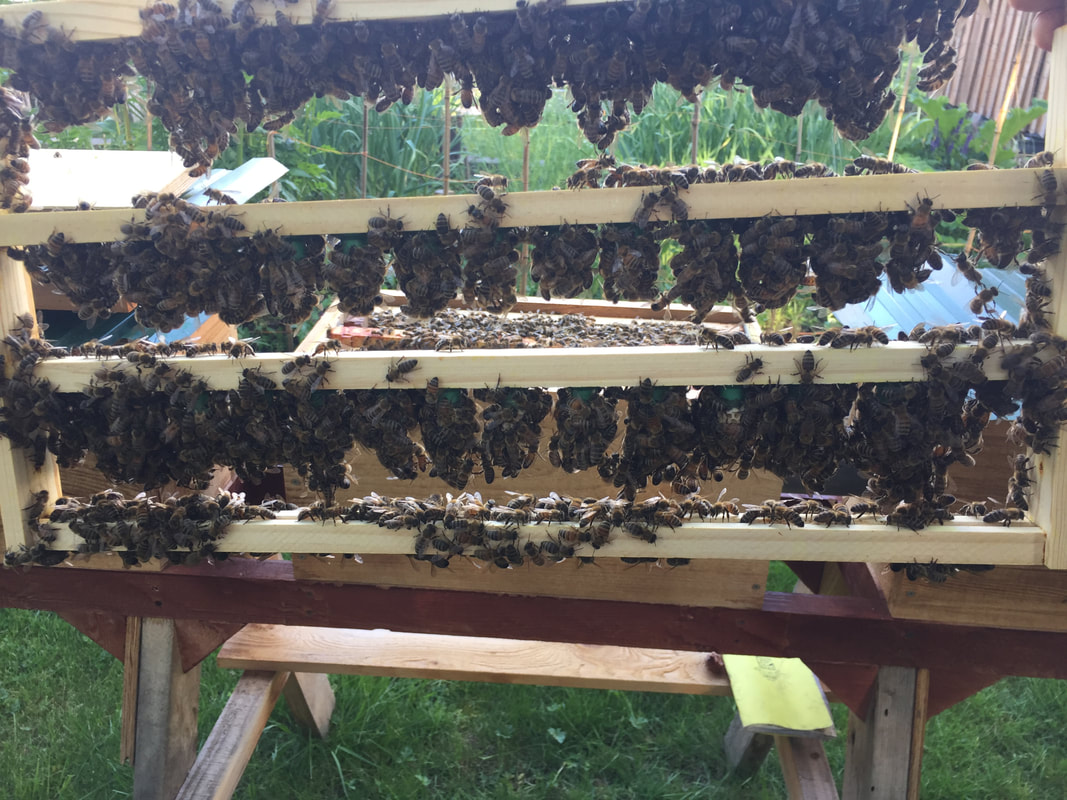
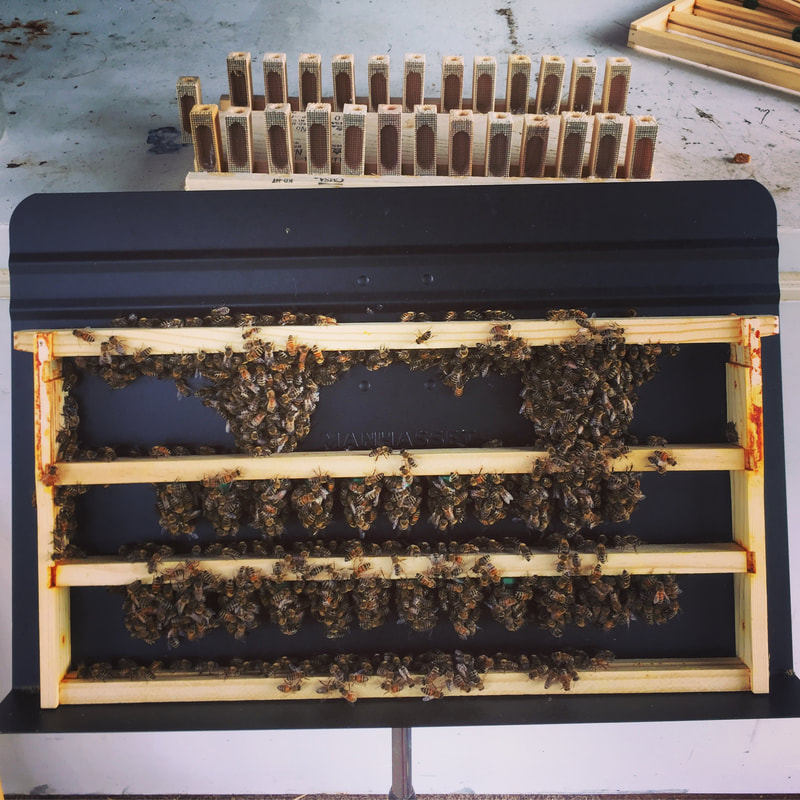
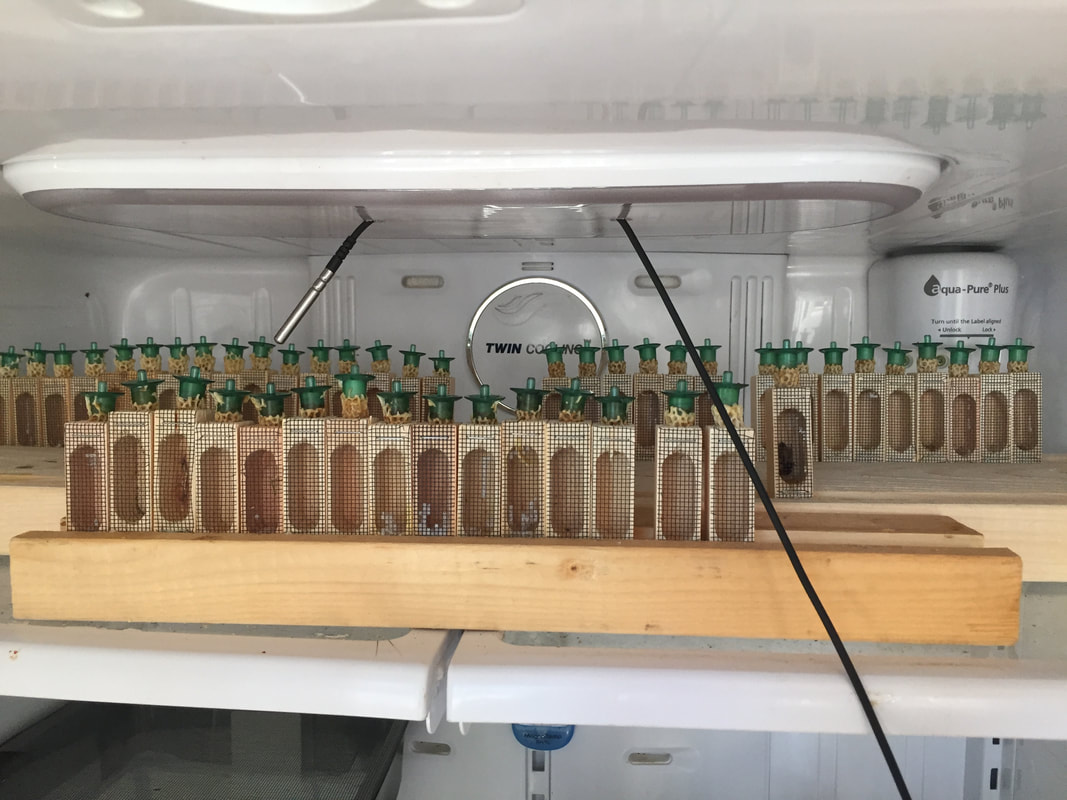
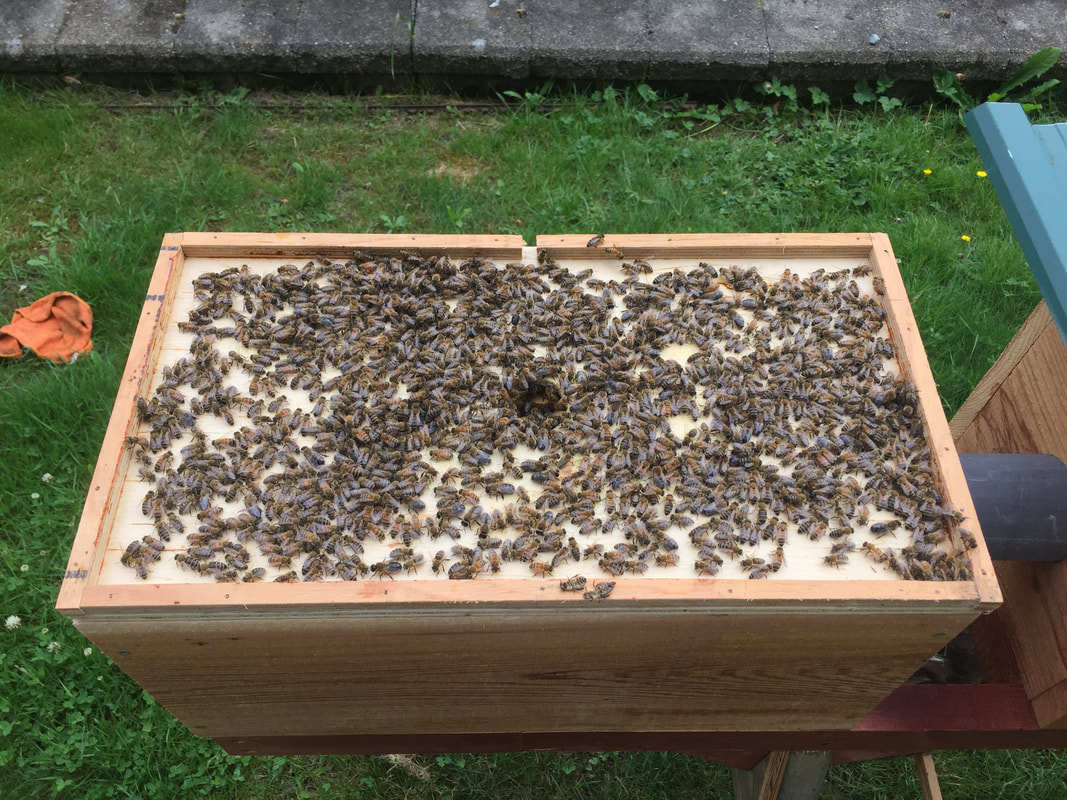
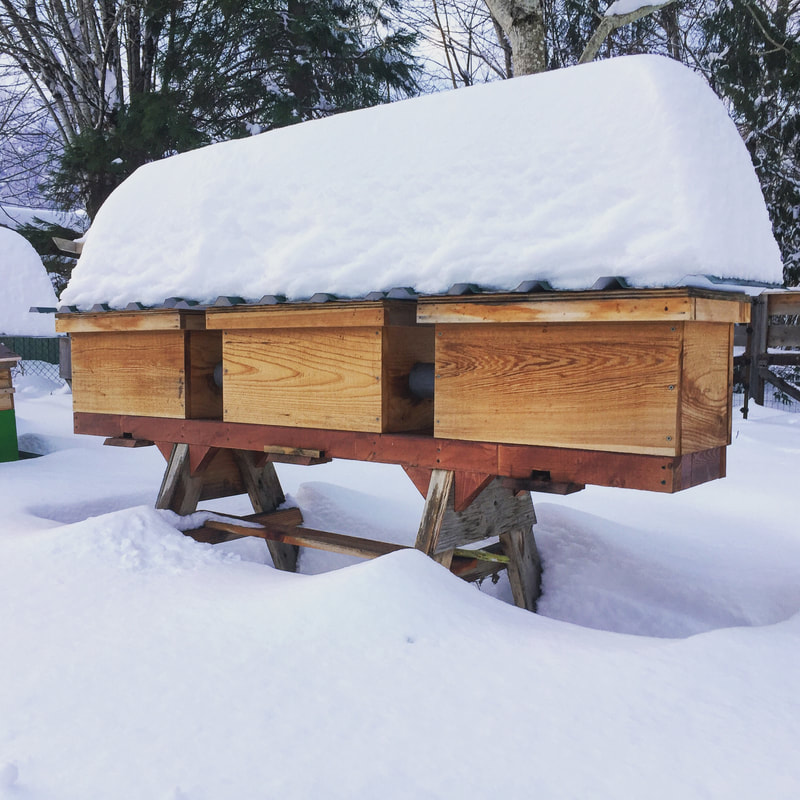
Considering that screened bottom boards constructed with similar components are available for purchase (not at wholesale prices mind you) for over $30CAD- making 25 of these out of scrap wood and purchased a roll of #8 hardware cloth, screws, nails, glue, and mis-tinted wood stain, I think I easily saved $20 each. Yes, that's a savings of about $500, with very conservative calculations. They did take a few afternoons of work to build, but I feel happy enough with this product already. It is becoming widely understood that locally adapted honey bees are generally better suited to thrive in your region and climate. Often we hear about special “designer queens” bred across the world in exotic settings, and it’s tempting to want to buy packages or requeen our apiaries with these genetics. However, they might not be as good at surviving in your climate (not to mention the stress put on bees by shipping them), and it can lead to poor genetic diversity if all the bees in a region come from one breeder (in our case this would mean Hawaiian bred bees would not likely be well suited to Canadian winters... and yet there are so many tropical bees imported to our decidedly not tropical climate). If each community raises their own queens, we can have stock adapted to different regions, and in the case of changing climates and disease resistance, have different genetic pools to pull from that are resistant or adapted accordingly. It is is our goal to be self sufficient in this respect, provide locally successful queens and NUCs for our community, and encourage others to do the same—breeding bees in our own yards and communities rather than routinely importing our bees from all over the world. We first came across the John Harding system for queen rearing after a couple seasons using more commercially viable ways to raise our queens; i.e. by shaking many frames of nurse bees from one or a couple parent colonies into a ventilated queenless box, confining them for up to 24 hrs until hopelessly queenless, then introducing the grafted queen cells for them to start. We had success with this method, and with more passive methods such as Cloake board methods, etc. But we were not pleased with the impact that so many manipulations had on the parent colonies or the stress on the young bees, and we were not getting the consistent results that we wanted. Our bees are kept without the use of chemical treatments (we do feed sugar syrup if we think it’s needed, with the addition of organic apple cider vinegar, and sugar bricks over the winter months), and the Integrated Pest Management (IPM) that we employ for mite and disease control is primarily achieved through re-queening and providing breaks in the brood rearing cycle. In order to breed from successfully overwintered colonies with desirable traits and incorporate this frequent need for brood breaks in our colonies we need a reliable way to rear our own queens. **EDIT In the fall of 2017 we incorporated a formic acid mite control treatment (MAQs) into our varroa management regime. We treated approximately half of our colonies based on mite-counts.** While we did have success with these more commercial methods of queen rearing, we were determined to find a low impact approach. We had observed that our bees would raise queen cells from larvae that were placed too far away from the brood nest (by shuffling a brood frame away from the rest of the brood nest at the other end of one of our top bar hives for example), and speculated about ways to encourage this for our queen production. We learned about the queen mandibular pheromone, and that the queen’s pheromones become quickly diminished on frames of eggs and larva that she can not easily visit, which creates a supercedure scenario in the hive—the colony believes that either a) the hive has gotten too big for the queen’s pheromones to be strong everywhere, so they are motivated to raise another queen and swarm, or b) the queen is failing and they must raise another to supersede her. In our research there were various methods that seemed to make effective use of this behaviour in Langstroth hives; Cloake boards, Snelgrove boards, elevating brood above honey supers and an excluder, all seem to be effective ways to raise queens. These methods all seemed to have lower impact on the donor colonies, but still involved regular manipulations that we felt overly disrupted the colonies or did not produce a sufficient number of cells for our needs. And then we came across this John Harding Queen rearing system in a BIBBA (Bee Improvement and Bee Breeders Association) publication from several years ago. http://bibba.com/the-john-harding-queen-rearing-system/ We had never seen or heard of any other bee breeders or even hobbyists using this method, and there were so few mentions of it in online searches that it seemed never to have gained any traction. Regardless, the concept was the one we wanted to explore, and seemed to be very effective if this article was to be believed. We decided to build one and try it out. The System The system uses two distinct queenright (with their own mated queen) colonies on the outside boxes, both connected to a central grafting box that is permanently queenless. Three boxes in a row. There are queen excluders cut and installed vertically in the outer hives preventing the passage of either queen to the central grafting box, but allowing nurse bees and workers to pass through to the other boxes. As the boxes are all connected, smells and pheromones are carried throughout the entire system, and as in other two-queen systems, the colonies cooperate in harmony. Our first version (mostly) followed the design explained in the BIBBA article, utilizing 5 frame NUC boxes on a purpose built stand, each with their own entrance, and connected 6” apart by PVC pipe with a minimum diameter of 5cm (although you could use anything really, so long as the opening will not easily be propolized shut). We prefer to use inner covers and a telescoping hive roof over migratory lids, as well as feed using frame feeders for queen rearing. We built screened bottoms into the stand with the slide-in bottoms for monitoring natural mite-drop. Our next versions will integrate slatted bottom racks to aid ventilation, and clustering. We decided to double-wall and insulate our PVC connections to assist with, and take advantage of any temperature regulation being performed by the two outer colonies. Because our short and moderate summers on the Pacific Northwest are generally cool in the evenings, grafting into a lid above the frames as described in the BIBBA article may not be as practical for us as it might be in warmer locations. We use a grafting frame for this reason, and have enjoyed great success. This photo shows one of our very first attempts at grafting into this system. We experimented with this system during the summer of 2016, and quickly began producing nice large cells consistently. The Virgin Queens were well fed, a nice size, and were for the most part happily accepted by the queenless colonies they were intended for. I hope you read the original post about this method by following the BIBBA link provided above, but in case you need any further convincing there are a few things we thought worth adding and reinforcing. Benefits of this Queen Rearing System A huge advantage of this system for folks that may not have the experience grafting, is that it is so forgiving. If you're just learning, grafting is one of those 'practice makes perfect' kind of things, and if you're shaking bees into a queenless box the day before your graft only to have that graft completely (or even mostly) fail- it can be very disappointing to the beekeeper and plenty disruptive to the bees. Because this system has a dedicated grafting box, checking or replacing your grafts does not involve completely dismantling a full-size colony, or confining any bees at any point. Generally, your bees should be happier (by that I mean less agitated or aggressive) because they are never actually queenless, which is fantastic if your apiary is near any human neighbours who don't like getting stung etc. And a failed graft can simply be tried again- on the spot. Generally no need to do any more manipulating than you already did to set up your box. This system can be used both as a cell starter, and as a cell finisher all in one- no need to move your grafts to a finishing colony. This alone means you're disturbing the process less, and the started cells do not have to be exposed or removed from the grafting box before they're fully capped, or even fully developed days later. This means that if you have somewhere for these cells to go, (like an incubator, or queenless colonies in the same apiary that you're wanting to re-queen) you could be grafting into this box every 5 days if conditions are good. This season we even banked queens in cages in this central box when we we had too many queens, and it worked wonderfully. We did not notice much difference in temperament when we caged and banked either mated, or virgin queens in the central box, and we did not have to do anything special to prepare the grafting box for use as a queen bank, as it already has all of the right conditions for such a purpose, as it is highly populated with well-fed young nurse bees motivated to care for young queens. If for some reason you don't need to raise any queens, these colonies don't need any attention in addition to your regular inspections. However, we did find a virgin queen in our grafting box last year that ruined a couple good grafts, so along with the usual manipulations it's worth being certain you don't have some rogue queen halfway down the connecting tubes by staying on top of any emergency or swarm cells that might get started on the brood frames in that central box. After using this system for a year...This is the kind of congestion we would be grafting into. Remember that these bees are there voluntarily! Each box has its own entrance, and the regular rotation of open brood frames from the outer colonies draws the nurse bees through the excluders to the central box with the brood pheromones. There are some experiences we would like to pass on with regards to management of this system. Watch out for Moving Queens and Queen Pheromone Around As you can read in the original BIBBA article, rotating brood frames from the outer two colonies into this central grafting box draws nurse bees through the excluders to feed them. These are the bees that will raise your queens. Brood frames that have been taken from the parent colonies should of course be carefully inspected to ensure that they are not hiding the queen, before being transferred to the central box. It is worth noting that these 'new' frames will still have plenty of residual queen pheromone present on them (and the bees that populate those frames), and we always seemed to have better grafting success if we moved the frames in advance of the intended graft so that the queen pheromones subsided. Box Size Queen larvae have to be extremely well-fed, and we have had best success using a frame feeder as pictured- but it takes up more space than we would like in this 5 frame box. We have built two more of these systems for use next year, and have made them a frame and a half wider to accommodate the frame feeder. If you're using jar feeders (or something else) you may not feel that the boxes need to be any wider. A 6.5 frame box may seem like an awkward size to have kicking around, but we won't be using these boxes for anything else since they've all got large holes bored in the sides. We are feeling pretty confident that this size will be better for our purposes and the way we manage our bees. It was tempting at first to ignore the advice in the article for having these boxes just be nuc sized, but having tried it, they really wouldn't benefit much by being built using standard 10 frame equipment. A note about design/function: The smaller width of the nuc forces the brood nest in each outer colony to be central in the box, right in line with the opening to the central grafting box. This seems like a simple concept, but if the frames were oriented the opposite way, as is typical, the smells and pheromones from the brood would not likely waft throughout all the boxes as effectively. What I'm saying is that you want to have the broodnest in each outer box directly in line with the opening to the central grafting box, and the frames oriented so that the ends are exposed to the hole so as to attract the maximum number of nurse bees to the larvae begging for food in the grafting box. The other thing to think about is congestion. In a 10 frame box it may take quite a bit longer to achieve the kind of congestion that we want for raising queens. Yes, you can always bring frames from other colonies to speed this process, but it's sure nice if the system builds up to that threshold at the right time in the season all by itself. Number of Queen Cells The last bit of experience with this system we want to share is also related to congestion, but that of the queen cells you ask your bees to raise for you. In this system, depending on the conditions, we found that we were happier with the size and evident nutrition of queens (known by observing leftover royal jelly at the base of the queen cells) when we grafted fewer cells. For us, that meant trying for 10-15 instead of 20-30+ like you might see the larger commercial frames of grafts sporting. With three of these queen systems in rotation next year and using the success we had last year as a gauge, we should be able to produce 30-50 high quality queen cells every week, if we want. And all of that without much disturbance to our bees, minimal hive manipulations, and so on. Friends of ours that have seen this in action are determined to build their own- we hope you will too- and we hope that this article might help encourage you to try it! Whatever method you use to raise queens, it's wonderful and rewarding to see them come back successfully mated, and heading their own colonies. The best queens are local queens, and it doesn't get much more local than your own back yard!!
|
|||||||||
| broeke_designingforhumansandbees_interview_article.pdf | |
| File Size: | 1916 kb |
| File Type: | |
BC is home to over 450 species of native, wild bees. They contribute to pollination of our gardens, food crops, and wild ecosystems. Creating a bee garden is one of the best things you can do to support our native bees, since much of their habitat is being destroyed for human uses such as agriculture and housing. The main priorities of a pollinator garden are providing food and nesting sites for different types of bees.
Here are some guidelines to get you started on your own garden. Even keeping a few pots of bee-friendly flowers on your balcony will help the bees!
Priorities in a Bee Garden
1. Plant native plants
Native plants and native bees have co-evolved together. Native bees may not be able to access non-native flowers, so focus on native plants in a bee garden (although non-native plants and weeds can be incredibly important, too! See below) Heavily hybridized flowers often stop producing nectar and pollen making them useless for bees.
2. Don't use pesticides
Never use pesticides on your garden. Insecticides and fungicides have been found to be extremely dangerous to bees.
Ask the managers of wherever you buy your plants and seeds from if they use neonicitinoids. These insecticides infiltrate all parts of the plant, including nectar and pollen, and either kill the bees outright, or affect them sub-lethally by interfering with their learning and memory, reproduction, etc. This is becoming a very hot topic, with neonics recently being found to be dangerous to other wildlife too. Growing plants from seed or cuttings is a good way to avoid planting neonic plants.
3. Continuous flowering
Plan your garden to have something flowering at all times. Bees need to eat every day, so try to provide flowers at all times of the season. Early and late flowering plants are especially beneficial.
4. Diversity of flower colours, shapes, and sizes
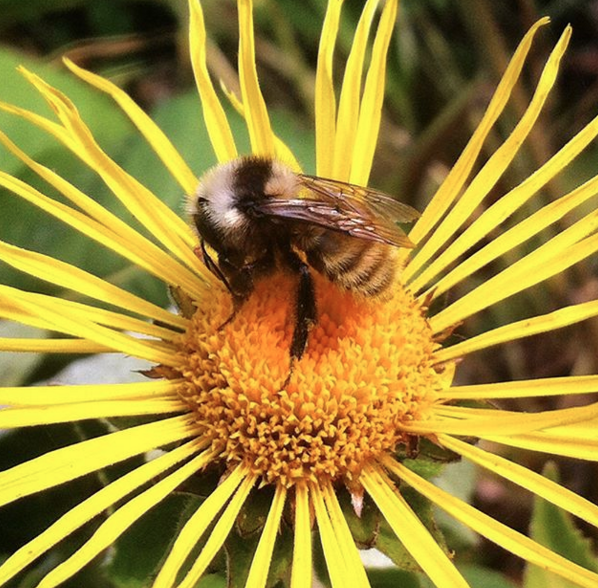
Native bees are a diverse bunch! From large fuzzy bumblebees to tiny slick sweat bees, you can bet each type of bee will have its favourite type of flower. Cover your bases and plant a diverse array of flowers.
5. Plant large patches of a single flower
It's easier for bees to forage if they can stick to a single species in an area. If you can't plant in large patches, don't fret, a single plant of one species if better than none!
6. Provide nest sites and materials
Native bees nest in a variety of ways. Some like to live in holes in the ground, some nest in hollow stems, some in holes in wood, bumblebees will nest in abandoned rodent holes and birdhouses or at the base of ferns.... Ground nesting bees like bare, compact, undisturbed, well-draining soil in a variety of orientations from steeply sloping to flat. You can dig a pit and fill it with sand to create softer ground for bees, too. Plant grasses with hollow stems, and leave dead plants with hollow stems intact over the winter. Piles of hollow stems can be made to provide nesting areas.
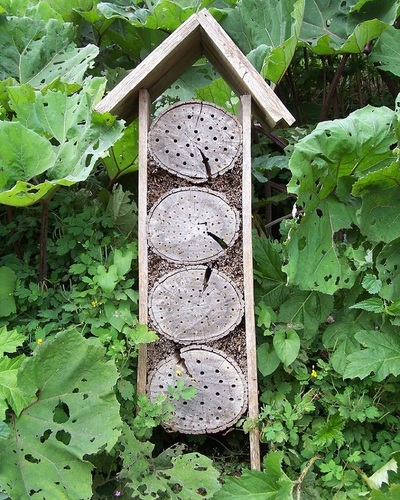
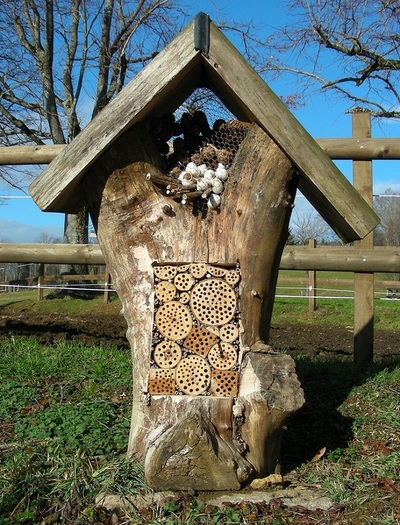
You can also make nests for solitary bees and bumblebees. Click here for more info from the Xerces Society. You can even make a insect hotel that is freestanding or mounted on a wall.
7. Providing water
Provide a water container filled with rocks so the bees can climb down to the water easily. I have also observed bees drinking from moist soil and mud.
Garden Management Strategies
8. Let the weeds live!
Flowering weeds in the garden or lawn are great for bees! Clover, dandelions, etc. are fantastic. Let your lawn grow long, and let the weeds flower before you mow or pull them.
9. Leave vegetables to flower
Let garden plants bolt and flower before pulling them out. Brassicas such as kale make especially nutritious pollen. The bees will thank you!
Plant List
Here is a list I have compiled from various sources that would be suitable for our area. Check out the resources below for more plant suggestions!
Trees
Maple
Linden
Fruit trees
Nut trees
Shrubs
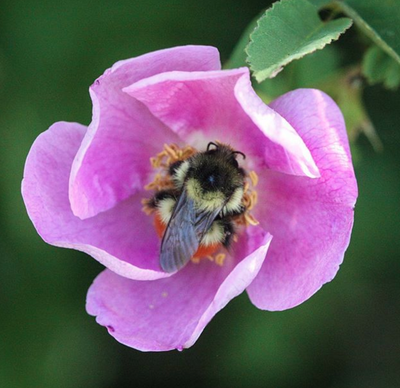
Nootka rose, Rosa nutkana
Rhododendron
Willow, Salix spp. (an important early bloomer)
Elderberry, Sambucus spp.
Black Twinberry
California lilac, Ceanothus spp.
Escallonia spp.
Hardhack, Spirea douglasii
Huckleberry
Ocean spray, Holodiscus discolor
Oregon Grape, Mahonia spp. (an important early bloomer)
Red flowering currant, Ribes sanguineum
Red Osier Dogwood
Salal
Salmonberry
Saskatoon, Amelanchier alnifolia
Shrubby veronica, Hebe pinguifolia 'Pagei’
Snowberry
Thimbleberry
Trailing blackberry
Flowers/Herbs Under 30 cm
Clover, white
Clover, red and crimson
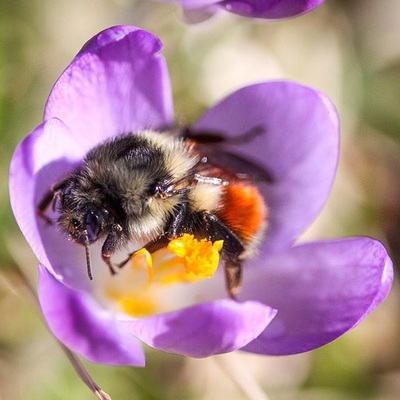
Crocus spp.
Dandelion
Thyme, Thymus spp. (including creeping thyme)
Sea blush, Plectritis congesta
Sedum spp.
Snow drops, Galanthus spp.
Strawberry
Thrift, Armeria maritima
Flowers/Herbs Over 30 cm
Alfalfa
Alyssum spp.
Aster spp. (e.g. Douglas aster)
Basil
Bee balm, Monarda spp. (especially lemon bee balm!)
Bellflower, Campanula spp.
Borage
Calendula
California poppy
Catnip
Chives, Allium schoenoprasum
Cilantro
Columbine, Aquilegia spp
Comfrey
Tickseed, Coreopsis spp.
Cotoneaster spp.
Cranesbill, Germanium macrorhizum, Geranium cantabrigiensis ‘Cambridge’
Douglas aster, Aster subspicatus
Coneflower, Echinacea
Blanket flower, Gaillardia spp.
Fireweed
Giant hyssop, Agastache spp.
Goldenrod (contrary to popular belief, this plant does not cause allergies, but ragweed does)
Heather, Calluna vulgaris
Hollyhock, Alcea
*Lavender
Lupin, Lupinus
Marshmallow, Malva spp
Moldavian Dragon Head
Pearly Everlasting
Penstemon ‘mexicali’
Pieris japonica (important early bloomer)
Purple toadflax, Linaria purpurea
Rosemary
Sainfoin
Salvia spp. - Many are wonderful for bees!
Sea holly, Eryngium maritimum
Speedwell, Veronica spicata
Sunflower
Tall and short grasses (species tbd)
Threadleaf phacelia, Phacelia linearis
Verbena bonariensis
Veronica
Yarrow, Achillea millefolium
Zinnia
Fantastic Resources for Plants and General Bee Information
Xerces Society
Earthwise Society
SFU Pollination Ecology Lab
David Suzuki Foundation
Book: Victory Gardens for Bees by Lori Weidenhammer (Vancouver local!)
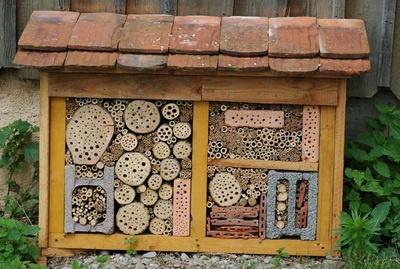
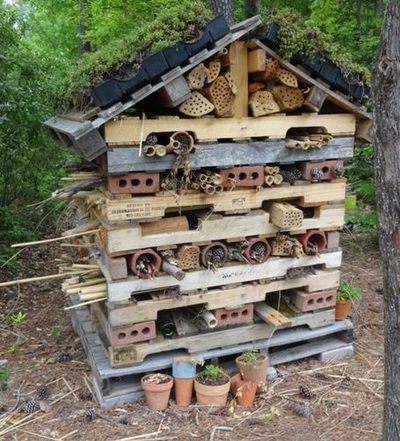
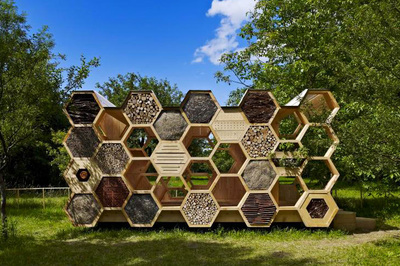
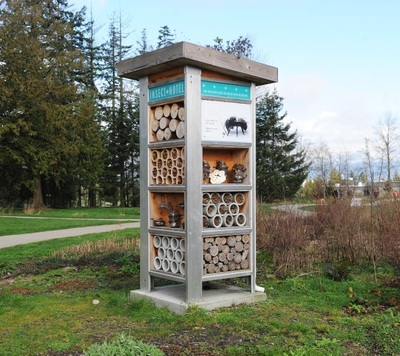
Check out these photos of other pollinator hotels around the world! Some are so cute and whimsical. You can also google "pollinator hotel" or "insect hotel" for some inspiring photos. Enjoy!
http://www.inspirationgreen.com/insect-habitats.html
http://www.inspirationgreen.com/insect-habitats.html
We've received many requests from people for more info on mason bee care. While we don't currently have live stream capabilities for sharing our in-person workshops, we can write how-to's! If you are local to Squamish or the Lower Mainland, stay tuned for more workshop dates in the spring and fall. We hope this post is helpful for keeping your mason bees happy and healthy.
What are mason bees?
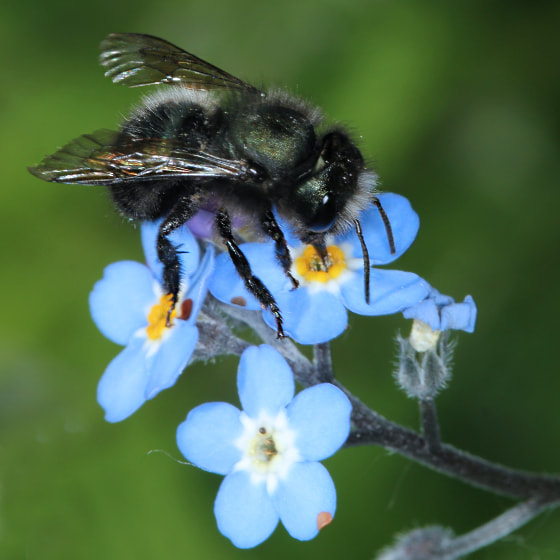
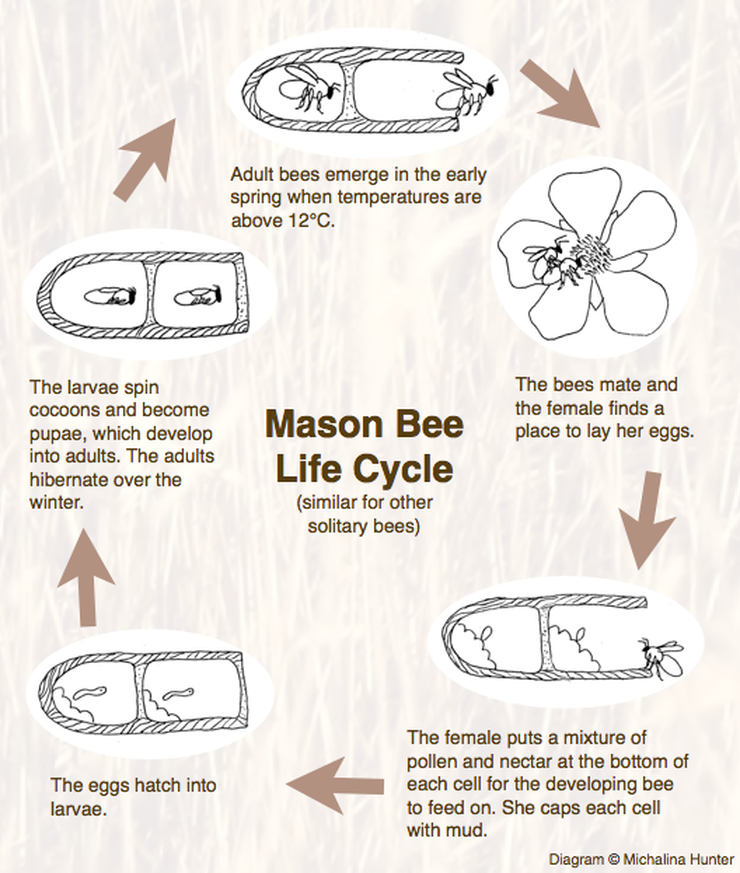
Mason bees are a group of bees in the Osmia genus. There are 140 species in North America, about 60 in BC! They are solitary, meaning that they don't live in a colony with other bees (unlike honey bees which live in colonies of 50-100,000 individuals). Instead, the male and female mason bees live and work alone, except for mating. (See lifecycle diagram below.) Mason bee females may nest together in mason bee homes we provide them, but they don't really interact with each other.
Mason bees are a group of bees in the Osmia genus. There are 140 species in North America, about 60 in BC! They are solitary, meaning that they don't live in a colony with other bees (unlike honey bees which live in colonies of 50-100,000 individuals). Instead, the male and female mason bees live and work alone, except for mating. (See lifecycle diagram below.) Mason bee females may nest together in mason bee homes we provide them, but they don't really interact with each other.
How to identify mason bees
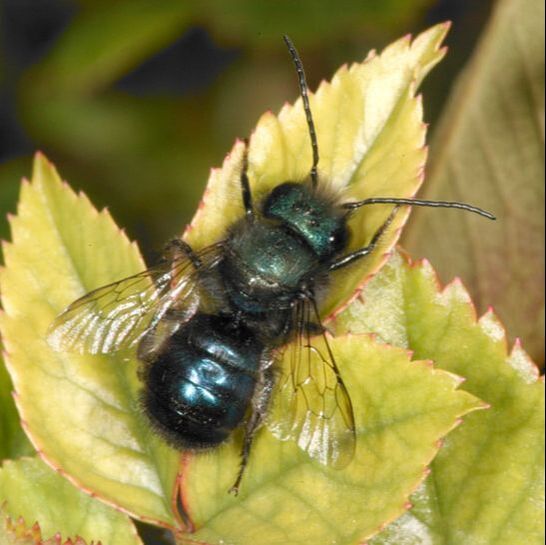
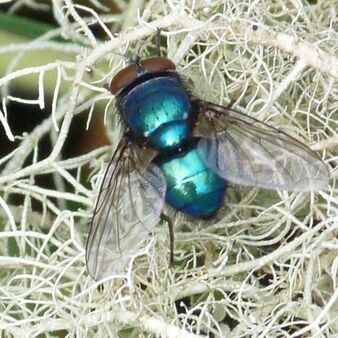
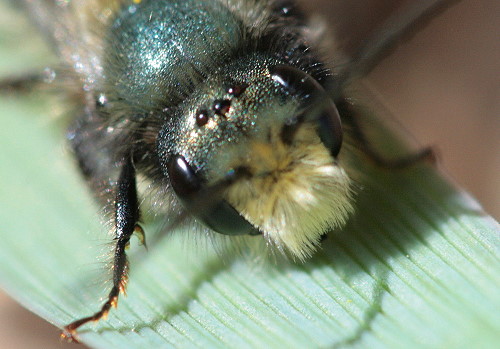
Mason bees are easy to miss- they look a lot like houseflies. They are usually dark and metallic blue/green around here, although they have longer bodies than houseflies and more distinct body segments (head, thorax, abdomen). Their bums are more rounded or "bullet-shaped" than other solitary bees that may look similar. A tip for telling flies apart from bees is flies have big bulgy eyes on the tops of their heads, while bee eyes are smaller and on the side of head (not counting honey bee drones). Flies have 2 wings, bees have 4. Another mason bee characteristic is they are only around in the spring- approximately from late February to June. The adults die after that. For that reason, they are great pollinators for early flowering crops, like fruit trees.
Mason bees are easy to miss- they look a lot like houseflies. They are usually dark and metallic blue/green around here, although they have longer bodies than houseflies and more distinct body segments (head, thorax, abdomen). Their bums are more rounded or "bullet-shaped" than other solitary bees that may look similar. A tip for telling flies apart from bees is flies have big bulgy eyes on the tops of their heads, while bee eyes are smaller and on the side of head (not counting honey bee drones). Flies have 2 wings, bees have 4. Another mason bee characteristic is they are only around in the spring- approximately from late February to June. The adults die after that. For that reason, they are great pollinators for early flowering crops, like fruit trees.
The males are smaller than the females, have longer antennae, and often have fuzzy blonde moustaches- no joke!! The males can't sting, and while the females can sting, it's unlikely.
How do I "keep" mason bees?
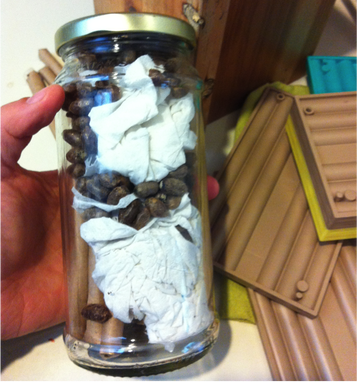
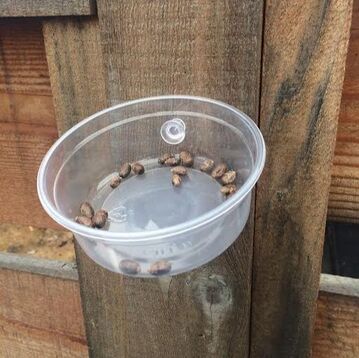
Mason bees do not require extensive maintenance like honey bees. You can simply buy or make a mason bee home (lots of style options, but make sure you can take the whole home apart to access cocoons in the fall, or use paper tube liners in drilled holes), mount it outside in late February/March, and wait for wild mason bees to find it. They will get busy laying eggs in the home, and then it's your job to clean the home in August-October, and store the cocoons over the winter to keep them safe.
Mason bees do not require extensive maintenance like honey bees. You can simply buy or make a mason bee home (lots of style options, but make sure you can take the whole home apart to access cocoons in the fall, or use paper tube liners in drilled holes), mount it outside in late February/March, and wait for wild mason bees to find it. They will get busy laying eggs in the home, and then it's your job to clean the home in August-October, and store the cocoons over the winter to keep them safe.
Why do I need to clean the cocoons and mason bee home? In nature their cocoons wouldn't get cleaned!
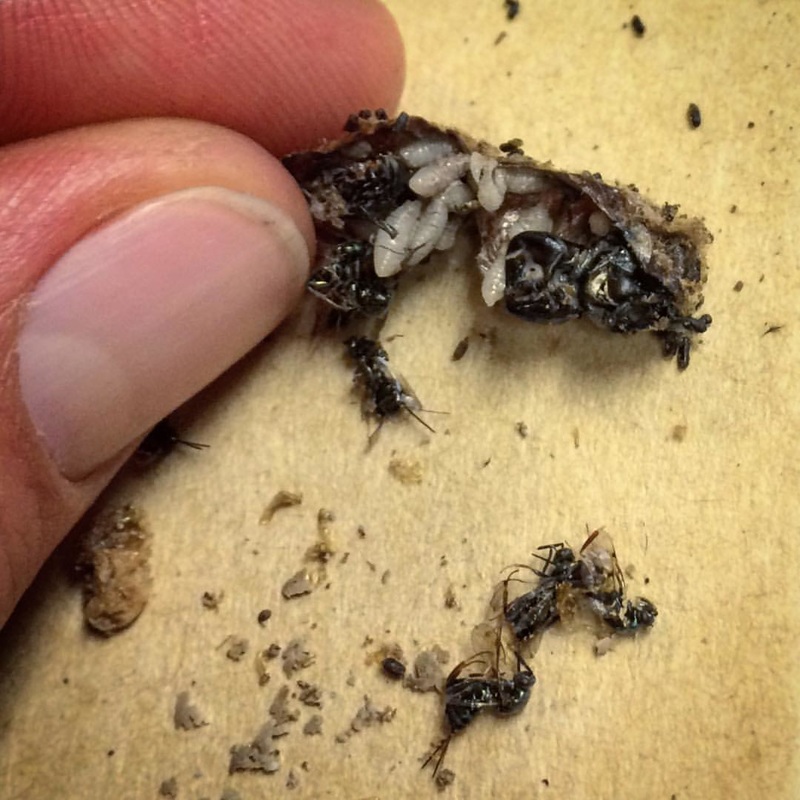
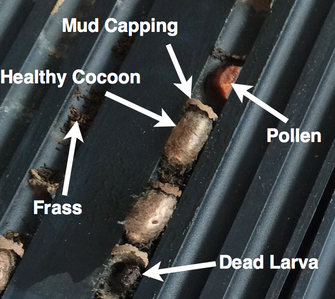
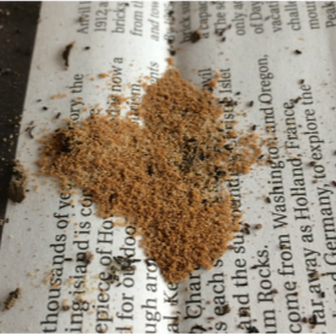
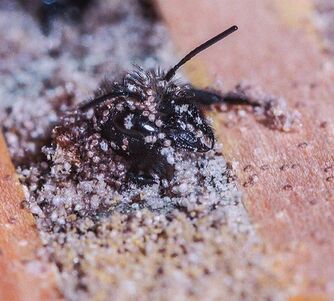
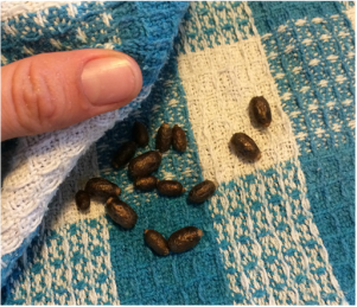
When we put up a mason bee home, we are encouraging the bees to lay a bunch of eggs very close together. In the wild, the bees would be forced to lay a few eggs over here in a hollow stem, and a few over somewhere else. With many nests together, it's easy for parasites to locate them and move from one nest tube to another. Your whole mason bee home could become a breeding ground for parasitic wasps, pollen mites, fungi, etc. over the winter (see photos below). So because we are setting up these unnatural situations, it's important for us to be responsible and give the bees a hand, so we don't do more harm than good.
When we put up a mason bee home, we are encouraging the bees to lay a bunch of eggs very close together. In the wild, the bees would be forced to lay a few eggs over here in a hollow stem, and a few over somewhere else. With many nests together, it's easy for parasites to locate them and move from one nest tube to another. Your whole mason bee home could become a breeding ground for parasitic wasps, pollen mites, fungi, etc. over the winter (see photos below). So because we are setting up these unnatural situations, it's important for us to be responsible and give the bees a hand, so we don't do more harm than good.
Author
Michalina and Darwyn are beekeepers on Vancouver Island, BC, Canada.
Archives
January 2018
March 2017
February 2017
January 2017
October 2016

 RSS Feed
